Cubase 4.1 brings a wealth of new features: we explore what you can do with the new side-chaining function.


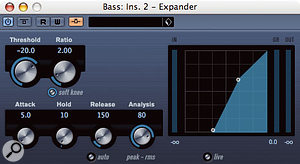
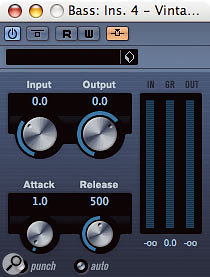
 Cubase 4.1 has brought external side-chaining to four of its dynamics plug-ins: Gate, Expander, Compressor and Vintage Compressor.The lack of proper side-chaining functionality in Cubase is something about which I (and judging by various discussion forums, many others) have long been critical. This lack meant that you could only side-chain via a laborious work-around, using a dedicated plug-in such as Twisted Lemon's Sidekick (as described in John Walden's Cubase column in SOS June 2007). But thanks to a free update to Cubase 4.1, we need be frustrated no longer — and now that we have proper side-chaining functionality, let me take you through how it works and what you can do with it.
What's New, What's Missing?
Before I talk techniques, let's pause to consider what the C4.1 implementation of side-chaining does and doesn't offer — because there's plenty of useful new functionality, but there are also some restrictions on what you can do.
The most obvious limitation is that there are currently only four plug-ins that benefit. Compressor, Vintage Compressor, Gate and Expander can be fed from an external side-chain but, for reasons unknown to me, Steinberg have chosen not to provide an external side-chain input for the multi-band compressor. This would have enabled you to use it as a dynamic EQ, which is something that Cubase presently lacks. A related criticism is that only one of the plug-ins, allows you to process the external side-chain signal in any way. The Gate plug-in already included high-, low-, and band-pass filters for this purpose, so it's a shame these haven't been added to the others. While we're on the subject, it is worth pointing out that the Gate plug-in's functionality is rather limited, in that its depth is fixed. Often, you'd expect to find a variable depth control on a gate, which would allow you to define the level of attentuation when it is closed. When Cubase's Gate is open, sound passes through; when it is shut it doesn't — but there's no in-between. There are some side-chaining techniques that require a variable depth control, so I'll describe how you can get around this limitation later.
 A new button activates the external side-chain input on plug-ins such as Compressor.Another restriction is that you can't send audio to a plug-in's side-chain input from its own channel. This would have simplified some of the techniques we'll be looking at, but it's an understandable omission, as it would have the potential to create feedback loops. Perhaps my biggest disappointment is that you still can't side-chain in Cubase using most third-party plug-ins (unless you use either the Sidekick workaround mentioned earlier, or tools specifically designed to circumvent the sequencer's routing limitations, such as the Side-chain Gate and Compressor plug-ins by db Audioware). My fingers are firmly crossed, though: I'm told the release of the VST3 software developer's kit (SDK) is imminent — it may even be available by the time you read this — and I can only hope that this will allow third-party developers to benefit from Cubase's side-chaining functionality in future updates to their software.
Finally, I can't help but feel that Steinberg have missed a trick by not implementing a similar system of audio routing for at least one of the built-in VST Instruments. It's something that can be incredibly useful as a complex source of LFO waveform generation, for example, and it is something to which Logic users have long had access via the ES1 synth.
Still, in talking about what isn't there, I'm wandering off-topic — so let's look at what you can do with side-chaining in Cubase 4.1.
Ducking For Dummies
Perhaps the most obvious application for side-chaining is ducking. The classic example is where you use a radio DJ's voice to trigger a compressor that operates on a music track, thus reducing the loudness of the music while the DJ speaks. The idea is that it makes it easier to hear the DJ, but the music automatically fades back in to fill any gaps in the speech. For recorded audio rather than live radio, level automation can do the same job more precisely, but it still provides a great way of illustrating the basic side-chaining technique, so here's how.
 Selecting the side-chain of an instance of Compressor as a send destination.First, import or record some audio on two separate tracks in Cubase — use a dialogue recording on one (make sure there are some suitably long pauses), and any music track on the other. Now insert Cubase's Compressor plug-in on the music track and set it so that you can easily hear that it is doing something to the sound. If you make sure there's plenty of gain reduction, for example, the effect will be clearly audible — something like -15 to -20dB should do nicely. You can leave the attack and release settings for now, as we'll get on to them later.
All compressors are triggered by a side-chain signal, but by default this is normally the same as the input signal, so next we need to tell the compressor that we're going to use the dialogue track, rather than the music one, as Compressor's side-chain. To do this, you must activate Compressor's external side-chain by clicking on the side-chain icon at the top of the plug-in. You can find this at the top of the plug-in's GUI, just to the right of the 'R' and 'W' automation buttons (as shown in the screenshot at the bottom of the opposite page). Once you've done this, you'll find that if you play the track. Compressor is no longer having any effect (something that is reflected in its meters).
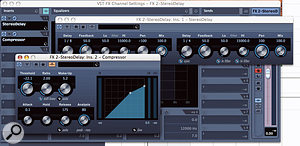
 Ducking a delay (or, for that matter, a reverb) is a great trick for keeping the main dry sound focused and uncluttered while retaining the 'feel' of your delay.Now go to the vocal track and click on a send effect slot. Along with the usual options (Groups, FX channels and outputs) you'll see the compressor's side-chain input — and if you activate the external side-chain for more than one plug-in, they'll all appear in a 'Side-chain' sub-menu. Next, select the compressor's side-chain as the send destination and send a healthy portion of the vocal signal there — enough to exceed the compressor's threshold (it doesn't matter what it sounds like, as it won't be audible; it is simply the level information that we want to get from this signal).
If you now play back a loop that contains sections with and without vocals you should hear the compressor kicking in to squish the music during the vocals, and releasing to allow the levels to come back up when the vocal dips back beneath the compressor's threshold. It is worth having a play with the attack and release times of the compressor to hear for yourself what they do, but as a rule, the faster the attack, the quicker the sound will duck when the vocals start; the slower the release time, the longer it will take for the compressor to 'let go' of the music — so a long release should give you a gradual rise in the level of the music after the vocal stops.
While the example above uses dialogue to duck music, there are, of course, many more creative applications for ducking that can help us when mixing music (most of us aren't radio producers, after all), so let's move on to them.
Ducked Delay & Reverb
 Keeping a mix uncluttered when using delay or reverb is a problem that a lot of readers ask us about at SOS. There are many things that can help to de-clutter a mix, but one simple trick to thin things out a bit is to duck the return of a delay or reverb.
You can get dedicated ducked delay (and reverb) plug-ins, but none comes bundled with Cubase, and it is nice in any case to be able to choose which delay or reverb you want to use. The approach is just the same as in the DJ example above, except that you place the compressor after the delay on an FX channel: you send the dry instrument (let's say guitar) to the FX channel, and do another send from the guitar track to Compressor's external side-chain input. It's a great trick, but bear in mind that it usually works best on a reverb or delay that's dedicated to a single element of the mix. If you're using a delay or reverb as a global effect for lots of different instruments, you probably won't want to hear it ducked by just one of those instruments.
Kick & Bass
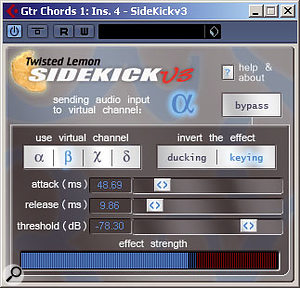
 For those who have yet to upgrade to 4.1, there are workarounds involving plug-ins such as Twisted Lemon's Sidekick and Cubase's own MIDI Gate.Many people have trouble getting the kick drum to sit well with the bass part of a track. Some people like to notch the EQ of both parts to emphasise different frequencies in the two as a way of keeping them out of each other's way, but another approach — which can arguably yield more pleasant results — is to use the kick drum signal as the side-chain source for a compressor that's processing the bass part. You'll need to use a fast attack setting on the compressor to make this work. It is a trick that works well for various genres of music, including rock and dance styles.
Conversely, if you use the Gate plug-in instead of the compressor, you're able to achieve the opposite: that is to say, make the bass sound only when the kick plays, and then go silent according to the hold and release settings of the Gate. This can be quite an effective trick for pruning up an overly busy bass line, though its degree of success will depend on the actual bass part in question.
Bombastic Kick
For some music styles, you can never seem to have enough sub energy on your kick, and you can also use the same side-chain gating technique to augment your kick sound. Of course, you have to be a bit careful here, as sub frequencies can eat up headroom very easily (many 'big kick' sounds only kid you into thinking those frequencies are there) and you'll need to be monitoring on a system and in a room that can handle these frequencies accurately. Anyway, to do this, try loading a VST synth and dialling up a sine-wave patch. Play a sustained note at the pitch you want to sound. You then use the same gating technique we've already looked at to open the Gate to 'reveal' the booming sine-wave note along with the kick. You can use the same approach on bass too — though you'll probably want to make this more melodic, in which case you need either to program the correct notes or use a pitch-to-MIDI converter such as in Melodyne (as there's nothing built into Cubase that can do this job).
Enveloping Sustained Notes
With the exception of the ducked delay, the effects we've looked at so far aren't particularly subtle, but there are some less obvious effects. Take this example, which I came across in a recent project. There was a deep, Hammond-style organ part playing long, sustained notes beneath a very busy track. There was very little attack to the sound, so the notes seemed to morph into one another. The bass sound was getting very lost in the mix, but it munched headroom like there was no tomorrow when I raised the levels. So, as well as various tricks to fuzz things up a bit to generate harmonic information, I used a side-chain gate to control the envelope of the organ notes, making them slightly louder at the start, but then backing off to leave more space for other instruments. The side-chain was triggered from a kick drum that coincided with the bass notes.
 Cubase's Gate doesn't have a variable depth control, so side-chain gating to create a volume envelope isn't simple. Here, I've sent the bass part to an FX channel and then routed both tracks to a Group. This enabled me to use the kick drum to trigger a gate on the FX channel of the bass, and then mix the two parts to taste, before setting the overall level of the bass part using the Group.As I mentioned earlier, the Gate supplied with Cubase is somewhat limited in that it doesn't have a variable depth control — which means you can't simply set it to control the envelope and back off to a lower level. To get around this, you need to get your instrument sound running through a second track, apply the extreme default Gate setting to that, and mix it back in with the original to taste. To do this, you can either duplicate the instrument's original audio track, or take a send from it to a Group or FX channel. On this second track, you place an instance of Gate, with its side-chain input activated. You then send from the kick to the side-chain input of the Gate, and play with the send levels again so that the kick exceeds the Gate's threshold. In other words, it is just the same as the gating trick to thin out the bass that I described earlier, except that this time, you are doing parallel gating to compensate for the lack of functionality in the Gate.
You will usually want to use a fast attack with this technique — otherwise the bass will sound as though it is lagging behind — but the release can be tweaked as desired, so you get anything from a brief 'blip' of bass to a longer, more rounded sound. One thing you can try is to set the release so that the gate closes just before the next beat — you can do a lot to manipulate the groove in this way.
Adding Rhythmic Interest
So far, we've only been considering kicks, vocals, basses and guitars as potential candidates for side-chaining, but there's plenty of 'funtential' in more complex rhythmic parts, such as hi-hats. By using them to trigger an expander or gate acting on a pad sound, you can create a stuttered melodic sound from your pad. In fact, even if you don't have Cubase 4.1 yet, this is an effect you can still create from MIDI parts by using the excellent MIDI Gate plug-in. Give it a try — it can be a great trick for remixes, or just livening things up if you feel a pad sound is dragging things back a little.
Side-chain Filtering
All of the examples we've looked at so far rely simply on you sending a signal from an audio track directly to a processor's side-chain input, but, as I explained earlier, there's no facility to shape that signal en route. Say, for example, that you don't work with multitrack drums — you only have stereo loops and you want to us the kick sound to feed a Compressor side-chain. You'd need to be able to filter that loop without audibly affecting the drums. The answer, again, is to create a duplicate of that drum track that is dedicated to side-chaining. Again, the duplicate can simply be a copy of the original audio track, or a Group or FX channel fed by a send from the original audio track. Route the duplicate channel's output directly to the desired side-chain input, and you can use all of its insert effects slots and Channel EQ to sculpt the sound before it goes to the side-chain. In the example above, that probably means using an aggressive low-pass filter and a boost somewhere around 60-80Hz, but you'll need to be careful not to filter out all the attack of the kick to keep things in time. It doesn't matter what this channel sounds like, as its sole function is to create a reliable key signal for the compressor. Indeed, you can do more than filter it. You could, for example, take a standard kick or snare signal and insert a delay to create a much more complex rhythm. This could then be used to feed a gate to create the stuttering-pad effect described earlier. I'm sure there are plenty of possibilities along these lines, and it would be worth taking some time to experiment with different setups.
Anyway, I could go on (and arguably have done) but I hope this introduction to side-chaining in Cubase 4.1 has given you at least a little inspiration. As ever, the best way to learn about it is to go and try it for yourself!
Published February 2008

No comments:
Post a Comment