Saturday, October 31, 2015
Friday, October 30, 2015
Mash The System | Media
Cubase Tips & Techniques
Technique : Cubase NotesAudio files to accompany the article.
John Walden
Audio Example
Download
2.5 MB
This audio example accompanies the Cubase article that appears in SOS February 2015.
Cubase 7 Getting Mashed JW
The Getting Mashed audio demo is built around a simple eight–bar example featuring vocals, drums, a synth line and a bass synth. The same phrase is repeated six times with a couple of bars of drums separating each repetition. The following processing has been applied in each case:
1. No processing, just the simple mix.
2. LoopMash FX applied as an insert effect to just the vocal track.
3. LoopMash FX applied as an insert effect to just the drum track.
4. LoopMash FX applied as an insert effect on a Group Channel with drums, synth and bass synth (but not vocal) routed through the Group Channel for processing.
5. LoopMash FX applied as a send–return effect and sends active from the drum, synth and bass synth tracks (more subtle than example 4).
6. LoopMash FX applied as an insert effect on the stereo output bus so the whole mix is processed through the effect.
Thursday, October 29, 2015
Wednesday, October 28, 2015
Spot The Reverb | Media
Technique : Cubase Notes
Audio files to accompany the article.
John Walden
Download Cubase 0415
3.8 MB
Audio Examples
There are six audio examples included in the MP3 that illustrate some of the approaches described in the main text using a simple demo project.
Example 1: This provides an example of automating REVelation’s reverb levels on the approach to, and at the end of, a short one-bar ‘stop’ section. As the stop approaches, reverb is added to the synth sound (almost as a riser) while at the ‘stop’, a large splash of reverb is applied to the otherwise isolated kick drum. Finally, as the snare roll signals the return of the other instruments, its reverb level is automated to add a further spot effect.
Example 2: This is split into two parts. In the first part you hear the standard arrangement with reverb applied. In the second run through of the same material, the reverb level from REVelation is being controlled via the Compressor. As described in the main text, the compressor is being triggered via its side-chain input from the drum track causing the reverb level within the mix to be ducked slightly whenever there is a drum kit. The difference is subtle (it’s meant to be) but it does mean that the drums can punch through the mix a little more easily.
Example 3: In this section, the return from the vocal reverb has the Gate plug-in applied to it. The gate is being triggered via its side-chain input from the drum track. The send level from the vocal to REVelation is deliberately overcooked to exaggerate the effect and, because of the slow attack time set for Gate, the reverb kicks in more towards the ends of words only and is rhythmically linked to the drums. To add a bit of further interest, an instance of Auto-Pan has been placed on the REVelation FX Channel after Gate so that the reverb effect is panned across the stereo field, while the dry vocal remains fixed in the centre.
Example 4: This uses an instance of the MIDI Gate plug-in. MIDI Gate has been inserted after REVelation on an FX Channel and the gate is being triggered from a specifically created MIDI track. This contains notes played in a rhythmic fashion. The drum mix has a send to this FX Channel but, because of MIDI Gate, the reverb is only audible when the rhythmic MIDI channel triggers the gate to open, resulting in a rhythmic pulse of reverb on the kit. I’ve dialled in quite a high send level from the drum kit to REVelation to make the effect obvious but you can, of course, set to taste.
Example 5: In this section you hear two runs through of the same synth part. In the first, REVelation is simply applying a constant reverb to the part. In the second, the send level to REVelation has been increased and an instance of MorphFilter applied after REVelation on the FX Channel. The settings for the filter have been automated over the course of the part (and also panned using AutoPan again). The dry synth part therefore stays constant but the variation in the tonal character of the reverb and its stereo movement adds a bit of extra interest.
Example 6: This provides two different examples of reverse reverb as a spot effect applied to vocals. In the first pass you hear something approaching the classic application of this technique where the reversed reverb provides a riser effect into specific words within the sung phrase. In the second pass reverse reverb has been applied to the whole phrase (so what you hear alongside the main vocal is a reversed reverb-only version of the full phrase) and creates a sort of ghostly, backwards backing vocal effect.
Tuesday, October 27, 2015
Monday, October 26, 2015
Strike A Chord
Cubase Tips & Techniques
Technique : Cubase NotesStuck in a songwriting rut? Cubase’s Chord Pads and Chord Assistant can help you out.
John Walden
Whether you’re one of those Cubase users who has traditional musical skills and a firm grasp of music theory, or someone who has an irrational phobia of formal music training, Cubase 8’s suite of composition tools can be incredibly useful in developing your songwriting. Two of these tools, the Chord Assistant and the Chord Track, were the subject of a Cubase workshop in SOS June 2013 (http://sosm.ag/cubase7-chordtrack), but with Cubase Pro 8 Steinberg have both tweaked their functionality (as well as improving the associated documentation), and added a new, related, element, which they call Chord Pads.
There’s quite a lot of ground to cover, so I’ll split this workshop into two parts. This time, I’ll focus on ways to configure the Chord Pads and to use the Chord Assistant to construct an appealing series of harmonically related chords. Next month, I’ll look at the performance options provided by the Chord Pads, and explain how you can use these to create something more interesting (and hopefully more inspiring) than just a series of basic chord changes to sit alongside the Chord Track.
Three (or more) Chord Trick
To start, you’ll need a MIDI track routed to your chosen ‘writing’ instrument — I used a Halion Sonic SE acoustic piano for my examples. So either create an instrument track or load an instrument into the VST Instrument rack and associate it with a MIDI track. Then select the Chord tab in the track’s Inspector panel and hit the button that looks like a playhead (next to the Chord Pad section) to open the Chord Pads tool at the bottom of the Project page.

 The Chord Pad panel with a modest chord selection that has created countless popular songs.The Chord Pad panel with a modest chord selection that has created countless popular songs.You can adjust the layout of the Chord Pads via the Pad Layout tab.You can adjust the layout of the Chord Pads via the Pad Layout tab.The panel’s simple default layout is dominated by a series of 12 large pads, which are arranged like the keys of a piano keyboard, and these can be triggered using notes C1-B1 — single notes are used to play the chord loaded onto the associated pad. Selecting the Edit (E) button and choosing the Pad Layout tab will present you with options for expanding the number of pads or switching to a grid layout (useful with a drum-pad controller). At the top of the panel is a mini-keyboard graphic, on which the blue coloured keys show the default MIDI trigger notes for the Chord Pads, and arranged down the left edge are icons that provide access to various editing and preset features.
The keyboard also features green Remote Control keys, which might not be activated by default, in which case click on the ‘E’ button on the left, select the Remote Control tab, and check the Activate box. There are three ‘modifiers’ that you can toggle up/down: voicing, tension and transpose — I’ll explain about these in more detail next month. (The Remote Control keys are mapped by default to C2-F2. When adding more pads, make sure you also visit the Remote Control tab and adjust the MIDI notes used to trigger both the Chord Pads and the Remote Control options so that they don’t overlap.)
Perfect Presets
You should find that the Chord Pads are automatically populated with a basic set of chords that would be suitable for a song construction in the key of C major (ish), but there’s also an impressive list of presets that can be explored — click on the Preset option in the control set that runs down the left edge of the panel. You could choose to use these presets as-is, but they’re best used as starting points for your own sequences, so with that in mind let’s work through an example.

 Select the Favourite Pop Chords preset and clear all but four pads by right-clicking on a pad and selecting ‘unassign pad’, to leave you with the most classic of four-chord sequences in C major: C, F, G and A minor. There are thousands of popular songs built around sequences of these four basic chords (the I, IV, V and VI chords in a major key), but our aim is to come up with something more interesting that’s a little outside your compositional comfort zone.
The Chord Assistant’s Proximity mode.The Chord Assistant’s Proximity mode.The Circle of Fifths mode is perhaps a little more intuitive for budding songwriters.The Circle of Fifths mode is perhaps a little more intuitive for budding songwriters.We’ll assume that your music theory is a bit sketchy and seek advice from the Chord Assistant. Click the ‘speech bubble’ icon on the left, which opens and closes the Chord Assistant window. Within this are two tabs, each offering a different graphical mode, one called Proximity and the other Circle of Fifths. These modes both display the harmonic relationships between the various chords shown, and which you prefer will be a matter of taste and/or the extent of your musical knowledge. Whichever mode you use, the first task is to pick an initial chord. Then use the ‘assign chord as origin for Chord Assistant’ option (right-click on a chord in the Chord Assistant window to do this). The chord you assign as the ‘origin’ defines your major/minor key, and the rest of the display will automatically adjust to reflect this.
In Proximity mode, the ‘origin’ chord is shown bottom-centre, with chords arranged in arcs around it. The further a chord is away from the origin, the more complex its harmonic relationship with the origin chord (so, effectively, the more surprising it will be to the listener). Click on a chord and it will sound via your chosen instrument. You could quite easily wander from one pad to another in stepping-stone fashion, safe in the knowledge that each step won’t ask too much of the ear. Potentially more useful are the simple chord progressions that are suggested as you hover the mouse over any chord in the display — for those without traditional music skills, these suggestions can be a very helpful starting point.
The Circle of Fifths mode provides a visual take on the classic relationship between the 12 tones in the chromatic scale and the corresponding chords in major and minor keys. In this mode, the ‘origin’ chord is shown both at the centre and as the I (tonic) chord, top-centre. The other six standard chords of the corresponding key dominate the top wedge of the display and their associated Roman numerals are also indicated. Less obvious chord choices are shown in the lower part of the display.
Pimp My Pad
Assembling a few chords to work with is a breeze — find your desired chords via the Assistant and drag them onto the Chord Pads below. However, as discussed above, the chord types offered by the Chord Assistant are fairly standard three- and four-note varieties, which can become a little boring and predictable. The screenshot shows an example chord set I created by starting with my four-chord trick, and notice that I’ve included a few additional chords. Here are four simple ways in which you can spice up your chord selections:

1. Right-click on a Chord Pad and select the ‘Assign Pad from MIDI input’. The pad will be highlighted in red until you play a combination of notes on your MIDI keyboard. Rather wonderfully, whether you knew what chord you were playing or were simply hitting a selection of notes that you think ‘sound nice’, Cubase will do its best to identify the chord and give it a suitable label on the Chord Pad. If you play the keyboard by ear, this is a very helpful means of finding out what you’re actually playing — you can then use the Chord Assistant to identify chords that will work well with the one you’ve played.
2. Hover over a Chord Pad and click the down-arrow icon on its left edge. This opens the Chord Editor, which makes available a slightly wider selection of chords from which to choose.
 and III (E minor) chords, alternative voicings for C, G and F, as well as three more interesting chords (Amin9, Cmaj7 and Fmaj7).")
3. Again, hover over a pad and this time use the left/right arrow buttons (located centre-bottom) to toggle through different ‘tensions’ based on the starting chord. This provides you with a small selection of more harmonically complex chords to consider.
The Chord Editor offers you some additional, more sophisticated chord options.The Chord Editor offers you some additional, more sophisticated chord options.My final choice of chords, assigned to Chord Pads: I selected four ‘classic’ chords in C major, but to add a little variety I also included the II (D minor) and III (E minor) chords, alternative voicings for C, G and F, as well as three more interesting chords (Amin9, Cmaj7 and Fmaj7).My final choice of chords, assigned to Chord Pads: I selected four ‘classic’ chords in C major, but to add a little variety I also included the II (D minor) and III (E minor) chords, alternative voicings for C, G and F, as well as three more interesting chords (Amin9, Cmaj7 and Fmaj7).4. Use the up/down arrows on the right edge of a Chord Pad to cycle through different voicings of the selected chord (same chord but with the notes played using a different keyboard fingering), each of which will sound somewhat different.
I’ll explore these last two options in more detail next month.
Playing Partner
Provided you’ve let the Chord Assistant guide you, and have not broken the rules of harmony completely (by adding too many harmonically distant chords to your selection), you should be ready to write, using the custom-made chord palette you have at your fingertips. You can then trigger the pads via MIDI, whether via your keyboard, or by programming notes in the piano-roll editor, to create a sequence. And you can record that sequence into a new MIDI track if you wish, for further refinement. Next month, I’ll take things a step further, looking in particular at some performance options related to Chord Pads.
Saturday, October 24, 2015
Friday, October 23, 2015
Inversion Therapy
Article Preview :: Cubase Tips & Techniques
Technique : Cubase Notes
With the Chord Pads configured, it’s time to write a song.With the Chord Pads configured, it’s time to write a song.
Cubase 8 can help you experiment with different chords and voicings to fake a good performance.
John Walden
In last month’s Cubase workshop (http://sosm.ag/cubase-0515), we used both the new Chord Pad functionality and the Chord Assistant to select a series of harmonically related chords that we might use for a songwriting session. This month we’ll build on that by exploring the performance options provided by the Chord Pads. These options will enable you to inject some life into your songwriting, and might speed the whole process up for you too.
Start Me Up
We finished last month’s workshop, courtesy of some help from the Chord Assistant, with our Chord Pads containing some classic chords in C major, a small number of extra harmonically related chords and alternative voicings of the three major chords C, F and G. The next stage of the writing process is actually about two things: finding some nice chord sequences from which to build your various song elements (verse, chorus and bridge, for example), and creating a ‘performance’ of these various sequences that captures the mood you’re seeking and inspires you to develop the song further.
Because the Chord Pads can be triggered by a single note, you’re freed from the need to concentrate on fingering the full chords — which is great news if you’re not the most accomplished of keyboardists! What’s more, because they respond to MIDI velocity, it’s easy to create fairly expressive performances. We can do better though, by taking that expression up a further notch (or rather three further notches!) courtesy of the voicings, tensions and ‘players’ options. I’ll consider each in turn.
Finding Your Voice
Pianists and guitarists will often vary their fingering/neck position when playing chords, just to add a little variation to an otherwise repetitive part — while these different voicings do result in the same chord, they sound different. Cubase’s Chord Pads can replicate this via the Adaptive Voicing system. When playing any Chord Pad, you can also step through some alternative voicings using the Voicings Remote Control keys (by default, C2 and C#2, as explained last month).
Published in SOS June 2015
Thursday, October 22, 2015
Wednesday, October 21, 2015
Tuesday, October 20, 2015
Plug-in Pruning
Article Preview :: Cubase Tips & Techniques
Technique : Cubase Notes

When creating a new Collection, you can base it on the entire plug-in list or an existing Collection, or you can start from scratch by selecting Empty.When creating a new Collection, you can base it on the entire plug-in list or an existing Collection, or you can start from scratch by selecting Empty.
Take some of the work out of your workflow, with Cubase 8 Pro’s Plug-in Manager.
Carsten Kaiser
We’re really lucky these days to have such instant and affordable access to so many high-quality plug-ins. But, for many of us, acquiring new plug-ins becomes an unhealthy habit that gets in the way of actually using them to make music. How many times have you clicked to insert a plug-in and then spent an age browsing through an endless list in search of ‘the one’ effect or instrument that will do something special? Several minutes later you still haven’t found it and, worse, you’ve lost your creative mojo.
While experimentation is obviously important in music production, there’s a time and a place for it, and such an unfocused trial-and-error approach to plug-in selection is seldom productive. While it’s possible to search for a plug-in by typing its name, this only works if you can remember that name, and it’s not going to help you browse a few select alternatives for the same task — a more focused way of browsing — or those of us who prefer to use a mouse/trackpad rather than the computer keyboard.
Thankfully, Cubase 8 Pro has a feature that can help. It’s called the Plug-in Manager and if you use it wisely it will save you lots of time and help you keep your focus on the music. In this month’s column, I’ll suggest some strategies to get the best out of it.
Basic Setup
The basic idea of the Plug-in Manager is that you can impose your own preferred structure on your plug-in collection by creating what Steinberg call ‘Collections’ of plug-ins. It’s really easy to use, too.
Published in SOS July 2015
Monday, October 19, 2015
Saturday, October 17, 2015
Double Bass | Media
Cubase Tips & Techniques
Technique : Cubase NotesAudio files to accompany the article.
John Walden
These files accompany the Cubase Notes article in the August 2015 issue of SOS
Download Cubase 0815
2.8 MB
Audio Examples
Example 1
This example uses a DI’d electric bass as described in the main text of the article. The audio is split into four parts: (i) the dry DI’d bass, (ii) the DI’d bass processed through the VST Bass Amp, (iii) as for (ii) but with the real-time pitch-shifted version also passed through the VST Amp Rack and (iv) as for (iii) but using the ‘cheat’ described in the main text (using VariAudio to create a pitch-shifted version of the bass track) that avoids having to use the real-time pitch-correction.
Example 2
This example uses a MIDI-based electric bass from Halion Sonic SE2 as described in the main text of the article. The audio is split into four parts: (i) the dry MIDI bass, (ii) the MIDI bass processed through the VST Bass Amp, (iii) as for (ii) but with the real-time pitch-shifted version also passed through the VST Amp Rack and (iv) as for (iii) but using the ‘cheat’ described in the main text (creating a second instance of Halion Sonic bass patch) that avoids having to use the real-time pitch-correction.
Bottom end
VST Bass Amp was introduced for the first time with Cubase Pro 8. It’s very similar to the VST Amp Rack guitar-amp modelling plug-in included in earlier versions, but features emulations of gear for use with electric bass. With six different amp models, four cabinet types, over 20 effects pedals and the option to blend any two of eight different virtual microphone types and adjust their placement in front of the speaker cabinet, you can coax a huge range of tones out of this plug-in. It might not have the ‘street cool’ of a real bass stack but it sounds solid and is both flexible and convenient.
Published in SOS August 2015
Friday, October 16, 2015
Thursday, October 15, 2015
Double Bass
Article Preview :: Cubase Tips & Techniques
Technique : Cubase Notes
The new VST Bass Amp offers six different models and plenty of effects and processing options but not, unfortunately, an ‘octave up’ facility in its Octaver effect.The new VST Bass Amp offers six different models and plenty of effects and processing options but not, unfortunately, an ‘octave up’ facility in its Octaver effect.
Use Cubase’s new VST Bass Amp to recreate the sound of Royal Blood’s doubled electric bass.
John Walden
Ever since the likes of Jimi Hendrix and Cream graced the charts, it’s been obvious just how much noise a ‘power trio’ can make, and many bands have followed in their footsteps. But in recent years, some artists have taken the concept further, stripping the line-up back to two while still delivering ‘big’ sounds. The most obvious example is perhaps the White Stripes, whose guitarist Jack White often applied a bit of pitch-shifting to his guitar sound to fill out the bottom end of some of the riff-based songs. The latest such ‘power duo’ to hit the charts is Royal Blood, who play only electric bass and drums, and yet manage to make a very impressive amount of sound.
Cubase 8 brought with it the new VST Bass Amp plug-in, which, along with a few other of Cubase’s in-built tools, can easily be used to create something in the style of Royal Blood’s bass-driven riffs. Here’s how...
All Tooled Up
The band are understandably a little secretive about the exact details of the setup they used to create their sound, but in essence the bass output is split and sent to two amplifiers: one a bass amp, as you’d expect, but the other a guitar amp. Both amps are tube-based, and the feed to the guitar amp is passed through some sort of pitch-processor, to shift the part up an octave. And for their live performances at least, the setup allows the player to mute the feed to either amp as and when required.
Cubase Pro 8 has all the tools required to create a similar setup — and while we might not be able to copy the sound exactly, we can certainly capture the key features. Note, though, that if you want to emulate the setup using a single bass instrument, whether a ‘real’ one or something MIDI-based, it requires careful configuration.
Published in SOS August 2015
Wednesday, October 14, 2015
Reverb Rating
Article Preview :: Cubase Tips & Techniques
Technique : Cubase Notes
Revelation, Cubase’s ‘upmarket’ algorithmic reverb, isn’t the resource hog that you might expect.Revelation, Cubase’s ‘upmarket’ algorithmic reverb, isn’t the resource hog that you might expect.
Cubase Pro 8 gives you four different reverb plug-ins to choose from, but which one should you be using?
John Walden
It’s not that many years since Cubase’s reverb plug-ins seemed to be the butt of a fair few forum jokes, but Steinberg have made considerable progress on this front in recent years and Cubase 8 Pro boasts four decent reverbs. Two, Roomworks and Roomworks SE, were first introduced with Cubase 4. Roomworks is an algorithmic reverb which supports both stereo and surround formats, and the SE version is a streamlined version which places a lower strain on your computer’s CPU. In Cubase 5 Steinberg upped their game further by introducing Reverence, a convolution-based reverb capable of both stereo and surround-sound operation. Finally, Cubase 7.5 brought with it a new stereo-only algorithmic reverb called Revelation.
We may be spoiled for choice, then, but do you know which is the best reverb to opt for in your project? Two obvious factors might influence that decision. First, the sound, pure and simple: in different circumstances, you may be after different end results. You might require realism, you might prefer classic sheen, you might want to focus only on early reflections, or you may yearn for a lo-fi sound, and so on. The second factor is how efficient a reverb you require, which depends on the complexity of your project and the processing ‘grunt’ of your computer. A particularly CPU-hungry reverb plug-in might not always be the best option — it’s not as if you can ‘freeze’ an effects channel in the way you can an audio or instrument track. So, I’ll look at CPU load and sound quality here, and in that order...
Published in SOS September 2015
Tuesday, October 13, 2015
Monday, October 12, 2015
Reverb Rating | Media
Audio files to accompany the article.
Technique : Cubase Notes
Cubase Pro 8 gives you four different reverb plug-ins to choose from, but which one should you be using?
John Walden
These files accompany the Cubase Technique article in the September 2015 issue of SOS
Download
Cubase 0915 01 Zip 12.5 MB
Sound Cloud
Reverb Rating Audio Examples
The audio examples on this page accompany John Walden’s Cubase technique workshop in SOS September 2015.
Cubase_0915_01
This example uses a short vocal and short drum phrase. In each case, the short audio section is repeated six times with the following treatments; dry, Revelation, Reverence, Roomworks (Efficiency setting on 10), Roomworks (Efficiency setting on 50), Roomworks SE. In this example, a short ‘room’-style reverb has been selected in each case with a reverb time of around 1 second.
Cubase_0915_02
This second audio example is identical in structure to the first but a ‘cathedral’-style reverb has been selected in each case with a reverb time of around 2-3 seconds. The gaps between the audio sections have also been extended so the reverb tails can be heard more clearly.
Cubase_0915_03
This third audio example is similar in structure to the first two but, instead of the drum loop as the second sound source, a single dry snare hit has been used. The reverb treatment used is an ‘ambience’ setting that emphasises the ‘early reflections’ part of the reverb processing (Revelation and Reverence allow independent adjustment of the early reflections and tail; for Roomworks, a short reverb time has been used to simulate the same effect).
Saturday, October 10, 2015
Friday, October 9, 2015
Services Rendered
Article Preview :: Cubase Tips & Techniques
Technique : Cubase NotesWhether archiving projects, creating stems or saving CPU resources, Cubase 8’s Render In Place feature has you covered.
John Walden

Whether you need to save some CPU resources in a complex project, create a set of stems for mixing and/or mastering, or simply ensure that you can either move your project to another audio environment or preserve it for archive purposes, the Render In Place facility that was added in both the Pro and Artist versions of Cubase 8 can be a really useful tool.
The Render In Place settings give you plenty of flexibility when rendering your audio or MIDI events and tracks.The Render In Place settings give you plenty of flexibility when rendering your audio or MIDI events and tracks.
Rendered Superfluous?
As the name suggests, Render In Place (RIP) provides a way of turning existing audio or virtual-instrument tracks into new audio files. RIP is not without its limitations, as we’ll see, but it is both versatile and powerful. Cubase already has a number of other tools that provide audio-rendering services, of course, including Bounce Selection, Track Freeze and Export Audio Mixdown. So does RIP render (sorry!) these existing functions superfluous? Well, yes and no, because while there’s certainly plenty of overlap between these features, and Steinberg may see RIP as an eventual replacement for some or even all of the above facilities, my educated guess is that all those older features will hang around for some time so that users with established workflows are not unduly disturbed. I’m sure that I will continue to use Export Audio Mixdown for final stereo mixdown tasks, for example, and perhaps for archiving projects, but for other tasks I can see myself turning to RIP.
Published in SOS October 2015
Thursday, October 8, 2015
Wednesday, October 7, 2015
Tuesday, October 6, 2015
Q Should I choose Windows 8 or 10?
Sound Advice : Recording
Pete Gardner

Q Should I choose Windows 8 or 10?
I’m currently looking into a new music PC build and wondered which Windows operating system you’d recommend I opt for at this time. What advice are you able to offer me?
James Woodcock via email
SOS contributor Pete Gardner replies: There are many musicians and engineers still happily running Windows 7 systems, but with that version of Microsoft’s OS having entered its ‘extended support phase’ at the start of this year, and with its production now long ceased, the choice for a new machine’s primary installation is pretty much exclusively between Windows 8.1 or Windows 10. Whether Windows 10’s particular benefits will appeal to you depends to some extent on what you wish to do with this machine, as I’ll explain below.
Windows 8’s GUI may sometimes have been divisive with users but by the time the 8.1 was released this had been refined and was much improved. The underlying engine also proved to be more efficient and better performing than the older operating system — generally a big improvement. Windows 10 takes all those improvements and makes further changes in the layout and design which, so far, seem to be getting positive feedback from many users (though, as always, your own views may differ!). Along with those changes are a number of improvements in the native WASAPI (Windows Audio Session Application Program Interface) and MIDI drivers that may hold appeal for the average music maker.
The new MIDI API allows multi-client access to a single piece of MIDI hardware, along with jitter-free operation and other smaller bug fixes. With this API being implemented across all of the Windows 10 builds, right down to the editions catering for Raspberry Pi-style devices, it could open up the possibility to piece together some interesting controllers in the future, as well as being a general benefit to those who rely on MIDI on a daily basis.
Also touted by Microsoft are the improvements to the ‘audio stack’ and WASAPI itself — the native equivalent of ASIO drivers for handling internal audio routing. Having had a chance to run some tests, I’ve found that the claimed 15 percent improvement over the older WASAPIs seems to be holding true; if anything, it may be a conservative claim. This may prove useful for some applications, especially those running on mobile Windows devices, but the performance is still not as good as with a decent set of ASIO drivers. So for recording and getting the best out of your main music-production machine ASIO remains the way to go, whichever OS version you choose.
For those looking to move from Windows 7 or 8.1 to Windows 10, rather than to buy the whole OS license afresh, there’s a one-year window in which to accept a free upgrade, and I’d recommend taking full advantage of this generous window of time. The early days of the Windows 10 roll-out saw some big surprises for some audio manufacturers and developers: there was a flurry of announcements from various software and hardware manufacturers advising users to hold back until they can release updates and drivers to fix bugs and ensure great driver performance. They’re reacting fairly quickly to put things right, but it makes sense to check for announcements from manufacturers of any gear or software you plan to use on your new system, and wait for them to give the all clear and confirm support for Windows 10 before you take the plunge. For most of us, that will probably mean holding back on the upgrade for a few months.
If buying the OS license outright, you could still opt for Windows 8.1 and upgrade for free over the coming year. Note that you won’t be able to run both OSs side by side on the same machine on a single license, though you should be able to roll back from a Windows 10 installation to the previous version if you need to. In that sense, Windows 8.1 allows you to defer your decision while buying 10 outright does not. That said, plenty of music makers are already happily running Windows 10 systems!
Pete Gardner
Q Should I choose Windows 8 or 10?
I’m currently looking into a new music PC build and wondered which Windows operating system you’d recommend I opt for at this time. What advice are you able to offer me?
James Woodcock via email
SOS contributor Pete Gardner replies: There are many musicians and engineers still happily running Windows 7 systems, but with that version of Microsoft’s OS having entered its ‘extended support phase’ at the start of this year, and with its production now long ceased, the choice for a new machine’s primary installation is pretty much exclusively between Windows 8.1 or Windows 10. Whether Windows 10’s particular benefits will appeal to you depends to some extent on what you wish to do with this machine, as I’ll explain below.
Windows 8’s GUI may sometimes have been divisive with users but by the time the 8.1 was released this had been refined and was much improved. The underlying engine also proved to be more efficient and better performing than the older operating system — generally a big improvement. Windows 10 takes all those improvements and makes further changes in the layout and design which, so far, seem to be getting positive feedback from many users (though, as always, your own views may differ!). Along with those changes are a number of improvements in the native WASAPI (Windows Audio Session Application Program Interface) and MIDI drivers that may hold appeal for the average music maker.
The new MIDI API allows multi-client access to a single piece of MIDI hardware, along with jitter-free operation and other smaller bug fixes. With this API being implemented across all of the Windows 10 builds, right down to the editions catering for Raspberry Pi-style devices, it could open up the possibility to piece together some interesting controllers in the future, as well as being a general benefit to those who rely on MIDI on a daily basis.
Also touted by Microsoft are the improvements to the ‘audio stack’ and WASAPI itself — the native equivalent of ASIO drivers for handling internal audio routing. Having had a chance to run some tests, I’ve found that the claimed 15 percent improvement over the older WASAPIs seems to be holding true; if anything, it may be a conservative claim. This may prove useful for some applications, especially those running on mobile Windows devices, but the performance is still not as good as with a decent set of ASIO drivers. So for recording and getting the best out of your main music-production machine ASIO remains the way to go, whichever OS version you choose.
For those looking to move from Windows 7 or 8.1 to Windows 10, rather than to buy the whole OS license afresh, there’s a one-year window in which to accept a free upgrade, and I’d recommend taking full advantage of this generous window of time. The early days of the Windows 10 roll-out saw some big surprises for some audio manufacturers and developers: there was a flurry of announcements from various software and hardware manufacturers advising users to hold back until they can release updates and drivers to fix bugs and ensure great driver performance. They’re reacting fairly quickly to put things right, but it makes sense to check for announcements from manufacturers of any gear or software you plan to use on your new system, and wait for them to give the all clear and confirm support for Windows 10 before you take the plunge. For most of us, that will probably mean holding back on the upgrade for a few months.
If buying the OS license outright, you could still opt for Windows 8.1 and upgrade for free over the coming year. Note that you won’t be able to run both OSs side by side on the same machine on a single license, though you should be able to roll back from a Windows 10 installation to the previous version if you need to. In that sense, Windows 8.1 allows you to defer your decision while buying 10 outright does not. That said, plenty of music makers are already happily running Windows 10 systems!
Monday, October 5, 2015
Saturday, October 3, 2015
Q Can I use an effects pedal for vocals?
Sound Advice : Recording
Matt Houghton
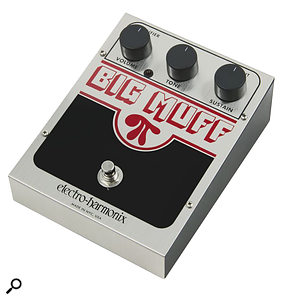
I have an Electro-Harmonix Big Muff effects pedal that I’d like to try out on vocals, drums and possibly some other things during tracking. How would I go about putting this between a dynamic or condenser microphone and the mixing console?
Q Can I use an effects pedal for vocals?
SOS Forum post
Reviews Editor Matt Houghton replies: There will be people who tell you to track clean and add this sort of effect to a vocal only while mixing — but it can be both fun and inspirational to try mangling things while tracking can’t it? Still, they have a point: the sort of fuzzy distortion a Big Muff Pi can be responsible for is not something you can undo. For that reason, it makes sense to track a clean part alongside your distorted one, and there are a few ways of doing this. If you have a small mixer (or even a large one!) you could simply mult the clean mic signal out to another track and process that. You could try patching the pedal in as an insert effect on that channel, and this will work to some extent, but there’s likely to be both a level and impedance mismatch, which means the pedal probably won’t operate quite as it would on the instrument signal for which it’s intended. Whether it’s working, though, is a subjective matter — use your ears, and if you like what you hear then great! If not, then you need some way of overcoming those problems. Using the Big Muff as a send effect might improve things, as you can change the level going into the pedal using the mic channel’s aux send control. If that doesn’t work, what you’re looking for is a DI/re-amp box. The re-amp signal goes to the Big Muff’s input, and its output goes via the DI to a line input on your mixer or recording device. If you have no mixer, you could do pretty much the same thing, but beware of latency. You’ll need an interface with zero-latency monitoring with which the input signal can be routed straight to an output without passing through the A-D/D-A converters. The incoming mic signal is routed both to your DAW and to a physical output. That physical out goes into the Big Muff (the same level/impedance considerations apply) and the output comes back, either via a DI box to a mic input, or straight into an instrument input if your interface has one. Alternatively, you could just use the processed part in your monitor mix and ‘re-amp’ the clean signal through your pedal later, when you might have a little more control over the tone.
Finally, if you do prefer to just track the distortion effect on its own — or if you want to use it on live vocal parts — there are a couple of devices dedicated to this sort of thing. One is the Eventide Mixing Link (http://sosm.ag/eventide-mixinglink) and the other the Meris 440 (http://sosm.ag/meris-440). Each of these offers a mic preamp and an instrument-level effects loop..
Matt Houghton
I have an Electro-Harmonix Big Muff effects pedal that I’d like to try out on vocals, drums and possibly some other things during tracking. How would I go about putting this between a dynamic or condenser microphone and the mixing console?
Q Can I use an effects pedal for vocals?
SOS Forum post
Reviews Editor Matt Houghton replies: There will be people who tell you to track clean and add this sort of effect to a vocal only while mixing — but it can be both fun and inspirational to try mangling things while tracking can’t it? Still, they have a point: the sort of fuzzy distortion a Big Muff Pi can be responsible for is not something you can undo. For that reason, it makes sense to track a clean part alongside your distorted one, and there are a few ways of doing this. If you have a small mixer (or even a large one!) you could simply mult the clean mic signal out to another track and process that. You could try patching the pedal in as an insert effect on that channel, and this will work to some extent, but there’s likely to be both a level and impedance mismatch, which means the pedal probably won’t operate quite as it would on the instrument signal for which it’s intended. Whether it’s working, though, is a subjective matter — use your ears, and if you like what you hear then great! If not, then you need some way of overcoming those problems. Using the Big Muff as a send effect might improve things, as you can change the level going into the pedal using the mic channel’s aux send control. If that doesn’t work, what you’re looking for is a DI/re-amp box. The re-amp signal goes to the Big Muff’s input, and its output goes via the DI to a line input on your mixer or recording device. If you have no mixer, you could do pretty much the same thing, but beware of latency. You’ll need an interface with zero-latency monitoring with which the input signal can be routed straight to an output without passing through the A-D/D-A converters. The incoming mic signal is routed both to your DAW and to a physical output. That physical out goes into the Big Muff (the same level/impedance considerations apply) and the output comes back, either via a DI box to a mic input, or straight into an instrument input if your interface has one. Alternatively, you could just use the processed part in your monitor mix and ‘re-amp’ the clean signal through your pedal later, when you might have a little more control over the tone.
Finally, if you do prefer to just track the distortion effect on its own — or if you want to use it on live vocal parts — there are a couple of devices dedicated to this sort of thing. One is the Eventide Mixing Link (http://sosm.ag/eventide-mixinglink) and the other the Meris 440 (http://sosm.ag/meris-440). Each of these offers a mic preamp and an instrument-level effects loop..
Friday, October 2, 2015
Thursday, October 1, 2015
Q Are front-ported monitors better in poor rooms?
Sound Advice : Recording
Hugh Robjohns

My room is not ideally treated, especially in the corners near my monitors, which have no bass traps. Would it help to use monitors with bass ports on the front (as with some KRK and Tannoy models) instead of my Yamaha ones, which have bass ports in the back, or do bass ports distribute spherically, which would mean there’s no benefit in this? I don’t have the opportunity to test monitors before buying them, so I’d appreciate your advice on this, as well as any words on the bass port concept more generally.
There’s nothing inherently wrong with ported monitors and many high-end designs are ported. However, many manufacturers of budget and entry-level speakers abuse the characteristics of ports to give the impression of larger speakers with deeper bass — at the expense of accuracy.There’s nothing inherently wrong with ported monitors and many high-end designs are ported. However, many manufacturers of budget and entry-level speakers abuse the characteristics of ports to give the impression of larger speakers with deeper bass — at the expense of accuracy.
SOS Forum post
SOS Technical Editor Hugh Robjohns replies: As long as the rear bass ports are not pressed up against the back wall, it really won’t make a lot of difference. There’s nothing wrong with porting as a concept; any problems come down to the implementation by the manufacturer. Some of them deliberately ‘abuse’ the characteristics of porting to try to make small speakers sound bigger (and, in particular, bassier) than they really are. Such models might sound impressive on a first listen, but this approach can seriously compromise the time-domain performance — in other words the speakers don’t stop making sound as quickly as they should. But well-designed ported speakers can be very good indeed and most (though not all) models from high-end speaker manufacturers such as ATI, Genelec, Focal, Dynaudio — and many more — are ported types.
Hugh Robjohns
My room is not ideally treated, especially in the corners near my monitors, which have no bass traps. Would it help to use monitors with bass ports on the front (as with some KRK and Tannoy models) instead of my Yamaha ones, which have bass ports in the back, or do bass ports distribute spherically, which would mean there’s no benefit in this? I don’t have the opportunity to test monitors before buying them, so I’d appreciate your advice on this, as well as any words on the bass port concept more generally.
There’s nothing inherently wrong with ported monitors and many high-end designs are ported. However, many manufacturers of budget and entry-level speakers abuse the characteristics of ports to give the impression of larger speakers with deeper bass — at the expense of accuracy.There’s nothing inherently wrong with ported monitors and many high-end designs are ported. However, many manufacturers of budget and entry-level speakers abuse the characteristics of ports to give the impression of larger speakers with deeper bass — at the expense of accuracy.
SOS Forum post
SOS Technical Editor Hugh Robjohns replies: As long as the rear bass ports are not pressed up against the back wall, it really won’t make a lot of difference. There’s nothing wrong with porting as a concept; any problems come down to the implementation by the manufacturer. Some of them deliberately ‘abuse’ the characteristics of porting to try to make small speakers sound bigger (and, in particular, bassier) than they really are. Such models might sound impressive on a first listen, but this approach can seriously compromise the time-domain performance — in other words the speakers don’t stop making sound as quickly as they should. But well-designed ported speakers can be very good indeed and most (though not all) models from high-end speaker manufacturers such as ATI, Genelec, Focal, Dynaudio — and many more — are ported types.
Subscribe to:
Posts (Atom)