Friday, October 31, 2014
Q. What's the best way to back up my data?
Sound Advice : Maintenance
Martin Walker
I have a PC running Windows XP, and currently back up my data regularly using copy and paste onto an external hard drive. The problem with my current drive‑to‑drive method is that, in the case of a full windows reinstall, it means that I still have to reinstall some software (and this eats into my downloads and licences from the developers' web site). Is specialised disk cloning or imaging software a better option?
 will create a complete snapshot of your computer's hard drive and save you having to reinstall software after a crash or drive failure.")
Paul Allerton, via email
SOS contibutor Martin Walker replies:
You're very wise to back up your data regularly, but there's a fundamental difference between copy and paste backups and disk imaging or cloning: the latter takes a snapshot of everything on the chosen partition or drive, including all the hidden and system files, although it's clever enough to ignore such things as huge page files that only contain temporary data, to keep the image file sizes to a minimum.
Each image file is, therefore, a time capsule, since when you 'restore' it your computer will return to exactly the same state it was in when you created that image file, leaving your licensed software intact. Most imaging utilities also offer compression options, typically squashing the data to about half the original size, while still letting you explore and restore individual files contained within.
It's always safest to store these image files onto external media, such as DVD or an external hard drive, to cope with the worst‑case scenario of your entire computer blowing up or being struck by lightning. In which case, when you get your replacement PC, you can restore your external backups onto this and avoid days of reinstalling Windows and applications, and authorising copy‑protected software. However, if, like many musicians, you have several hard drives in your audio PC, you can also store routine images of one drive to another, so that if one drive goes belly‑up, you'll still have a recent image file on your other drive to restore when you've replaced the faulty one.
We explored different strategies for backing up your data in the October 2007 issue of Sound On Sound (see /sos/oct07/articles/data_protection.htm), and it might be worth giving that a read for more information.
There's a bewildering array of imaging utilities on offer, so here's a quick rundown of some of the best alternatives. Windows 7 now includes its own Backup & Restore application that many users find perfectly sufficient, and for Windows 7/XP/Vista a very popular commercial package is Acronis True Image, especially since free licensed versions are available from various hard-drive manufacturers, for use with their own products.
An imaging utility (such as Paragon Backup & Recovery, shown here) will create a complete snapshot of your computer's hard drive and save you having to reinstall software after a crash or drive failure.An imaging utility (such as Paragon Backup & Recovery, shown here) will create a complete snapshot of your computer's hard drive and save you having to reinstall software after a crash or drive failure.There are also various utilities that work with all makes of hard drive and are totally free for the home user. After trying out quite a few, I've ended up using Paragon Backup & Recovery 2010 (www.paragon‑software.com/home/db‑express), which has a free advanced version that is fairly unique among the free utilities in offering an incremental backup option that only stores files newer than your previous image files. I've been very pleased with its clear and easy‑to‑use interface, and my slimmed‑down 10GB Windows partition takes just four minutes to back up to a compressed file of some 6GB.
This free version of Paragon Backup & Recovery 2010 runs on both 32‑bit and 64‑bit versions of Windows 7, Vista, XP and Server 2003/2008. It can create a Linux/DOS recovery environment onto CD, DVD or Flash memory (so that you can boot your PC from these media and restore image files even if your computer refuses to boot up by itself). You can even assign a drive letter to 'mount' an archived partition, so you can access the files within using Windows Explorer. More sophisticated versions are available, but to date I've been perfectly happy with the free one.
Martin Walker
I have a PC running Windows XP, and currently back up my data regularly using copy and paste onto an external hard drive. The problem with my current drive‑to‑drive method is that, in the case of a full windows reinstall, it means that I still have to reinstall some software (and this eats into my downloads and licences from the developers' web site). Is specialised disk cloning or imaging software a better option?
Paul Allerton, via email
SOS contibutor Martin Walker replies:
You're very wise to back up your data regularly, but there's a fundamental difference between copy and paste backups and disk imaging or cloning: the latter takes a snapshot of everything on the chosen partition or drive, including all the hidden and system files, although it's clever enough to ignore such things as huge page files that only contain temporary data, to keep the image file sizes to a minimum.
Each image file is, therefore, a time capsule, since when you 'restore' it your computer will return to exactly the same state it was in when you created that image file, leaving your licensed software intact. Most imaging utilities also offer compression options, typically squashing the data to about half the original size, while still letting you explore and restore individual files contained within.
It's always safest to store these image files onto external media, such as DVD or an external hard drive, to cope with the worst‑case scenario of your entire computer blowing up or being struck by lightning. In which case, when you get your replacement PC, you can restore your external backups onto this and avoid days of reinstalling Windows and applications, and authorising copy‑protected software. However, if, like many musicians, you have several hard drives in your audio PC, you can also store routine images of one drive to another, so that if one drive goes belly‑up, you'll still have a recent image file on your other drive to restore when you've replaced the faulty one.
We explored different strategies for backing up your data in the October 2007 issue of Sound On Sound (see /sos/oct07/articles/data_protection.htm), and it might be worth giving that a read for more information.
There's a bewildering array of imaging utilities on offer, so here's a quick rundown of some of the best alternatives. Windows 7 now includes its own Backup & Restore application that many users find perfectly sufficient, and for Windows 7/XP/Vista a very popular commercial package is Acronis True Image, especially since free licensed versions are available from various hard-drive manufacturers, for use with their own products.
An imaging utility (such as Paragon Backup & Recovery, shown here) will create a complete snapshot of your computer's hard drive and save you having to reinstall software after a crash or drive failure.An imaging utility (such as Paragon Backup & Recovery, shown here) will create a complete snapshot of your computer's hard drive and save you having to reinstall software after a crash or drive failure.There are also various utilities that work with all makes of hard drive and are totally free for the home user. After trying out quite a few, I've ended up using Paragon Backup & Recovery 2010 (www.paragon‑software.com/home/db‑express), which has a free advanced version that is fairly unique among the free utilities in offering an incremental backup option that only stores files newer than your previous image files. I've been very pleased with its clear and easy‑to‑use interface, and my slimmed‑down 10GB Windows partition takes just four minutes to back up to a compressed file of some 6GB.
This free version of Paragon Backup & Recovery 2010 runs on both 32‑bit and 64‑bit versions of Windows 7, Vista, XP and Server 2003/2008. It can create a Linux/DOS recovery environment onto CD, DVD or Flash memory (so that you can boot your PC from these media and restore image files even if your computer refuses to boot up by itself). You can even assign a drive letter to 'mount' an archived partition, so you can access the files within using Windows Explorer. More sophisticated versions are available, but to date I've been perfectly happy with the free one.
Thursday, October 30, 2014
Q. What are the characteristics of vintage mics?
Mike Senior
I've been browsing a vintage microphone site and it got me thinking: what kind of characteristics are actually offered by vintage mics? Can the same sound be achieved with modern mics and EQ? Isn't most of the 'vintage sound' due to tape and valves rather than mics?
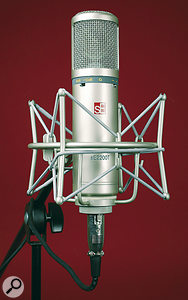
 The sought-after sound of the classic vintage mics is partly down to the fact that microphones used in professional studios many years ago would have been of particularly high quality to start with — and quality tends to age well.The sought-after sound of the classic vintage mics is partly down to the fact that microphones used in professional studios many years ago would have been of particularly high quality to start with — and quality tends to age well.
Via SOS web site
SOS Technical Editor Hugh Robjohns replies: A good vintage capacitor mic sounds much the same as a good modern equivalent, and the same goes for ribbons and moving coils. Having said that, there has been a tendency over the last decade or two to make modern mics sound brighter, partly because the technology has improved to allow that, and partly because of aural fashion.
Also, professional mics that are now considered vintage were usually pretty expensive in their day — studios and broadcasters bought very high‑quality products — and that high‑end quality generally persists despite the age of the microphones.
Most of the vintage mics you'll find on those kinds of sites, though, are either valve capacitor mics or ribbons, and they both have inherent characteristics of their own that a lot of people revere. Ribbons have a delightfully smooth and natural top end, while high‑quality valve capacitor mics often have mid‑range clarity and low‑end warmth. These qualities can still be found in some modern equivalents if you choose carefully.
Some of the vintage character is certainly attributable to recording on tape, replaying from vinyl, and the use of valves and transformers. But some is also down to the construction of the microphone capsules and the materials used, not all of which are still available in commercial products today.
I've been browsing a vintage microphone site and it got me thinking: what kind of characteristics are actually offered by vintage mics? Can the same sound be achieved with modern mics and EQ? Isn't most of the 'vintage sound' due to tape and valves rather than mics?
The sought-after sound of the classic vintage mics is partly down to the fact that microphones used in professional studios many years ago would have been of particularly high quality to start with — and quality tends to age well.The sought-after sound of the classic vintage mics is partly down to the fact that microphones used in professional studios many years ago would have been of particularly high quality to start with — and quality tends to age well.Via SOS web site
SOS Technical Editor Hugh Robjohns replies: A good vintage capacitor mic sounds much the same as a good modern equivalent, and the same goes for ribbons and moving coils. Having said that, there has been a tendency over the last decade or two to make modern mics sound brighter, partly because the technology has improved to allow that, and partly because of aural fashion.
Also, professional mics that are now considered vintage were usually pretty expensive in their day — studios and broadcasters bought very high‑quality products — and that high‑end quality generally persists despite the age of the microphones.
Most of the vintage mics you'll find on those kinds of sites, though, are either valve capacitor mics or ribbons, and they both have inherent characteristics of their own that a lot of people revere. Ribbons have a delightfully smooth and natural top end, while high‑quality valve capacitor mics often have mid‑range clarity and low‑end warmth. These qualities can still be found in some modern equivalents if you choose carefully.
Some of the vintage character is certainly attributable to recording on tape, replaying from vinyl, and the use of valves and transformers. But some is also down to the construction of the microphone capsules and the materials used, not all of which are still available in commercial products today.
Q. How can I learn to create drum parts?
Mike Senior
I'm just starting out in learning to record audio but am beginning to expand on what I want to do. Though I'm now fairly competent at using my DAW of choice (Reaper), I'm finding it really difficult to create drum parts. What would be the most straightforward way for a complete beginner to get into and learn about this?

Just type 'sample' into the 'quick search' box at the top right‑hand side of the SOS home page to access an enormous archive of sample‑library reviews.Just type 'sample' into the 'quick search' box at the top right‑hand side of the SOS home page to access an enormous archive of sample‑library reviews.
Sara Willis, via email
SOS contributor Mike Senior replies: In a word: loops. There are two basic things you have to contend with when putting together great drum parts. Firstly, you have to obtain good performances: whether you're wanting the sound of live drums or electronic drum‑machine timbres, the nuances of the performance or programming of the part play a vital role in creating a commercial sound in almost any style. Secondly, you need to be able to control the sonics well enough to build up a decent mix once all the other parts of your arrangement are in place. The reason I recommend loops as a starting point is that it simplifies the process of dealing with these issues. All you have to do is find a suitable loop and then learn how to adjust its performance or sonics where the unique circumstances of your music require it.

Finding a good library really shouldn't be hard. I've been reviewing loop collections for the magazine for ages now and I know that there are loads of really good ones available, catering for just about every musical genre imaginable. My first suggestion would be to go back through the magazine's sample‑library reviews: typing 'sample' into the 'quick search' field at the top right‑hand side of the SOS web site should pull them up out of the magazine's online archives for you. Anything with a four‑ or five‑star review is definitely worth investigating, but don't part with any cash before you've had a careful listen to the manufacturer's audio demos, and you should be as picky as possible in looking for exactly the right sonics for your needs. Don't just listen on your laptop's speaker or earbuds — drag the demo files over to your studio system, and if example loops are provided, try those out within a test project. This is what I regularly do as part of the review process, and it can be very revealing. Lining the demos up against some of your favourite commercial records may also help you narrow down the choices.
As far as the library format is concerned, I suggest you look for something based on REX2 loops, because these beat‑sliced files typically offer better tempo‑matching and rearrangement opportunities than the time‑stretching formats (such as Acidised WAV or Apple Loops). I don't think there's much sense in getting involved with any of the virtual instrument‑based libraries at this stage: while they can increase your flexibility in terms of sonics and programmability, they can also add a great deal of complexity to the production process, and I imagine you've got enough on your plate already with learning about all of this stuff! Often, loop‑library developers structure their libraries into 'suites', with several similar loops grouped together, and this can make it easier to build some musical variation into your song structure. There are also libraries that include supplementary 'one‑shot' samples of some of the drums used, and these can also be very handy for customising the basic loops, as well as for programming fills, drops and endings manually.
If you drag a REX2 file into Reaper's main arrange window, it'll automatically match itself to the project's tempo and present you with a series of beat slices. These slices make it easy to rearrange the performance, and also provide you with a lot of extra sonic options at mixdown.If you drag a REX2 file into Reaper's main arrange window, it'll automatically match itself to the project's tempo and present you with a series of beat slices. These slices make it easy to rearrange the performance, and also provide you with a lot of extra sonic options at mixdown.Faced with a shortlist of good‑sounding REX2 libraries, the last consideration is whether the performances really sound musical. This is the most elusive character of a loop library and it's an area where the SOS review can provide some guidance. My usual barometer in this respect while reviewing is whether the loops make me want to stop auditioning and immediately rush off to make some music, so thinking in those terms may help clarify your thinking. It's also a good sign if the drum hits in the loop seem somehow to lead into each other, rather than just sounding like isolated events, because this can really make a difference to how a track drives along.
Once you've laid hands on some decent loops, you can just drag files directly onto a track in your Reaper project and they should, by default, match themselves to your song's tempo. Because each drum hit will have its own loop slice, it's quite easy to shuffle them around to fit existing parts. Just be aware that sounds with long sustain tails may carry over several adjacent slices. Map out a rough drum part by copying your chosen loops, making sure that Snap is 'on' so that the loops always lock to bar‑lines, but then be sure to also put in some work introducing fills and variations, so that the listener doesn't get bored. There are lots of ways of varying the loop patterns: edit or rearrange the slices; substitute a different loop from the same 'suite'; or layer additional one‑shots over the top. A lot of people think that using loops inevitably makes repetitive‑sounding music, but with most REX2 libraries there's no excuse whatsoever for letting this happen. (If you want to listen to an example of a drum part built with REX2 loops, check out my Mix Rescue remix from SOS October 2008 at /sos/oct08/articles/mixrescue_1008.htm, where I completely replaced the band's original drum parts in this way.)
The REX2 slices can also assist when it comes to adjusting sonics at the mix, because it's easy to slide, say, all the kick‑drum slices onto a separate track for processing. This is such a useful technique that I often end up doing it manually with loops at mixdown, even when they're not REX2 files! The Mix Rescue I did in SOS November 2010 (/sos/nov10/articles/mixrescue‑1110.htm) is a good example of this, and with that one you can even download the full Reaper remix project from the SOS web site if you want to look at how I implemented this in more detail.
I'm just starting out in learning to record audio but am beginning to expand on what I want to do. Though I'm now fairly competent at using my DAW of choice (Reaper), I'm finding it really difficult to create drum parts. What would be the most straightforward way for a complete beginner to get into and learn about this?
Just type 'sample' into the 'quick search' box at the top right‑hand side of the SOS home page to access an enormous archive of sample‑library reviews.Just type 'sample' into the 'quick search' box at the top right‑hand side of the SOS home page to access an enormous archive of sample‑library reviews.
Sara Willis, via email
SOS contributor Mike Senior replies: In a word: loops. There are two basic things you have to contend with when putting together great drum parts. Firstly, you have to obtain good performances: whether you're wanting the sound of live drums or electronic drum‑machine timbres, the nuances of the performance or programming of the part play a vital role in creating a commercial sound in almost any style. Secondly, you need to be able to control the sonics well enough to build up a decent mix once all the other parts of your arrangement are in place. The reason I recommend loops as a starting point is that it simplifies the process of dealing with these issues. All you have to do is find a suitable loop and then learn how to adjust its performance or sonics where the unique circumstances of your music require it.
Finding a good library really shouldn't be hard. I've been reviewing loop collections for the magazine for ages now and I know that there are loads of really good ones available, catering for just about every musical genre imaginable. My first suggestion would be to go back through the magazine's sample‑library reviews: typing 'sample' into the 'quick search' field at the top right‑hand side of the SOS web site should pull them up out of the magazine's online archives for you. Anything with a four‑ or five‑star review is definitely worth investigating, but don't part with any cash before you've had a careful listen to the manufacturer's audio demos, and you should be as picky as possible in looking for exactly the right sonics for your needs. Don't just listen on your laptop's speaker or earbuds — drag the demo files over to your studio system, and if example loops are provided, try those out within a test project. This is what I regularly do as part of the review process, and it can be very revealing. Lining the demos up against some of your favourite commercial records may also help you narrow down the choices.
As far as the library format is concerned, I suggest you look for something based on REX2 loops, because these beat‑sliced files typically offer better tempo‑matching and rearrangement opportunities than the time‑stretching formats (such as Acidised WAV or Apple Loops). I don't think there's much sense in getting involved with any of the virtual instrument‑based libraries at this stage: while they can increase your flexibility in terms of sonics and programmability, they can also add a great deal of complexity to the production process, and I imagine you've got enough on your plate already with learning about all of this stuff! Often, loop‑library developers structure their libraries into 'suites', with several similar loops grouped together, and this can make it easier to build some musical variation into your song structure. There are also libraries that include supplementary 'one‑shot' samples of some of the drums used, and these can also be very handy for customising the basic loops, as well as for programming fills, drops and endings manually.
If you drag a REX2 file into Reaper's main arrange window, it'll automatically match itself to the project's tempo and present you with a series of beat slices. These slices make it easy to rearrange the performance, and also provide you with a lot of extra sonic options at mixdown.If you drag a REX2 file into Reaper's main arrange window, it'll automatically match itself to the project's tempo and present you with a series of beat slices. These slices make it easy to rearrange the performance, and also provide you with a lot of extra sonic options at mixdown.Faced with a shortlist of good‑sounding REX2 libraries, the last consideration is whether the performances really sound musical. This is the most elusive character of a loop library and it's an area where the SOS review can provide some guidance. My usual barometer in this respect while reviewing is whether the loops make me want to stop auditioning and immediately rush off to make some music, so thinking in those terms may help clarify your thinking. It's also a good sign if the drum hits in the loop seem somehow to lead into each other, rather than just sounding like isolated events, because this can really make a difference to how a track drives along.
Once you've laid hands on some decent loops, you can just drag files directly onto a track in your Reaper project and they should, by default, match themselves to your song's tempo. Because each drum hit will have its own loop slice, it's quite easy to shuffle them around to fit existing parts. Just be aware that sounds with long sustain tails may carry over several adjacent slices. Map out a rough drum part by copying your chosen loops, making sure that Snap is 'on' so that the loops always lock to bar‑lines, but then be sure to also put in some work introducing fills and variations, so that the listener doesn't get bored. There are lots of ways of varying the loop patterns: edit or rearrange the slices; substitute a different loop from the same 'suite'; or layer additional one‑shots over the top. A lot of people think that using loops inevitably makes repetitive‑sounding music, but with most REX2 libraries there's no excuse whatsoever for letting this happen. (If you want to listen to an example of a drum part built with REX2 loops, check out my Mix Rescue remix from SOS October 2008 at /sos/oct08/articles/mixrescue_1008.htm, where I completely replaced the band's original drum parts in this way.)
The REX2 slices can also assist when it comes to adjusting sonics at the mix, because it's easy to slide, say, all the kick‑drum slices onto a separate track for processing. This is such a useful technique that I often end up doing it manually with loops at mixdown, even when they're not REX2 files! The Mix Rescue I did in SOS November 2010 (/sos/nov10/articles/mixrescue‑1110.htm) is a good example of this, and with that one you can even download the full Reaper remix project from the SOS web site if you want to look at how I implemented this in more detail.
Wednesday, October 29, 2014
Tuesday, October 28, 2014
Q. How can I make my masters louder?
Sound Advice : Mixing
Mike Senior
I'm really new to recording, but I've been getting on well using the Tascam 2488 Neo 24-track digital recorder. However, when I create a master and then burn to CD, the overall volume is low. I record at about ‑10dBFS to avoid clipping and then use the compressor at mixdown to boost levels and even things out. This does raise the volume a tad, but nowhere near to that of commercial CDs. Am I correct in thinking that I'll have to use a lot of compression and limiting to get the levels to where I want them?
Low‑threshold, low‑ratio compression can be used to increase the subjective loudness of your mixes without excessively compromising dynamic range.Low‑threshold, low‑ratio compression can be used to increase the subjective loudness of your mixes without excessively compromising dynamic range.
Via SOS web site

SOS Technical Editor Hugh Robjohns replies: Indeed, you will find it very hard to match the insane levels of some commercial CDs, but with a little compression and limiting you should be able to produce something that doesn't sound excessively quiet in comparison.
There are lots of ways of approaching this but, in general, when you're working on a track that is fundamentally well balanced but lacking in overall volume, I would start with some wide‑range and gentle compression. Typically, I would use a very low ratio — say 1.5:1 or even lower — and set it up with a very low threshold of around ‑40dBFS, so that it is slightly squashing everything in the mix, from the loudest to the softest instrument, all the time. This gives a very subtle and homogenous sound and is very different to the more typical use of compression with higher ratios and higher thresholds, which only affects the loud bits and for only some of the time.
Using this low‑threshold level, very gentle compression technique you can often squeeze as much as 8dB of gain reduction without the material sounding squashed at all. Adjust the attack and release times to suit the track — slower rather than faster is usually the right way to go for smooth level control — and then crank up the make‑up gain to raise the level close to 0dBFS.
The track will now sound significantly louder than it did, but there will still be spiky transients poking up above the main body of the waveform, and these are now restricting the total volume you can achieve. So the next process is to shave off those brief transients with a fast‑acting limiter and then wind up the make‑up gain again (unless your limiter does that automatically, as many do) to give another 2‑4dB of level increase.
By using this simple approach of a low‑threshold, low‑ratio compressor followed by a good limiter, you should find the material is substantially louder than the original mix track, but still without sounding overly compressed. However, this is obviously an artistic judgement call that only you can make: how much 'squash' will you accept for a louder‑sounding track? Sometimes you can only squeeze a few decibels before it starts to sound damaged, and sometimes you can manage 10dB without obvious problems.
Mike Senior
I'm really new to recording, but I've been getting on well using the Tascam 2488 Neo 24-track digital recorder. However, when I create a master and then burn to CD, the overall volume is low. I record at about ‑10dBFS to avoid clipping and then use the compressor at mixdown to boost levels and even things out. This does raise the volume a tad, but nowhere near to that of commercial CDs. Am I correct in thinking that I'll have to use a lot of compression and limiting to get the levels to where I want them?
Low‑threshold, low‑ratio compression can be used to increase the subjective loudness of your mixes without excessively compromising dynamic range.Low‑threshold, low‑ratio compression can be used to increase the subjective loudness of your mixes without excessively compromising dynamic range.
Via SOS web site
SOS Technical Editor Hugh Robjohns replies: Indeed, you will find it very hard to match the insane levels of some commercial CDs, but with a little compression and limiting you should be able to produce something that doesn't sound excessively quiet in comparison.
There are lots of ways of approaching this but, in general, when you're working on a track that is fundamentally well balanced but lacking in overall volume, I would start with some wide‑range and gentle compression. Typically, I would use a very low ratio — say 1.5:1 or even lower — and set it up with a very low threshold of around ‑40dBFS, so that it is slightly squashing everything in the mix, from the loudest to the softest instrument, all the time. This gives a very subtle and homogenous sound and is very different to the more typical use of compression with higher ratios and higher thresholds, which only affects the loud bits and for only some of the time.
Using this low‑threshold level, very gentle compression technique you can often squeeze as much as 8dB of gain reduction without the material sounding squashed at all. Adjust the attack and release times to suit the track — slower rather than faster is usually the right way to go for smooth level control — and then crank up the make‑up gain to raise the level close to 0dBFS.
The track will now sound significantly louder than it did, but there will still be spiky transients poking up above the main body of the waveform, and these are now restricting the total volume you can achieve. So the next process is to shave off those brief transients with a fast‑acting limiter and then wind up the make‑up gain again (unless your limiter does that automatically, as many do) to give another 2‑4dB of level increase.
By using this simple approach of a low‑threshold, low‑ratio compressor followed by a good limiter, you should find the material is substantially louder than the original mix track, but still without sounding overly compressed. However, this is obviously an artistic judgement call that only you can make: how much 'squash' will you accept for a louder‑sounding track? Sometimes you can only squeeze a few decibels before it starts to sound damaged, and sometimes you can manage 10dB without obvious problems.
NEW! Jordan McClung (New Age Music) Website

Take a look at Jordan McClung (New Age Music) new website!
Check out his music and join his Email list. There are videos, his biography, photo gallery, stores and more sites available. Join his Facebook page's
Q. Can I get rid of string buzz?
Hugh Robjohns
I've got a recording of an acoustic guitar that I'm loath to re‑record, but there are several sections in which string buzz is clearly audible. Can I remove this with a bit of clever processing?
Mike Fenton, via email

SOS contributor Mike Senior replies: As far as after‑the‑fact mix processing is concerned, I'm not sure I can think of any decent way to remove string buzz, I'm afraid. The problem is that, unlike a lot of other mechanical noises the guitar makes, there's not really any way to get independent control over it with normal plug‑in processing. (I suspect that even high‑end off‑line salvage tools such as CEDAR's Retouch might struggle to make much of an impact with this, in fact.) In the case of pick noise, for example, the transient nature of the noise means that it can be effectively targeted with transient‑selective processors such as SPL's Transient Designer or Waves' TransX Wide. For fret squeaks you can use high‑frequency limiting, or simply an automated high‑frequency shelving EQ to duck the high end of the spectrum briefly whenever a squeak occurs, because such noises are usually brief and occur as the previously played notes are decaying (therefore having less high‑frequency content to damage). String buzz, on the other hand, isn't transient by nature and usually happens most obviously at the beginnings of notes, where the noise spectrum is thoroughly interspersed with the wanted note spectrum.It's relatively difficult to fix fret noises with processsing, due to the very specific nature of the transients produced. For this reason, it's always advisable to record several takes of an important guitar part.
All is not lost, however, because you still may be able to conjure up a fix using audio editing if your recording includes any repeated sections and the string buzz isn't common to all sections; you may be able to just paste clean chords or notes over the buzzy ones. The main thing to remember is to try to put your edits just before picking transients if possible, to disguise them, but you should also be careful that all notes sustain properly across each edit point too, because you may not have played exactly the same thing every time. If you know that string buzz is a problem for you, I'd recommend doing several takes of guitar parts, as this will increase your editing options. If the guitar part is important enough that a bit of string buzz really matters, you should probably be comping it anyway, to be honest, if you're after commercial‑sounding results.
I've got a recording of an acoustic guitar that I'm loath to re‑record, but there are several sections in which string buzz is clearly audible. Can I remove this with a bit of clever processing?
Mike Fenton, via email
SOS contributor Mike Senior replies: As far as after‑the‑fact mix processing is concerned, I'm not sure I can think of any decent way to remove string buzz, I'm afraid. The problem is that, unlike a lot of other mechanical noises the guitar makes, there's not really any way to get independent control over it with normal plug‑in processing. (I suspect that even high‑end off‑line salvage tools such as CEDAR's Retouch might struggle to make much of an impact with this, in fact.) In the case of pick noise, for example, the transient nature of the noise means that it can be effectively targeted with transient‑selective processors such as SPL's Transient Designer or Waves' TransX Wide. For fret squeaks you can use high‑frequency limiting, or simply an automated high‑frequency shelving EQ to duck the high end of the spectrum briefly whenever a squeak occurs, because such noises are usually brief and occur as the previously played notes are decaying (therefore having less high‑frequency content to damage). String buzz, on the other hand, isn't transient by nature and usually happens most obviously at the beginnings of notes, where the noise spectrum is thoroughly interspersed with the wanted note spectrum.It's relatively difficult to fix fret noises with processsing, due to the very specific nature of the transients produced. For this reason, it's always advisable to record several takes of an important guitar part.
All is not lost, however, because you still may be able to conjure up a fix using audio editing if your recording includes any repeated sections and the string buzz isn't common to all sections; you may be able to just paste clean chords or notes over the buzzy ones. The main thing to remember is to try to put your edits just before picking transients if possible, to disguise them, but you should also be careful that all notes sustain properly across each edit point too, because you may not have played exactly the same thing every time. If you know that string buzz is a problem for you, I'd recommend doing several takes of guitar parts, as this will increase your editing options. If the guitar part is important enough that a bit of string buzz really matters, you should probably be comping it anyway, to be honest, if you're after commercial‑sounding results.
Monday, October 27, 2014
Q. Can you explain audio interface input sensitivity?
Hugh Robjohns
My interface allows me to switch line‑input sensitivity between +4dBu and ‑10dBV. My calculations suggest that should be a difference of 14dB, but it looks more like 12dB on my DAW's meters. What's going on?
Via SOS web site

SOS Technical Editor Hugh Robjohns replies: As anyone with a GCSE Maths qualification knows, the difference between +4 and ‑10 is, indeed, 14. However, as any audio engineer knows, the difference between +4dBu and ‑10dBV is actually 12dB. So your meters are telling the truth!
This is a very common, but very basic, misunderstanding for a lot people (and even some manufacturers), but it is well worth understanding the facts.
The reason for the apparent discrepancy is that the two standard operating levels your interface allows you to select are quoted in respect of different reference signal voltages. Those little letters after the dB values are there for a very important reason! It may seem obvious that the difference between these two input sensitivity settings is 14dB, so you may be surprised when your DAW measures it as 12.
The professional operating level of +4dBu is measured with respect to a reference signal level (denoted by the little 'u') of 0.775Vrms, and works out at a signal voltage of 1.228Vrms. (The 'rms' appendage basically means that we are assessing the average signal level — and we're talking about sine-wave test‑tones here.)
The semi‑pro operating level of ‑10dBV is with reference to 1.000Vrms (denoted by the big 'V') and works out to 0.316Vrms. The difference between the two is 11.790dB, although, unless you wear anoraks or have a PhD, it's probably much easier and more convenient to think of it as a 12dB difference. If you want the maths (which is still only GCSE level, thankfully), here it is:
Decibels = 20 x log (signal voltage/reference voltage)
So:
20 x log (1.228/0.775) = 4dBu (Note the term dBu to denote the 0.775Vrms reference.)
And:
20 x log (0.316/1.000) = ‑10dBV (Again, the use of dBV denotes the 1.000Vrms reference.)
To calculate the difference between the two standard operating‑level voltages:
20 x log (1.228/0.316) = 11.79dB ~ 12dB
Note that in this case, where we are simply calculating the ratio of two signal voltages, no reference is involved, so the letters 'dB' are used on their own.
My interface allows me to switch line‑input sensitivity between +4dBu and ‑10dBV. My calculations suggest that should be a difference of 14dB, but it looks more like 12dB on my DAW's meters. What's going on?
Via SOS web site
SOS Technical Editor Hugh Robjohns replies: As anyone with a GCSE Maths qualification knows, the difference between +4 and ‑10 is, indeed, 14. However, as any audio engineer knows, the difference between +4dBu and ‑10dBV is actually 12dB. So your meters are telling the truth!
This is a very common, but very basic, misunderstanding for a lot people (and even some manufacturers), but it is well worth understanding the facts.
The reason for the apparent discrepancy is that the two standard operating levels your interface allows you to select are quoted in respect of different reference signal voltages. Those little letters after the dB values are there for a very important reason! It may seem obvious that the difference between these two input sensitivity settings is 14dB, so you may be surprised when your DAW measures it as 12.
The professional operating level of +4dBu is measured with respect to a reference signal level (denoted by the little 'u') of 0.775Vrms, and works out at a signal voltage of 1.228Vrms. (The 'rms' appendage basically means that we are assessing the average signal level — and we're talking about sine-wave test‑tones here.)
The semi‑pro operating level of ‑10dBV is with reference to 1.000Vrms (denoted by the big 'V') and works out to 0.316Vrms. The difference between the two is 11.790dB, although, unless you wear anoraks or have a PhD, it's probably much easier and more convenient to think of it as a 12dB difference. If you want the maths (which is still only GCSE level, thankfully), here it is:
Decibels = 20 x log (signal voltage/reference voltage)
So:
20 x log (1.228/0.775) = 4dBu (Note the term dBu to denote the 0.775Vrms reference.)
And:
20 x log (0.316/1.000) = ‑10dBV (Again, the use of dBV denotes the 1.000Vrms reference.)
To calculate the difference between the two standard operating‑level voltages:
20 x log (1.228/0.316) = 11.79dB ~ 12dB
Note that in this case, where we are simply calculating the ratio of two signal voltages, no reference is involved, so the letters 'dB' are used on their own.
Saturday, October 25, 2014
Q. What does the 'virtualization' PC BIOS setting do?
Hugh Robjohns
I was recently adjusting the BIOS settings on my PC, hoping to improve performance, and noticed the following option: 'Virtualization Technology — VMM can utilize hardware capabilities provided by Vanderpool Technology'.
What does this mean and, as a musician, should I be concerned with it?
Mark Cranfield, via email
SOS contributor Martin Walker replies: When Microsoft released Windows Vista, it was largely compatible with applications originally written for Windows XP, although some refused to run, and some of the earlier ones wouldn't even install. Since Windows 7 was built on the same code as Vista, it could have suffered from the same incompatibilities with older software, except that, this time around, Microsoft incorporated 'Windows XP Mode'.
This downloadable add‑on (www.microsoft.com/windows/virtual‑pc) runs in a separate window on the Windows 7 Professional, Ultimate or Enterprise desktop, much like another application, but, while in Windows XP Mode, you can access your CD/DVD drive, install applications and save files as if you were using Windows XP. This is because the add‑on is exactly that: a disk image of a pre‑installed and activated copy of Windows XP with SP3, along with 'virtualization' software. So, in effect, you are running the older operating system in a virtual environment inside Windows 7.
Once you've installed an application via Windows XP Mode, it will appear in both the Windows XP Mode list and the Windows 7 list, so in future you can open it directly from Windows 7. This can be a godsend to those who need to run some older applications, such as the PC version od Logic Audio 5.51, last updated in 2002.Here's an example of Microsoft's Virtual PC software helping the musician. Rain Recording's Solstice PC (reviewed in SOS October 2009) incorporates the 'RainZone', which is a virtual desktop environment incorporating web browser, email, chat and anti‑virus protection. As soon as you close down your Internet session, that instance of the computer disappears, along with any virus or other malware nasties, leaving your audio PC unaffected.
 incorporates the 'RainZone', which is a virtual desktop environment incorporating web browser, email, chat and anti‑virus protection. As soon as you close down your Internet session, that instance of the computer disappears, along with any virus or other malware nasties, leaving your audio PC unaffected.")
To run Windows XP Mode, you'll need at least 15GB of spare hard‑drive space, at least 2GB of system RAM and (until recently) a PC that featured HAV (Hardware‑assisted Virtualization) support. You'll also need Intel VT or AMD‑V functions in your processor, and an associated setting in your BIOS to complete the process by enabling these special functions. This is where your Virtualization Technology setting comes in.
Unfortunately, while most modern AMD processors include AMD‑V support, Intel's processor ranges are rather hit and miss, with some including VT support and some not. Thankfully, Tom's Hardware has a handy list (www.tomshardware.co.uk/windows‑xp‑mode‑virtualization‑intel,news‑31047.html) for you to check. So, if a Virtualization Technology option appears in your BIOS and you think Windows XP Mode would be useful to you, leave it enabled: it won't make any difference to normal performance.
In March 2010, Microsoft relented and issued a Windows 7 update that removed the HAV requirement, so even if your PC doesn't have this hardware‑assisted support you can still run Windows XP Mode. Only install this update, therefore, if you can't currently run Windows XP Mode, since 'hardware‑assisted' is always the better‑performing option.
I was recently adjusting the BIOS settings on my PC, hoping to improve performance, and noticed the following option: 'Virtualization Technology — VMM can utilize hardware capabilities provided by Vanderpool Technology'.
What does this mean and, as a musician, should I be concerned with it?
Mark Cranfield, via email
SOS contributor Martin Walker replies: When Microsoft released Windows Vista, it was largely compatible with applications originally written for Windows XP, although some refused to run, and some of the earlier ones wouldn't even install. Since Windows 7 was built on the same code as Vista, it could have suffered from the same incompatibilities with older software, except that, this time around, Microsoft incorporated 'Windows XP Mode'.
This downloadable add‑on (www.microsoft.com/windows/virtual‑pc) runs in a separate window on the Windows 7 Professional, Ultimate or Enterprise desktop, much like another application, but, while in Windows XP Mode, you can access your CD/DVD drive, install applications and save files as if you were using Windows XP. This is because the add‑on is exactly that: a disk image of a pre‑installed and activated copy of Windows XP with SP3, along with 'virtualization' software. So, in effect, you are running the older operating system in a virtual environment inside Windows 7.
Once you've installed an application via Windows XP Mode, it will appear in both the Windows XP Mode list and the Windows 7 list, so in future you can open it directly from Windows 7. This can be a godsend to those who need to run some older applications, such as the PC version od Logic Audio 5.51, last updated in 2002.Here's an example of Microsoft's Virtual PC software helping the musician. Rain Recording's Solstice PC (reviewed in SOS October 2009) incorporates the 'RainZone', which is a virtual desktop environment incorporating web browser, email, chat and anti‑virus protection. As soon as you close down your Internet session, that instance of the computer disappears, along with any virus or other malware nasties, leaving your audio PC unaffected.
To run Windows XP Mode, you'll need at least 15GB of spare hard‑drive space, at least 2GB of system RAM and (until recently) a PC that featured HAV (Hardware‑assisted Virtualization) support. You'll also need Intel VT or AMD‑V functions in your processor, and an associated setting in your BIOS to complete the process by enabling these special functions. This is where your Virtualization Technology setting comes in.
Unfortunately, while most modern AMD processors include AMD‑V support, Intel's processor ranges are rather hit and miss, with some including VT support and some not. Thankfully, Tom's Hardware has a handy list (www.tomshardware.co.uk/windows‑xp‑mode‑virtualization‑intel,news‑31047.html) for you to check. So, if a Virtualization Technology option appears in your BIOS and you think Windows XP Mode would be useful to you, leave it enabled: it won't make any difference to normal performance.
In March 2010, Microsoft relented and issued a Windows 7 update that removed the HAV requirement, so even if your PC doesn't have this hardware‑assisted support you can still run Windows XP Mode. Only install this update, therefore, if you can't currently run Windows XP Mode, since 'hardware‑assisted' is always the better‑performing option.
Friday, October 24, 2014
Q. If speakers have to be 'anchored', why don't mics?
Hugh Robjohns
As I understand it, loudspeakers create sound and momentum, which needs to be absorbed in order for the sound quality to be accurate, so we ensure they are braced or fixed to their stands and not wobbling about too much. So surely a mic diaphragm, which is moved by incoming sound, will less accurately represent the sound if the mic casing is not sufficiently anchored. Given that we hang these things from cables, or put them in elastic shockmounts, can you explain to me why this principle doesn't apply?
Is it just to do with acceptable tolerances or is it a trade‑off between picking up vibrations from the stand and capturing the intended sound?

Paul Hammond, via email
SOS Technical Editor Hugh Robjohns replies: In a perfect world, both the loudspeaker and the microphone would be held rigidly in space to deliver optimal performance. However, we don't live in a perfect world. Sometimes a shelf is the most appropriate position for a speaker, but the inevitable down side, then, is that the vibrations inherently generated by the speaker's drive units wobbling back and forth will set up sympathetic resonances and rattles in the shelf, adding unwanted acoustic contributions to the direct sound from the speaker, and thus messing up the sound.We 'decouple' speakers with foam to prevent annoying low‑end frequencies leaving the speakers from reaching the surface they sit on. In the case of mics, we want to stop problem frequencies from reaching them, so we support them in shockmounts.
The obvious solution is, therefore, to 'decouple' the speaker from the shelf with some kind of damped mass‑spring arrangement optimised to prevent the most troubling and annoying frequencies (generally the bottom end) from reaching the shelf. This is often achieved, in practice, using a foam pad or similar.
With microphones, we are trying to control energy going the other way. We want to stop mechanical vibrations from reaching the mic, whereas we were trying to stop mechanical vibrations leaving the speaker.
 Again, in a perfect world the mic would be held rigidly in space, using some kind of tripod, much like the ones photographers use for their cameras. However, in practice, we tend to place mics at the ends of long, undamped boom arms on relatively floppy mic stands which are, themselves, placed on objects that pick up mechanical vibrations (foot tapping, perhaps) and then pass them along the metalwork straight to the mic.
The obvious result is that the mic body moves in space, and in so doing forces the diaphragm back and forth through the air. This results in a varying air pressure impinging on the diaphragm that the mic can't differentiate from the wanted sound waves coming through the air, and so the mic indirectly captures the 'sound' of its physical movement as well as the wanted music.
The solution is to support the mic in a well‑designed shockmount so that the troublesome (low end, again) vibrations that travel up through the mic stand are trapped by another damped mass‑spring arrangement and thus are prevented from reaching the mic. If the shockmount works well, the mic stays still while the stand wobbles about around it, much like the interior of a car moving smoothly while the wheels below are crashing in and out of potholes!
The only potential problem with the microphone shockmount is that it can easily be bypassed by the microphone cable. If the cable is relatively stiff and is wrapped around the mic stand, the vibrations can travel along the mic cable and reach the mic that way, neatly circumventing the shockmount. The solution is to use a very lightweight cable from the mic to the stand, properly secured at the stand to trap unwanted vibrations.
As I understand it, loudspeakers create sound and momentum, which needs to be absorbed in order for the sound quality to be accurate, so we ensure they are braced or fixed to their stands and not wobbling about too much. So surely a mic diaphragm, which is moved by incoming sound, will less accurately represent the sound if the mic casing is not sufficiently anchored. Given that we hang these things from cables, or put them in elastic shockmounts, can you explain to me why this principle doesn't apply?
Is it just to do with acceptable tolerances or is it a trade‑off between picking up vibrations from the stand and capturing the intended sound?
Paul Hammond, via email
SOS Technical Editor Hugh Robjohns replies: In a perfect world, both the loudspeaker and the microphone would be held rigidly in space to deliver optimal performance. However, we don't live in a perfect world. Sometimes a shelf is the most appropriate position for a speaker, but the inevitable down side, then, is that the vibrations inherently generated by the speaker's drive units wobbling back and forth will set up sympathetic resonances and rattles in the shelf, adding unwanted acoustic contributions to the direct sound from the speaker, and thus messing up the sound.We 'decouple' speakers with foam to prevent annoying low‑end frequencies leaving the speakers from reaching the surface they sit on. In the case of mics, we want to stop problem frequencies from reaching them, so we support them in shockmounts.
The obvious solution is, therefore, to 'decouple' the speaker from the shelf with some kind of damped mass‑spring arrangement optimised to prevent the most troubling and annoying frequencies (generally the bottom end) from reaching the shelf. This is often achieved, in practice, using a foam pad or similar.
With microphones, we are trying to control energy going the other way. We want to stop mechanical vibrations from reaching the mic, whereas we were trying to stop mechanical vibrations leaving the speaker.
Again, in a perfect world the mic would be held rigidly in space, using some kind of tripod, much like the ones photographers use for their cameras. However, in practice, we tend to place mics at the ends of long, undamped boom arms on relatively floppy mic stands which are, themselves, placed on objects that pick up mechanical vibrations (foot tapping, perhaps) and then pass them along the metalwork straight to the mic.The obvious result is that the mic body moves in space, and in so doing forces the diaphragm back and forth through the air. This results in a varying air pressure impinging on the diaphragm that the mic can't differentiate from the wanted sound waves coming through the air, and so the mic indirectly captures the 'sound' of its physical movement as well as the wanted music.
The solution is to support the mic in a well‑designed shockmount so that the troublesome (low end, again) vibrations that travel up through the mic stand are trapped by another damped mass‑spring arrangement and thus are prevented from reaching the mic. If the shockmount works well, the mic stays still while the stand wobbles about around it, much like the interior of a car moving smoothly while the wheels below are crashing in and out of potholes!
The only potential problem with the microphone shockmount is that it can easily be bypassed by the microphone cable. If the cable is relatively stiff and is wrapped around the mic stand, the vibrations can travel along the mic cable and reach the mic that way, neatly circumventing the shockmount. The solution is to use a very lightweight cable from the mic to the stand, properly secured at the stand to trap unwanted vibrations.
Q. How can I edit my Tascam DP004 recordings on a PC?
Tom Flint
I currently use a Tascam DP004 to record electro/acoustic guitars, but the Tascam doesn't allow me to copy and paste or shift parts around so that I can build a song. So, I need a simple, quick system to transfer WAVs in order to do this. Once I have the song built I can go to a friend's studio to mix and master. I need tracks for at least three guitars and three vocals. I don't need effects, loops or a drum machine, but I would like to be able to use a bit of reverb. I've been looking at the free programs such as Audacity and Tracktion 3, but I'm confused. I have a PC but I am a medium‑to‑light user and bit of a recording novice.

John Bentley via email
SOS contributor Tom Flint replies: Setting up a system to manage WAV data — using your DP004 and a PC with a suitable software audio editor — should be fairly easy, once you get to grips with the way Tascam's products deal with audio data. The most important thing to understand is that all recordings saved on the 004 can be made readily available to your computer if they are copied into the right partition on the DP004's memory card. By default, recordings are saved to what Tascam call the 'MTR' partition, but there is also something called the 'FAT32' partition and, in order for data to be seen by a computer, WAVs first have to be copied into it from the MTR section.It should be fairly straightforward to chop up and edit your DP004 recordings on your PC, so long as you've gotten the hang of how the Tascam systems generally handle audio data. The key point to remember is that your files have to be transferred to the FAT partition in order to be seen by your computer.It should be fairly straightforward to chop up and edit your DP004 recordings on your PC, so long as you've gotten the hang of how the Tascam systems generally handle audio data. The key point to remember is that your files have to be transferred to the FAT partition in order to be seen by your computer.
Copying data to the FAT partition might seem a bit of a pain at first, but at least it means that what is on the MTR partition can't accidentally be deleted by a careless swipe of the PC's mouse. The FAT partition, on the other hand, is treated by a computer like any peripheral device, be it a mobile phone, camera or memory stick, enabling the user to save stuff onto it (such as sampled loops) as well as grab whatever is already there and drag it onto the PC's hard drive.
One drawback of the system is that, even when SDHC cards of 32GB are used, a FAT partition is restricted to 4GB, but that should still be plenty big enough to cope with even the longest compositions.
To get data into the FAT partition, stop the recorder and press the Menu key. From the list that appears on screen, select 'Wave' and press the F4 key to open the folder's menu. Here the individual WAVs of each vocal or guitar part will be displayed. Each WAV can be selected for export by turning the data wheel, at which point another press of F4 will put a tick by whichever track is highlighted. As long as there is enough free space on the FAT partition, all of the WAVs recorded as part of the song composition can be exported as a batch.
While we're on the subject, there will also come a time when you need to back up song data to a computer to free up space on the card. This is almost the same procedure as exporting the basic WAVs, the difference being that the user selects Data Backup instead of Wave from the menu.
The DP004 can be connected to a PC using a USB cable, at which point it should be automatically recognised as a connected device, and the folder structure and contents of its FAT partition will appear on screen. However, my preference is to do away with the USB lead and simply pop the data card out, put it into a USB card reader and connect that to the PC. This is much more convenient if the DP004 is across the room from the computer and hooked up to a mass of guitar leads and effects.
At the computer end, the options are vast, as every audio editor worth mentioning will provide more record tracks than you've specified and will enable you to cut, copy, move and manipulate audio files in ways you didn't know you wanted to until you found out you could! Programs like Audacity and Tracktion 3 should serve all your current requirements and more besides, and there is nothing to lose from trying them and other similar options out, particularly if the software is freeware or available on a free time‑limited trial basis. The one thing to bear in mind, though, given that the plan is to mix on a friend's DAW, is that mix data, such as fades, EQ changes and mutes, will all be lost unless you either both work with the same DAW, or you 'bounce' that data so that it becomes permanently written into the audio files you give your friend. Most DAWs offer a 'bounce' function allowing you to export individual tracks in this way, but a more flexible option would be to use the same software owned by your friend — affordable, cut-down 'LE' versions of most packages are available which would do the job fine. You can then freely transfer projects between your machine and his.
In terms of importing the WAVs into the audio software, most programs support 'drag and drop', where the WAVs are literally dragged, using the mouse, into the appropriate track window, and dropped in place, just as if they were sections of text in a word processor. Alternatively, there will be an 'Import' option in a menu, from where the relevant WAVs can be selected.
I currently use a Tascam DP004 to record electro/acoustic guitars, but the Tascam doesn't allow me to copy and paste or shift parts around so that I can build a song. So, I need a simple, quick system to transfer WAVs in order to do this. Once I have the song built I can go to a friend's studio to mix and master. I need tracks for at least three guitars and three vocals. I don't need effects, loops or a drum machine, but I would like to be able to use a bit of reverb. I've been looking at the free programs such as Audacity and Tracktion 3, but I'm confused. I have a PC but I am a medium‑to‑light user and bit of a recording novice.
John Bentley via email
SOS contributor Tom Flint replies: Setting up a system to manage WAV data — using your DP004 and a PC with a suitable software audio editor — should be fairly easy, once you get to grips with the way Tascam's products deal with audio data. The most important thing to understand is that all recordings saved on the 004 can be made readily available to your computer if they are copied into the right partition on the DP004's memory card. By default, recordings are saved to what Tascam call the 'MTR' partition, but there is also something called the 'FAT32' partition and, in order for data to be seen by a computer, WAVs first have to be copied into it from the MTR section.It should be fairly straightforward to chop up and edit your DP004 recordings on your PC, so long as you've gotten the hang of how the Tascam systems generally handle audio data. The key point to remember is that your files have to be transferred to the FAT partition in order to be seen by your computer.It should be fairly straightforward to chop up and edit your DP004 recordings on your PC, so long as you've gotten the hang of how the Tascam systems generally handle audio data. The key point to remember is that your files have to be transferred to the FAT partition in order to be seen by your computer.
Copying data to the FAT partition might seem a bit of a pain at first, but at least it means that what is on the MTR partition can't accidentally be deleted by a careless swipe of the PC's mouse. The FAT partition, on the other hand, is treated by a computer like any peripheral device, be it a mobile phone, camera or memory stick, enabling the user to save stuff onto it (such as sampled loops) as well as grab whatever is already there and drag it onto the PC's hard drive.
One drawback of the system is that, even when SDHC cards of 32GB are used, a FAT partition is restricted to 4GB, but that should still be plenty big enough to cope with even the longest compositions.
To get data into the FAT partition, stop the recorder and press the Menu key. From the list that appears on screen, select 'Wave' and press the F4 key to open the folder's menu. Here the individual WAVs of each vocal or guitar part will be displayed. Each WAV can be selected for export by turning the data wheel, at which point another press of F4 will put a tick by whichever track is highlighted. As long as there is enough free space on the FAT partition, all of the WAVs recorded as part of the song composition can be exported as a batch.
While we're on the subject, there will also come a time when you need to back up song data to a computer to free up space on the card. This is almost the same procedure as exporting the basic WAVs, the difference being that the user selects Data Backup instead of Wave from the menu.
The DP004 can be connected to a PC using a USB cable, at which point it should be automatically recognised as a connected device, and the folder structure and contents of its FAT partition will appear on screen. However, my preference is to do away with the USB lead and simply pop the data card out, put it into a USB card reader and connect that to the PC. This is much more convenient if the DP004 is across the room from the computer and hooked up to a mass of guitar leads and effects.
At the computer end, the options are vast, as every audio editor worth mentioning will provide more record tracks than you've specified and will enable you to cut, copy, move and manipulate audio files in ways you didn't know you wanted to until you found out you could! Programs like Audacity and Tracktion 3 should serve all your current requirements and more besides, and there is nothing to lose from trying them and other similar options out, particularly if the software is freeware or available on a free time‑limited trial basis. The one thing to bear in mind, though, given that the plan is to mix on a friend's DAW, is that mix data, such as fades, EQ changes and mutes, will all be lost unless you either both work with the same DAW, or you 'bounce' that data so that it becomes permanently written into the audio files you give your friend. Most DAWs offer a 'bounce' function allowing you to export individual tracks in this way, but a more flexible option would be to use the same software owned by your friend — affordable, cut-down 'LE' versions of most packages are available which would do the job fine. You can then freely transfer projects between your machine and his.
In terms of importing the WAVs into the audio software, most programs support 'drag and drop', where the WAVs are literally dragged, using the mouse, into the appropriate track window, and dropped in place, just as if they were sections of text in a word processor. Alternatively, there will be an 'Import' option in a menu, from where the relevant WAVs can be selected.
Thursday, October 23, 2014
Q. Where should I place my monitors in a small room?
Paul White
I recently built my own home studio by converting an old garage into a well‑isolated music room of 410 x 215 x 275cm. The isolation is great, but I'm now moving on to phase two — acoustics — and bass is a problem, especially on the notes of A, B‑flat and B, which are kind of booming.
So I am wondering how to position my Dynaudio BM6As? At first I put them along the short wall, but a lot of bass was built up, probably because of the proximity of the corners. I've already tried to put the speakers backwards, but noticed no change.

I've now got them along the long wall, which I think sounds more balanced, even though there's still some resonance on certain notes. Also, this tends to differ a lot depending on whether I sit in the exact 'sweet spot' or not. The further forward I go with my head, the more bass I get; the further back I go, the less bass I get.
In your books and in Sound On Sound, I've seen you advocate placing speakers on both the shortest wall, and the longest wall, depending on the room. So, what would you recommend for a room of my size and dimensions? Also, are the BM6As too much for my room?
Paul Stanhope via email
SOS Editor In Chief Paul White replies: In large studio rooms, which includes many commercial studios, putting the speakers along the longest wall is quite common and has the benefit of getting those reflective side walls further away. However, in the smaller rooms many of us have to deal with, it is invariably best to have the speakers facing down the longest axis of the room. If you work across the room, the reflective wall behind you is too close and the physical size of the desk means you're almost certainly sitting mid‑way between the wall in front and the wall behind, which causes a big bass cancellation in the exact centre and, as you've noticed, causes the bass end to change if you move your position even slightly. In a room the size of yours, working lengthways will give the most consistent results. Your room is a slightly unfortunate size for bass response as the length is almost twice the width, so any resonant modes will tend to congregate at the same frequencies.In a small room such as this, which is about twice as long as it is wide, it's usually best to position monitors of this size along the shortest wall. Working the other way — across the room — would create a bass cancellation in the centre of the room, where you'll most likely be sitting. Moving around even slightly would create variable results, as the space is so small. Positioning them as shown in the bottom image will give more consistent results, though you will still need to treat the room accordingly.In a small room such as this, which is about twice as long as it is wide, it's usually best to position monitors of this size along the shortest wall. Working the other way — across the room — would create a bass cancellation in the centre of the room, where you'll most likely be sitting. Moving around even slightly would create variable results, as the space is so small. Positioning them as shown in the bottom image will give more consistent results, though you will still need to treat the room accordingly.
You can often change the bass behaviour by moving the speakers forward or backwards slightly, but try to keep them out of the corners, as that just adds more unevenness to the bass end. Corner bass traps of the type you're making may help, but if they don't do enough, you could try one of the automatic EQ systems designed for improving monitoring. I don't normally like to EQ monitors but, in difficult situations, using EQ to cut only the boomy frequencies can really help.
As for your monitors, the BM6As should be fine in that room. Just make sure they're perched on something solid, as standing them directly on a desk or shelf can also cause bass resonances. Either solid metal stands or foam speaker pads with something solid on top work best and can really tighten up the bass end. You can buy the Primacoustic or Silent Peaks pads, which have steel plate on top, use Auralex MoPads or similar with a heavy floor tile stuck on top, or make your own from furniture foam with ceramic floor tiles or granite table mats stuck on top. A layer of non‑slip matting under the speakers will keep them in place.
For the mid‑range, foam or mineral wool absorbers placed at the mirror points in the usual way should be adequate, but try to put something on the rear wall that will help to scatter the sound, such as shelving or unused gear.
I recently built my own home studio by converting an old garage into a well‑isolated music room of 410 x 215 x 275cm. The isolation is great, but I'm now moving on to phase two — acoustics — and bass is a problem, especially on the notes of A, B‑flat and B, which are kind of booming.
So I am wondering how to position my Dynaudio BM6As? At first I put them along the short wall, but a lot of bass was built up, probably because of the proximity of the corners. I've already tried to put the speakers backwards, but noticed no change.
I've now got them along the long wall, which I think sounds more balanced, even though there's still some resonance on certain notes. Also, this tends to differ a lot depending on whether I sit in the exact 'sweet spot' or not. The further forward I go with my head, the more bass I get; the further back I go, the less bass I get.
In your books and in Sound On Sound, I've seen you advocate placing speakers on both the shortest wall, and the longest wall, depending on the room. So, what would you recommend for a room of my size and dimensions? Also, are the BM6As too much for my room?
Paul Stanhope via email
SOS Editor In Chief Paul White replies: In large studio rooms, which includes many commercial studios, putting the speakers along the longest wall is quite common and has the benefit of getting those reflective side walls further away. However, in the smaller rooms many of us have to deal with, it is invariably best to have the speakers facing down the longest axis of the room. If you work across the room, the reflective wall behind you is too close and the physical size of the desk means you're almost certainly sitting mid‑way between the wall in front and the wall behind, which causes a big bass cancellation in the exact centre and, as you've noticed, causes the bass end to change if you move your position even slightly. In a room the size of yours, working lengthways will give the most consistent results. Your room is a slightly unfortunate size for bass response as the length is almost twice the width, so any resonant modes will tend to congregate at the same frequencies.In a small room such as this, which is about twice as long as it is wide, it's usually best to position monitors of this size along the shortest wall. Working the other way — across the room — would create a bass cancellation in the centre of the room, where you'll most likely be sitting. Moving around even slightly would create variable results, as the space is so small. Positioning them as shown in the bottom image will give more consistent results, though you will still need to treat the room accordingly.In a small room such as this, which is about twice as long as it is wide, it's usually best to position monitors of this size along the shortest wall. Working the other way — across the room — would create a bass cancellation in the centre of the room, where you'll most likely be sitting. Moving around even slightly would create variable results, as the space is so small. Positioning them as shown in the bottom image will give more consistent results, though you will still need to treat the room accordingly.
You can often change the bass behaviour by moving the speakers forward or backwards slightly, but try to keep them out of the corners, as that just adds more unevenness to the bass end. Corner bass traps of the type you're making may help, but if they don't do enough, you could try one of the automatic EQ systems designed for improving monitoring. I don't normally like to EQ monitors but, in difficult situations, using EQ to cut only the boomy frequencies can really help.
As for your monitors, the BM6As should be fine in that room. Just make sure they're perched on something solid, as standing them directly on a desk or shelf can also cause bass resonances. Either solid metal stands or foam speaker pads with something solid on top work best and can really tighten up the bass end. You can buy the Primacoustic or Silent Peaks pads, which have steel plate on top, use Auralex MoPads or similar with a heavy floor tile stuck on top, or make your own from furniture foam with ceramic floor tiles or granite table mats stuck on top. A layer of non‑slip matting under the speakers will keep them in place.
For the mid‑range, foam or mineral wool absorbers placed at the mirror points in the usual way should be adequate, but try to put something on the rear wall that will help to scatter the sound, such as shelving or unused gear.
Wednesday, October 22, 2014
Q. Where should I put my overhead mics?
Hugh Robjohns
When recording drums, I really want to get the kick, snare and hi‑hat in the middle of the image, but with a wide spread of cymbals. The snare is placed off to the left of the kick (from the drummer's point of view). I know I need to set my drum overhead mics so that there are no phasing issues with the kick and snare mics, but how do I know where to point the OH mics? For example, if I have two cardioid-pattern mics, should they be pointing straight down, at the snare, or somewhere between the kick and snare — or somewhere else entirely?
Adrian Cairns via email

SOS Technical Editor Hugh Robjohns replies: This is an interesting one because what you are trying to do is distort the stereo imaging of the recording, compared with the reality of the kit setup. And the only way you can do that is by maximising the separation of what each mic hears. That's easy enough with the kick, snare and hi‑hat mics because of their proximity to the sources and the effectiveness of bracketing EQ. The overheads, however, remain more of an issue, because they are naturally going to pick up significant spill from the snare and hi‑hat (you can use bracketing EQ to minimise the kick drum spill, of course).
To achieve your desire of keeping the snare and hi‑hat central in the image you will have to ensure that the overhead mics are equally spaced from those two sources, so that the level and time of arrival of snare and hi‑hat sounds are equal in both mics. With that as a primary requirement, you can then experiment with moving the mics (and/or cymbals) around to achieve the required spread of cymbal sound. Angling the mics, to assist with the rejection of as much snare and hat spill as possible while capturing the wanted cymbals, is also a useful tool, providing you maintain the equal distance so that whatever spill is captured remains central in the stereo image.To get a particular section of your drum kit central in the stereo image, it is important to set up your overhead mics such that they are equidistant from the relevant sources.To get a particular section of your drum kit central in the stereo image, it is important to set up your overhead mics such that they are equidistant from the relevant sources.
There are also some less conventional alternative techniques you might also like to consider, using fig‑8 mics where you can aim the deep null to minimise snare and hat pickup in a useful way.
When recording drums, I really want to get the kick, snare and hi‑hat in the middle of the image, but with a wide spread of cymbals. The snare is placed off to the left of the kick (from the drummer's point of view). I know I need to set my drum overhead mics so that there are no phasing issues with the kick and snare mics, but how do I know where to point the OH mics? For example, if I have two cardioid-pattern mics, should they be pointing straight down, at the snare, or somewhere between the kick and snare — or somewhere else entirely?
Adrian Cairns via email
SOS Technical Editor Hugh Robjohns replies: This is an interesting one because what you are trying to do is distort the stereo imaging of the recording, compared with the reality of the kit setup. And the only way you can do that is by maximising the separation of what each mic hears. That's easy enough with the kick, snare and hi‑hat mics because of their proximity to the sources and the effectiveness of bracketing EQ. The overheads, however, remain more of an issue, because they are naturally going to pick up significant spill from the snare and hi‑hat (you can use bracketing EQ to minimise the kick drum spill, of course).
To achieve your desire of keeping the snare and hi‑hat central in the image you will have to ensure that the overhead mics are equally spaced from those two sources, so that the level and time of arrival of snare and hi‑hat sounds are equal in both mics. With that as a primary requirement, you can then experiment with moving the mics (and/or cymbals) around to achieve the required spread of cymbal sound. Angling the mics, to assist with the rejection of as much snare and hat spill as possible while capturing the wanted cymbals, is also a useful tool, providing you maintain the equal distance so that whatever spill is captured remains central in the stereo image.To get a particular section of your drum kit central in the stereo image, it is important to set up your overhead mics such that they are equidistant from the relevant sources.To get a particular section of your drum kit central in the stereo image, it is important to set up your overhead mics such that they are equidistant from the relevant sources.
There are also some less conventional alternative techniques you might also like to consider, using fig‑8 mics where you can aim the deep null to minimise snare and hat pickup in a useful way.
Q. What do sample players do, and why do we need them?
Martin Walker
I've been thinking about buying some sample packs, as I've read reviews of some that sound really interesting. However, a lot of them require specific players, such as Kontakt and Elastik. Can you explain to me what these players are for? Can I not just load the content directly into my DAW?
James Turpin via email
 does a lot more than play back samples. In this library from Heavyocity we can see how lots of samples have been mapped across the musical keys so you can easily play them in combination, while a set of custom controls has been specially programmed to tweak them to your taste.")
SOS contributor Martin Walker replies: There certainly are sample collections that are just that: a set of audio files that you can load into any DAW or audio editor, and this is the simplest and most appropriate format for some material. However, the problem with WAV or AIFF‑format samples is that if they don't come exactly as you need them, you may need some work to fit them into your songs. For instance, let's say you buy a pack of drum loops, and you really like one that runs at 135bpm, but you want to use it in a song that is at 128bpm. To make it fit your new tempo you'll have to use an audio time‑stretching function — assuming your DAW offers one of high enough quality, that is. Or say you want to use a bass riff that's already at the correct tempo, but is in the wrong key: this time you'll need to use pitch‑shifting, and, once again, you'll be relying on the quality of the algorithm to keep your riff sounding as similar as possible to the original when it's been transposed.
Sampled instruments may feature multiple samples for each note to capture all the changes in timbre, from low notes to high notes, and soft ones to loud ones. Once again, you could build up tunes by dropping samples of individual notes into your song at the appropriate times. But wouldn't it be easier if you could just play the appropriate notes on a musical keyboard and have some software choose the correct samples for you?
This is essentially what a sample player does: it takes care of all the behind‑the‑scenes selecting of samples from the set, plus any time-stretching or pitch-shifting needed, so that samples can be 'stretched' across the keyboard as required. Most also offer tempo‑sync functions so that drum loops, for example, get automatically stretched or squashed to lock to your song's timing.
Every sample player offers these basic features, and most modern ones can stream all that sample data from your hard drive as and when it's needed, so you can access many gigabytes of sample data in a song without needing to load it all into your DAW at once.A sample player (such as NI's Kontakt 4 shown here) does a lot more than play back samples. In this library from Heavyocity we can see how lots of samples have been mapped across the musical keys so you can easily play them in combination, while a set of custom controls has been specially programmed to tweak them to your taste.A sample player (such as NI's Kontakt 4 shown here) does a lot more than play back samples. In this library from Heavyocity we can see how lots of samples have been mapped across the musical keys so you can easily play them in combination, while a set of custom controls has been specially programmed to tweak them to your taste.
Many sampler 'engines' also offer their own unique sets of extras, such as filters that change the timbre of samples over time, envelopes that enable you to change the attack or decay times of each note, and effects such as reverb. They may also offer customised graphic interfaces for each instrument and special performance features (such as 'round robin' sampling of instruments, so that each time you play a note it sounds slightly different, just as real acoustic instruments do).
So there is often a huge amount of difference between auditioning the raw samples and hearing the end result via a sample player 'engine'. By supporting a specific sample player, a developer can not only use its special features, but may also get some protection against piracy by having their library specially keyed to a serial number or licence, whereas collections of samples can never be protected in this way.
Some developers do release their products across a range of formats, but the more special features of a specific sample player they use, the more likely a product is to only be released on that single format. However, most sample players, including NI Kontakt, Steinberg HALion, Ueberschall Liquid/Elastik and Yellow Tools ENGINE run on both Mac and Windows and within the majority of sequencer applications.
I've been thinking about buying some sample packs, as I've read reviews of some that sound really interesting. However, a lot of them require specific players, such as Kontakt and Elastik. Can you explain to me what these players are for? Can I not just load the content directly into my DAW?
James Turpin via email
SOS contributor Martin Walker replies: There certainly are sample collections that are just that: a set of audio files that you can load into any DAW or audio editor, and this is the simplest and most appropriate format for some material. However, the problem with WAV or AIFF‑format samples is that if they don't come exactly as you need them, you may need some work to fit them into your songs. For instance, let's say you buy a pack of drum loops, and you really like one that runs at 135bpm, but you want to use it in a song that is at 128bpm. To make it fit your new tempo you'll have to use an audio time‑stretching function — assuming your DAW offers one of high enough quality, that is. Or say you want to use a bass riff that's already at the correct tempo, but is in the wrong key: this time you'll need to use pitch‑shifting, and, once again, you'll be relying on the quality of the algorithm to keep your riff sounding as similar as possible to the original when it's been transposed.
Sampled instruments may feature multiple samples for each note to capture all the changes in timbre, from low notes to high notes, and soft ones to loud ones. Once again, you could build up tunes by dropping samples of individual notes into your song at the appropriate times. But wouldn't it be easier if you could just play the appropriate notes on a musical keyboard and have some software choose the correct samples for you?
This is essentially what a sample player does: it takes care of all the behind‑the‑scenes selecting of samples from the set, plus any time-stretching or pitch-shifting needed, so that samples can be 'stretched' across the keyboard as required. Most also offer tempo‑sync functions so that drum loops, for example, get automatically stretched or squashed to lock to your song's timing.
Every sample player offers these basic features, and most modern ones can stream all that sample data from your hard drive as and when it's needed, so you can access many gigabytes of sample data in a song without needing to load it all into your DAW at once.A sample player (such as NI's Kontakt 4 shown here) does a lot more than play back samples. In this library from Heavyocity we can see how lots of samples have been mapped across the musical keys so you can easily play them in combination, while a set of custom controls has been specially programmed to tweak them to your taste.A sample player (such as NI's Kontakt 4 shown here) does a lot more than play back samples. In this library from Heavyocity we can see how lots of samples have been mapped across the musical keys so you can easily play them in combination, while a set of custom controls has been specially programmed to tweak them to your taste.
Many sampler 'engines' also offer their own unique sets of extras, such as filters that change the timbre of samples over time, envelopes that enable you to change the attack or decay times of each note, and effects such as reverb. They may also offer customised graphic interfaces for each instrument and special performance features (such as 'round robin' sampling of instruments, so that each time you play a note it sounds slightly different, just as real acoustic instruments do).
So there is often a huge amount of difference between auditioning the raw samples and hearing the end result via a sample player 'engine'. By supporting a specific sample player, a developer can not only use its special features, but may also get some protection against piracy by having their library specially keyed to a serial number or licence, whereas collections of samples can never be protected in this way.
Some developers do release their products across a range of formats, but the more special features of a specific sample player they use, the more likely a product is to only be released on that single format. However, most sample players, including NI Kontakt, Steinberg HALion, Ueberschall Liquid/Elastik and Yellow Tools ENGINE run on both Mac and Windows and within the majority of sequencer applications.
Tuesday, October 21, 2014
Q. How can I link outboard to prevent degradation in quality?
Matt Houghton
I have a few bits of outboard gear that I want to set up as external plug‑ins in Cubase. Should I be linking each bit of gear to different inputs and outputs of my soundcard (a Focusrite Saffire Pro 40), or should I just use a patchbay so that I can link multiple processors together in series? Presumably, doing it the latter way, I get less degradation of the audio signal as it's not passing through the Saffire's D‑A/A‑D each time?

Adding external effects with hardware can really open up your options in terms of adding character to your music. With good‑quality gear, you'd have to go through several stages of conversion to notice any degradation in sound quality.Adding external effects with hardware can really open up your options in terms of adding character to your music. With good‑quality gear, you'd have to go through several stages of conversion to notice any degradation in sound quality.Q. How can I link outboard to prevent degradation in quality?
John Corrigan via email
SOS Reviews Editor Matt Houghton replies: You are perfectly right in theory: yes, there is some distortion each time audio passes through your interface's A‑D or D‑A converter stages. So, if you're chaining multiple processors in series (say, an EQ and a compressor), then it's better to only pass through one stage of D‑A and A‑D conversion. But that's the theory and (as in all matters audio), in practice, it comes down to what you can hear.

With a good modern interface, like those in Focusrite's Saffire series, you have to go through many stages of conversion before you'll notice any audible degradation. This is especially true if you're using outboard to impart a bit of 'character' or 'flavour'; it's extremely unlikely that a couple of extra stages of conversion will be at all noticeable. If you're a mastering engineer then maybe you have good reason for worrying about this, but then you'd already know enough from listening to the difference that you wouldn't be asking this question! In my opinion, the benefits, in terms of saving time and being able to go with the creative flow of patching in your external effects as if they are DAW plug‑ins, far outweigh any theoretical disadvantage. Just remember to use and trust your ears!
I have a few bits of outboard gear that I want to set up as external plug‑ins in Cubase. Should I be linking each bit of gear to different inputs and outputs of my soundcard (a Focusrite Saffire Pro 40), or should I just use a patchbay so that I can link multiple processors together in series? Presumably, doing it the latter way, I get less degradation of the audio signal as it's not passing through the Saffire's D‑A/A‑D each time?
Adding external effects with hardware can really open up your options in terms of adding character to your music. With good‑quality gear, you'd have to go through several stages of conversion to notice any degradation in sound quality.Adding external effects with hardware can really open up your options in terms of adding character to your music. With good‑quality gear, you'd have to go through several stages of conversion to notice any degradation in sound quality.Q. How can I link outboard to prevent degradation in quality?
John Corrigan via email
SOS Reviews Editor Matt Houghton replies: You are perfectly right in theory: yes, there is some distortion each time audio passes through your interface's A‑D or D‑A converter stages. So, if you're chaining multiple processors in series (say, an EQ and a compressor), then it's better to only pass through one stage of D‑A and A‑D conversion. But that's the theory and (as in all matters audio), in practice, it comes down to what you can hear.
With a good modern interface, like those in Focusrite's Saffire series, you have to go through many stages of conversion before you'll notice any audible degradation. This is especially true if you're using outboard to impart a bit of 'character' or 'flavour'; it's extremely unlikely that a couple of extra stages of conversion will be at all noticeable. If you're a mastering engineer then maybe you have good reason for worrying about this, but then you'd already know enough from listening to the difference that you wouldn't be asking this question! In my opinion, the benefits, in terms of saving time and being able to go with the creative flow of patching in your external effects as if they are DAW plug‑ins, far outweigh any theoretical disadvantage. Just remember to use and trust your ears!
Monday, October 20, 2014
Q. What settings should I use when backing up vinyl?
Hugh Robjohns
I've just started putting my vinyl collection onto my hard drive for the purposes of backing up and preserving it. I'm currently using Audacity to record the WAVs but I don't know what settings I should be using. Someone mentioned that I should record at 32-bit — is this correct?
Via SOS web site

SOS Technical Editor Hugh Robjohns replies: To answer the last question first: not really! The longest word length you can get from any converter or interface is 24 bits, so that's the format you should record and archive your files in, and if you plan to make 'safety copies' in the CD audio format you'll need 16/44.1kHz files.
However, the 32‑bit format does exist. Most DAWs process signals internally using a '32‑bit floating-point' format and some allow you to choose whether to save ongoing projects in this native form to avoid multiple format changes as a project proceeds. In general, the 32‑bit floating‑point format still works with 24‑bit audio samples, but adds a scaling factor using the other eight bits to allow it to accommodate very loud or very quiet signals following processing. The problem is that not all DAWs share the same 32‑bit float format, so, for maximum compatibility, it's not the best idea to long‑term archive audio files in this format.As the longest word length any converter can record in is 24 bits, that's the setting you should use when backing up your vinyl. If you're likely to want to run de-clicking software, it's worth making your original recordings at 96kHz.As the longest word length any converter can record in is 24 bits, that's the setting you should use when backing up your vinyl. If you're likely to want to run de-clicking software, it's worth making your original recordings at 96kHz.If your records are in bad shape, it might be worth using de‑clicking software on your recordings before doing anything else.If your records are in bad shape, it might be worth using de‑clicking software on your recordings before doing anything else.

As for the other settings, it depends on the condition of the records you are transferring and how much processing you are planning to do to them. For starters, though, if your records suffer from clicks, these can have a huge dynamic range that can easily overload the A‑D converter (which doesn't sound nice!). The sensible way around this is to leave masses of headroom when digitising, and that means using a 24‑bit analogue-to-digital converter and leaving at least 20‑30dB of headroom — more if the noise floor of the disc and converter allow it.
If you are planning to run de‑click software, then I would also recommend using a higher sample rate during the digitisation. That makes things much easier for the software, so digitising at 24/96 would be a good starting point.
If you are going to use de‑clicking software, run that first. There are various packages that do this, from the superb (but expensive) CEDAR tools, down to various low‑cost plug‑ins. I often use Izotope RX, which is a very cost‑effective solution. Alternatively, you can manually edit out the clicks or, in some DAWs, redraw the waveform to erase them.
With the clicks taken out, you can then remove the (now empty) headroom margin by bringing up the level of the music signal to peak close to 0dBFS (I generally aim to normalise to ‑1dBFS).
You may, at this stage, want to deal with the surface noise — again, there are various tools for that — or adjust the overall tonal balance, but my advice would be to tread lightly if you do go down these routes.
Finally, sample‑rate convert the files down to 44.1kHz, reduce the word length (with dither) to 16 bits, and burn to CD.
I've just started putting my vinyl collection onto my hard drive for the purposes of backing up and preserving it. I'm currently using Audacity to record the WAVs but I don't know what settings I should be using. Someone mentioned that I should record at 32-bit — is this correct?
Via SOS web site
SOS Technical Editor Hugh Robjohns replies: To answer the last question first: not really! The longest word length you can get from any converter or interface is 24 bits, so that's the format you should record and archive your files in, and if you plan to make 'safety copies' in the CD audio format you'll need 16/44.1kHz files.
However, the 32‑bit format does exist. Most DAWs process signals internally using a '32‑bit floating-point' format and some allow you to choose whether to save ongoing projects in this native form to avoid multiple format changes as a project proceeds. In general, the 32‑bit floating‑point format still works with 24‑bit audio samples, but adds a scaling factor using the other eight bits to allow it to accommodate very loud or very quiet signals following processing. The problem is that not all DAWs share the same 32‑bit float format, so, for maximum compatibility, it's not the best idea to long‑term archive audio files in this format.As the longest word length any converter can record in is 24 bits, that's the setting you should use when backing up your vinyl. If you're likely to want to run de-clicking software, it's worth making your original recordings at 96kHz.As the longest word length any converter can record in is 24 bits, that's the setting you should use when backing up your vinyl. If you're likely to want to run de-clicking software, it's worth making your original recordings at 96kHz.If your records are in bad shape, it might be worth using de‑clicking software on your recordings before doing anything else.If your records are in bad shape, it might be worth using de‑clicking software on your recordings before doing anything else.
As for the other settings, it depends on the condition of the records you are transferring and how much processing you are planning to do to them. For starters, though, if your records suffer from clicks, these can have a huge dynamic range that can easily overload the A‑D converter (which doesn't sound nice!). The sensible way around this is to leave masses of headroom when digitising, and that means using a 24‑bit analogue-to-digital converter and leaving at least 20‑30dB of headroom — more if the noise floor of the disc and converter allow it.
If you are planning to run de‑click software, then I would also recommend using a higher sample rate during the digitisation. That makes things much easier for the software, so digitising at 24/96 would be a good starting point.
If you are going to use de‑clicking software, run that first. There are various packages that do this, from the superb (but expensive) CEDAR tools, down to various low‑cost plug‑ins. I often use Izotope RX, which is a very cost‑effective solution. Alternatively, you can manually edit out the clicks or, in some DAWs, redraw the waveform to erase them.
With the clicks taken out, you can then remove the (now empty) headroom margin by bringing up the level of the music signal to peak close to 0dBFS (I generally aim to normalise to ‑1dBFS).
You may, at this stage, want to deal with the surface noise — again, there are various tools for that — or adjust the overall tonal balance, but my advice would be to tread lightly if you do go down these routes.
Finally, sample‑rate convert the files down to 44.1kHz, reduce the word length (with dither) to 16 bits, and burn to CD.
Q. Can I use an SM58 as a kick-drum mic?
Sound Advice : Miking

Mike Senior
I'll be doing a session with lots of mics and I'm going to be running out of gear choices without hiring, begging or stealing! For the kit, I don't really have all the right mics, so will need to compromise. Is it wise to use a Shure SM58 on kick drum? What can I expect? The SM58 is better known as a vocal, guitar and snare mic than anything else — but can it be pressed into service as a kick-drum mic?The SM58 is better known as a vocal, guitar and snare mic than anything else — but can it be pressed into service as a kick-drum mic?If you have to use a kick‑drum close‑mic that lacks low end, the neatest mix fix is usually to employ some kind of sample‑triggering plug‑in to supplement the sound, such as Wavemachine Labs' Drumagog, SPL's DrumXchanger or Slate Digital's Trigger.If you have to use a kick‑drum close‑mic that lacks low end, the neatest mix fix is usually to employ some kind of sample‑triggering plug‑in to supplement the sound, such as Wavemachine Labs' Drumagog, SPL's DrumXchanger or Slate Digital's Trigger.Q. Can I use an SM58 as a kick-drum mic?Q. Can I use an SM58 as a kick-drum mic?

Via SOS web site
SOS contributor Mike Senior replies: The first thing to say is that, although this mic (and, indeed, its SM57 cousin) is much better known for vocal, guitar and snare miking, there is also a good deal to recommend it for kick‑drum applications: its physical ruggedness; its ability to deal with high SPLs; and its presence-frequency emphasis, which can, in many situations, help the drum 'click' to cut through the mix, even when it's played back on small speakers. The biggest potential problem will be the low‑frequency response, which has been tailored to compensate for proximity effect in close‑miking situations and so falls off pretty steeply below 100Hz. However, there are several reasons why this needn't actually be a disaster in practice.
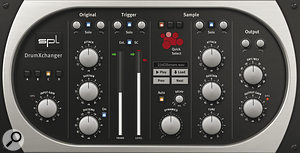
The first reason is that your microphone placement may well compensate for this, somewhat, especially if you're planning to use the mic inside the casing of the drum, where small changes in positioning can make an enormous difference to the amount of captured low end. It's also worth bearing in mind that lots of low‑end may not actually be very desirable at all, especially if the song you happen to be recording features detailed kick‑drum patterns that could lose definition in the presence of bloated lows. I often find myself filtering out sub‑bass frequencies at mixdown, in fact, as this can make the drum feel a lot tighter, as well as leaving more mix headroom for the bass part.
However, even if you do get an undesirably lightweight kick‑drum close‑mic sound, it's comparatively easy to supplement that at the mix: this is usually one of the simpler mix salvage tasks you're likely to encounter, in fact. One approach is to create some kind of low‑frequency synth tone (typically a sine wave, but it might be something more complex if you need more low‑end support) and then gate that in time with the kick‑drum hits. You can do this in most DAW systems now, using the built‑in dynamics side‑chaining system. I've done this in the past, but I tend to prefer the other common tactic: triggering a sample alongside the live kick‑drum using a sample‑triggering program (see our feature in last month's issue). There are now loads of these on the market, including the examples shown in the screens above.
Mike Senior
I'll be doing a session with lots of mics and I'm going to be running out of gear choices without hiring, begging or stealing! For the kit, I don't really have all the right mics, so will need to compromise. Is it wise to use a Shure SM58 on kick drum? What can I expect? The SM58 is better known as a vocal, guitar and snare mic than anything else — but can it be pressed into service as a kick-drum mic?The SM58 is better known as a vocal, guitar and snare mic than anything else — but can it be pressed into service as a kick-drum mic?If you have to use a kick‑drum close‑mic that lacks low end, the neatest mix fix is usually to employ some kind of sample‑triggering plug‑in to supplement the sound, such as Wavemachine Labs' Drumagog, SPL's DrumXchanger or Slate Digital's Trigger.If you have to use a kick‑drum close‑mic that lacks low end, the neatest mix fix is usually to employ some kind of sample‑triggering plug‑in to supplement the sound, such as Wavemachine Labs' Drumagog, SPL's DrumXchanger or Slate Digital's Trigger.Q. Can I use an SM58 as a kick-drum mic?Q. Can I use an SM58 as a kick-drum mic?
Via SOS web site
SOS contributor Mike Senior replies: The first thing to say is that, although this mic (and, indeed, its SM57 cousin) is much better known for vocal, guitar and snare miking, there is also a good deal to recommend it for kick‑drum applications: its physical ruggedness; its ability to deal with high SPLs; and its presence-frequency emphasis, which can, in many situations, help the drum 'click' to cut through the mix, even when it's played back on small speakers. The biggest potential problem will be the low‑frequency response, which has been tailored to compensate for proximity effect in close‑miking situations and so falls off pretty steeply below 100Hz. However, there are several reasons why this needn't actually be a disaster in practice.
The first reason is that your microphone placement may well compensate for this, somewhat, especially if you're planning to use the mic inside the casing of the drum, where small changes in positioning can make an enormous difference to the amount of captured low end. It's also worth bearing in mind that lots of low‑end may not actually be very desirable at all, especially if the song you happen to be recording features detailed kick‑drum patterns that could lose definition in the presence of bloated lows. I often find myself filtering out sub‑bass frequencies at mixdown, in fact, as this can make the drum feel a lot tighter, as well as leaving more mix headroom for the bass part.
However, even if you do get an undesirably lightweight kick‑drum close‑mic sound, it's comparatively easy to supplement that at the mix: this is usually one of the simpler mix salvage tasks you're likely to encounter, in fact. One approach is to create some kind of low‑frequency synth tone (typically a sine wave, but it might be something more complex if you need more low‑end support) and then gate that in time with the kick‑drum hits. You can do this in most DAW systems now, using the built‑in dynamics side‑chaining system. I've done this in the past, but I tend to prefer the other common tactic: triggering a sample alongside the live kick‑drum using a sample‑triggering program (see our feature in last month's issue). There are now loads of these on the market, including the examples shown in the screens above.
Saturday, October 18, 2014
Q. My self-build PC isn't working. What tests can I run?
Sound Advice : Maintenance
Martin Walker
I left my recently completed self‑build PC running overnight to run a soak test. During the night it switched itself off, but the next day it came back on by itself, then switched itself off again, and a few hours later it did exactly the same thing. I'm beginning to think that either my new machine is haunted or something in its setup is going wrong. I'd really like to find the culprit!

Luckily, I've yet to install any software onto the machine — so what tests should I run before I do, to make absolutely sure it's operating correctly and safely?
Via SOS web site
SOS contributor Martin Walker replies: The most obvious culprit for a computer powering down is the CPU overheating and switching itself off to avoid long‑term damage. As for randomly switching back on, this is most likely due to the BIOS settings that determine the devices or specific events that can 'wake up' your computer, which, apart from more obvious things such as pressing the power switch, can also include activity of your mouse or keyboard, another USB or LAN device, or even an alarm function on the motherboard's real‑time clock.
However, you should check for and deal with any basic overheating problems long before you install Windows or any software applications, so here are some quick checks that you can perform within a few seconds of switching on a new PC for the first time. While this always tends to be a nervous moment, you don't need to simply hope for the best.
First, before powering up, check in the motherboard manual for the key press required to enter the BIOS (Basic Input/Output System): this is typically Delete, or one of the Function keys. Then, armed with this information and with the PC side panel off, power up for the first time, pressing this BIOS key every second or so, while simultaneously checking that all cooling fans have started to spin and that the Standby power indicator LED on the motherboard is illuminated.
If any fans fail to spin, or if you smell burning, or even see smoke rising from any component, switch off immediately and double-check all connections. If you hear any sequence of beeps from the motherboard buzzer then, once again, power down. The most likely reasons for this behaviour from the motherboard are a RAM error or CPU overheating (did you properly install the heatsink/cooling fan?).
Otherwise, within a few seconds your PC will finish its POST (Power‑On Self‑Test), checking all the devices connected to the motherboard, and enter the main BIOS screen. This in itself proves that your graphics card is working, that your CPU has been identified, and that at least some of your RAM has been recognised, but this initial screen may also show your connected hard drives and the amount of detected RAM. After you've glanced at these to check everything's OK, navigate to the page labelled 'Health Status' or 'System Monitor' where you should find readouts of all the PSU voltages, along with one or more temperatures.
Check that all the voltages are close to the stated values, and then watch the temperature readings. The motherboard temperature is likely to stabilise quite quickly somewhere in the 30s, while the CPU temperature should rapidly rise to somewhere in the 30‑ to 50‑degrees centigrade range while idling in the BIOS, but not significantly higher. If it does, the CPU fan isn't rotating, due to its either not being plugged in or there being an obstruction. The obstruction could be as simple as a cable preventing it from turning, or you may not have correctly applied a thin layer of heatsink compound. Watch the temperature for a few minutes to make sure it stabilises safely. If it does, it's safe to proceed to other BIOS tweaks and the installing of Windows.
Now when you reach the desktop you know that everything is basically running OK, and can perform more stressful tests to make sure your new PC will cope well under all conditions. Use a utility such as the freeware Prime 95 (www.mersenne.org) or OCCT (www.ocbase.com/perestroika_en) to torture your CPU at 100 percent while monitoring its core temperatures: they will rise, but ideally shouldn't get much above 60 degrees centigrade, and if they rise to over 70 degrees you need to beef up your cooling-fan regime.If you stress-test your CPU using a freeware utility such as OCCT, you can check that it won't overheat and power‑down your machine at an inopportune moment.If you stress-test your CPU using a freeware utility such as OCCT, you can check that it won't overheat and power‑down your machine at an inopportune moment.
Once you're happy that the CPU stays within safe limits, boot your PC from a Memtest86 (www.memtest.org) CD or floppy disk and run it overnight to check that every bit of every byte of your RAM works correctly, so you don't discover a fault the hard way in the middle of a big project. Stay cool!
Martin Walker
I left my recently completed self‑build PC running overnight to run a soak test. During the night it switched itself off, but the next day it came back on by itself, then switched itself off again, and a few hours later it did exactly the same thing. I'm beginning to think that either my new machine is haunted or something in its setup is going wrong. I'd really like to find the culprit!
Luckily, I've yet to install any software onto the machine — so what tests should I run before I do, to make absolutely sure it's operating correctly and safely?
Via SOS web site
SOS contributor Martin Walker replies: The most obvious culprit for a computer powering down is the CPU overheating and switching itself off to avoid long‑term damage. As for randomly switching back on, this is most likely due to the BIOS settings that determine the devices or specific events that can 'wake up' your computer, which, apart from more obvious things such as pressing the power switch, can also include activity of your mouse or keyboard, another USB or LAN device, or even an alarm function on the motherboard's real‑time clock.
However, you should check for and deal with any basic overheating problems long before you install Windows or any software applications, so here are some quick checks that you can perform within a few seconds of switching on a new PC for the first time. While this always tends to be a nervous moment, you don't need to simply hope for the best.
First, before powering up, check in the motherboard manual for the key press required to enter the BIOS (Basic Input/Output System): this is typically Delete, or one of the Function keys. Then, armed with this information and with the PC side panel off, power up for the first time, pressing this BIOS key every second or so, while simultaneously checking that all cooling fans have started to spin and that the Standby power indicator LED on the motherboard is illuminated.
If any fans fail to spin, or if you smell burning, or even see smoke rising from any component, switch off immediately and double-check all connections. If you hear any sequence of beeps from the motherboard buzzer then, once again, power down. The most likely reasons for this behaviour from the motherboard are a RAM error or CPU overheating (did you properly install the heatsink/cooling fan?).
Otherwise, within a few seconds your PC will finish its POST (Power‑On Self‑Test), checking all the devices connected to the motherboard, and enter the main BIOS screen. This in itself proves that your graphics card is working, that your CPU has been identified, and that at least some of your RAM has been recognised, but this initial screen may also show your connected hard drives and the amount of detected RAM. After you've glanced at these to check everything's OK, navigate to the page labelled 'Health Status' or 'System Monitor' where you should find readouts of all the PSU voltages, along with one or more temperatures.
Check that all the voltages are close to the stated values, and then watch the temperature readings. The motherboard temperature is likely to stabilise quite quickly somewhere in the 30s, while the CPU temperature should rapidly rise to somewhere in the 30‑ to 50‑degrees centigrade range while idling in the BIOS, but not significantly higher. If it does, the CPU fan isn't rotating, due to its either not being plugged in or there being an obstruction. The obstruction could be as simple as a cable preventing it from turning, or you may not have correctly applied a thin layer of heatsink compound. Watch the temperature for a few minutes to make sure it stabilises safely. If it does, it's safe to proceed to other BIOS tweaks and the installing of Windows.
Now when you reach the desktop you know that everything is basically running OK, and can perform more stressful tests to make sure your new PC will cope well under all conditions. Use a utility such as the freeware Prime 95 (www.mersenne.org) or OCCT (www.ocbase.com/perestroika_en) to torture your CPU at 100 percent while monitoring its core temperatures: they will rise, but ideally shouldn't get much above 60 degrees centigrade, and if they rise to over 70 degrees you need to beef up your cooling-fan regime.If you stress-test your CPU using a freeware utility such as OCCT, you can check that it won't overheat and power‑down your machine at an inopportune moment.If you stress-test your CPU using a freeware utility such as OCCT, you can check that it won't overheat and power‑down your machine at an inopportune moment.
Once you're happy that the CPU stays within safe limits, boot your PC from a Memtest86 (www.memtest.org) CD or floppy disk and run it overnight to check that every bit of every byte of your RAM works correctly, so you don't discover a fault the hard way in the middle of a big project. Stay cool!
Friday, October 17, 2014
Q. How can I remove background noise from a voice recording?
Sound Advice : Recording
Mike Senior
I've made a recording of someone talking, but there's quite a lot of background noise. How can I extract the vocals, or at least bring them out a bit to make them clearer?

Katy Majewski via email
SOS contributor Mike Senior replies: Assuming that the voice you've recorded is destined to be heard on its own, any kind of normal full‑band dynamics process, such as the expansion or gating you might use at mixdown, will almost certainly be too blunt a tool for the job. All they'll do is restrict the noise only to those moments when the voice is actually speaking, which won't help make the voice itself come through any clearer.
In the first instance, I'd therefore recommend a dedicated multi‑band noise‑suppression algorithm instead: something like the Cockos ReaFIR plug‑in (part of their freeware ReaPlugs bundle) or Voxengo's ReduNoise would be a good first port of call. These work by analysing a section of the recording where the vocal isn't present, in order to build a profile of the noise signal, which can then be used to remove the noise more intelligently. The settings of these plug‑ins can seem a little intimidating, so you'll have to get your manual‑reading cap on, but they're capable of pretty good results in the right circumstances. One tip here, though: when you first try this process, dial up the noise reduction to its most severe so that you get familiar with the strange little digital chirping artifacts it can cause. That way, when you're actually trying to decide on the best compromise between the levels of noise‑reduction and processing artifacts, you'll know what to listen for.The ReaFIR plug‑in within Cockos' freeware ReaPlugs bundle can be used to reduce background noise in a more transparent way than is possible using ordinary expansion or gating processes.The ReaFIR plug‑in within Cockos' freeware ReaPlugs bundle can be used to reduce background noise in a more transparent way than is possible using ordinary expansion or gating processes.
If this doesn't do the job adequately, and the recording in question is an important one for you, it's probably time to call in the professionals, and in this regard I'd personally recommend giving CEDAR Audio (www.cedar‑audio.com) a call. They've been at the forefront of this kind of technology for years, and run a by‑the‑hour restoration service that is comparatively affordable, bearing in mind the cost of the processors they use!
Mike Senior
I've made a recording of someone talking, but there's quite a lot of background noise. How can I extract the vocals, or at least bring them out a bit to make them clearer?
Katy Majewski via email
SOS contributor Mike Senior replies: Assuming that the voice you've recorded is destined to be heard on its own, any kind of normal full‑band dynamics process, such as the expansion or gating you might use at mixdown, will almost certainly be too blunt a tool for the job. All they'll do is restrict the noise only to those moments when the voice is actually speaking, which won't help make the voice itself come through any clearer.
In the first instance, I'd therefore recommend a dedicated multi‑band noise‑suppression algorithm instead: something like the Cockos ReaFIR plug‑in (part of their freeware ReaPlugs bundle) or Voxengo's ReduNoise would be a good first port of call. These work by analysing a section of the recording where the vocal isn't present, in order to build a profile of the noise signal, which can then be used to remove the noise more intelligently. The settings of these plug‑ins can seem a little intimidating, so you'll have to get your manual‑reading cap on, but they're capable of pretty good results in the right circumstances. One tip here, though: when you first try this process, dial up the noise reduction to its most severe so that you get familiar with the strange little digital chirping artifacts it can cause. That way, when you're actually trying to decide on the best compromise between the levels of noise‑reduction and processing artifacts, you'll know what to listen for.The ReaFIR plug‑in within Cockos' freeware ReaPlugs bundle can be used to reduce background noise in a more transparent way than is possible using ordinary expansion or gating processes.The ReaFIR plug‑in within Cockos' freeware ReaPlugs bundle can be used to reduce background noise in a more transparent way than is possible using ordinary expansion or gating processes.
If this doesn't do the job adequately, and the recording in question is an important one for you, it's probably time to call in the professionals, and in this regard I'd personally recommend giving CEDAR Audio (www.cedar‑audio.com) a call. They've been at the forefront of this kind of technology for years, and run a by‑the‑hour restoration service that is comparatively affordable, bearing in mind the cost of the processors they use!
Thursday, October 16, 2014
Q. Which digital piano fits my budget?
Robin Bigwood
I don't have a lot of space or money, but I'm desperate to find a keyboard that I can use for fun and, possibly, for recording into a DAW. I'm quite serious about my piano playing, so I'd like something with weighted keys, but I need something that doesn't set me back too much (I have a few hundred pounds to spend) and doesn't take up much room. The technology seems to have moved on a lot since I was last looking around 10 years ago. What good options are on the market now?
Laura Stanley via email

SOS contributor Robin Bigwood replies: A capable electronic piano or gigging keyboard is a handy thing to have around in the studio or on stage, and you're right to say that the technology has moved on quite a bit in recent years.

Achieving all your aims is going to be a challenge, though. You're going to need a 76‑ or 88‑note keyboard, preferably with a hammer action, to get near the feel and flexibility of a real piano, and that's inevitably going to take up a certain amount of room. Then, finding something musically rewarding for a few hundred pounds really is a challenge. But there are various options available to you.
Right at the budget end of the market is the Yamaha NP30 (around £220) and M‑Audio ProKeys Sono 88 (around £320). These are lightweight, plastic‑constructed keyboards that don't have hammer action but play just fine for pop, rock and general use. They offer a handful of sounds beyond some perfectly respectable pianos: the 76‑note Yamaha has built‑in speakers and the M‑Audio even doubles as an audio interface. They're a long way from the cutting edge, but are useful and easily portable.
Squeezing a little more out of the wallet takes you up a rung in quality and road‑worthiness, and suddenly you're also in hammer‑action territory. The Korg SP250 (around £580) has been around for a while, but is still very attractive, with practice speakers built in and a dedicated stand thrown in for good measure. The Yamaha P85 (around £450) isn't dissimilar, but doesn't include a stand. For more of a real stage piano, with MIDI controller functions, the M‑Audio ProKeys 88 costs around £520, but its rather basic hammer action divides opinion.If you already have a suitable computer, a lower-cost alternative to buying a dedicated digital piano is something like the M‑Audio Keystation 88ES, a full‑sized controller with weighted keys, plus the 99 Euro Pianoteq Play, a scaled‑down version of the excellent Pianoteq modelled instrument.If you already have a suitable computer, a lower-cost alternative to buying a dedicated digital piano is something like the M‑Audio Keystation 88ES, a full‑sized controller with weighted keys, plus the 99 Euro Pianoteq Play, a scaled‑down version of the excellent Pianoteq modelled instrument.Q. Which digital piano fits my budget?
If none of these appeal, you can look at utilising your computer, running a virtual piano either as a stand-alone application or a plug‑in in your DAW, and driving it from a dedicated MIDI controller keyboard. What you lose in immediacy and portability, you more than gain in sound quality, so long as your computer is up to it. Ninety‑nine Euros buys you Pianoteq Play, a preset‑playback version of the full Pianoteq modelling instrument. Native Instruments' Alicia's Keys is a sample‑based Yamaha C3 for about the same money. And, for a few pounds more, you could try the wonderful Synthogy Ivory II Italian Grand, which gives you a Fazioli F308 without the six‑figure price tag. The cheapest 88-note controller is probably the weighted‑key M‑Audio Keystation 88ES at under £200. Beyond that, it's the rather clunky‑looking but very playable StudioLogic SL990XP (around £370) or the CME UF80 (around £400), both of which have hammer actions. The more affordable M‑Audio Keystation Pro 88 is now discontinued, but there are plenty about second-hand.
I don't have a lot of space or money, but I'm desperate to find a keyboard that I can use for fun and, possibly, for recording into a DAW. I'm quite serious about my piano playing, so I'd like something with weighted keys, but I need something that doesn't set me back too much (I have a few hundred pounds to spend) and doesn't take up much room. The technology seems to have moved on a lot since I was last looking around 10 years ago. What good options are on the market now?
Laura Stanley via email
SOS contributor Robin Bigwood replies: A capable electronic piano or gigging keyboard is a handy thing to have around in the studio or on stage, and you're right to say that the technology has moved on quite a bit in recent years.
Achieving all your aims is going to be a challenge, though. You're going to need a 76‑ or 88‑note keyboard, preferably with a hammer action, to get near the feel and flexibility of a real piano, and that's inevitably going to take up a certain amount of room. Then, finding something musically rewarding for a few hundred pounds really is a challenge. But there are various options available to you.
Right at the budget end of the market is the Yamaha NP30 (around £220) and M‑Audio ProKeys Sono 88 (around £320). These are lightweight, plastic‑constructed keyboards that don't have hammer action but play just fine for pop, rock and general use. They offer a handful of sounds beyond some perfectly respectable pianos: the 76‑note Yamaha has built‑in speakers and the M‑Audio even doubles as an audio interface. They're a long way from the cutting edge, but are useful and easily portable.
Squeezing a little more out of the wallet takes you up a rung in quality and road‑worthiness, and suddenly you're also in hammer‑action territory. The Korg SP250 (around £580) has been around for a while, but is still very attractive, with practice speakers built in and a dedicated stand thrown in for good measure. The Yamaha P85 (around £450) isn't dissimilar, but doesn't include a stand. For more of a real stage piano, with MIDI controller functions, the M‑Audio ProKeys 88 costs around £520, but its rather basic hammer action divides opinion.If you already have a suitable computer, a lower-cost alternative to buying a dedicated digital piano is something like the M‑Audio Keystation 88ES, a full‑sized controller with weighted keys, plus the 99 Euro Pianoteq Play, a scaled‑down version of the excellent Pianoteq modelled instrument.If you already have a suitable computer, a lower-cost alternative to buying a dedicated digital piano is something like the M‑Audio Keystation 88ES, a full‑sized controller with weighted keys, plus the 99 Euro Pianoteq Play, a scaled‑down version of the excellent Pianoteq modelled instrument.Q. Which digital piano fits my budget?
If none of these appeal, you can look at utilising your computer, running a virtual piano either as a stand-alone application or a plug‑in in your DAW, and driving it from a dedicated MIDI controller keyboard. What you lose in immediacy and portability, you more than gain in sound quality, so long as your computer is up to it. Ninety‑nine Euros buys you Pianoteq Play, a preset‑playback version of the full Pianoteq modelling instrument. Native Instruments' Alicia's Keys is a sample‑based Yamaha C3 for about the same money. And, for a few pounds more, you could try the wonderful Synthogy Ivory II Italian Grand, which gives you a Fazioli F308 without the six‑figure price tag. The cheapest 88-note controller is probably the weighted‑key M‑Audio Keystation 88ES at under £200. Beyond that, it's the rather clunky‑looking but very playable StudioLogic SL990XP (around £370) or the CME UF80 (around £400), both of which have hammer actions. The more affordable M‑Audio Keystation Pro 88 is now discontinued, but there are plenty about second-hand.
Q. Have I broken my monitors?
Sound Advice : Maintenance
Hugh Robjohns
My left monitor appears to be buzzing somewhere in the high/mid-frequency range. When I pan the same material to the right speaker, the buzz isn't there. The trouble is that the left speaker sounds fine, as far as I can tell, except for this buzzing anywhere around that frequency.

I did accidentally send something horribly loud and abrasive through them last week (and they are 12 years old!), so I fear I may have ruined one. Do you have any advice as to how to test for damage? I've sent a test sine-sweep through and it's not doing anything at low levels, but I risk deafening myself going louder.
Via SOS web site
SOS Technical Editor Hugh Robjohns replies: It does sound as though you may have partially fried the voice coil of your left speaker, I'm afraid. However, there are a few less‑terminal possibilities that would still be worth checking.
First, try swapping the input to the left speaker with the right, just in case it's something upstream that is causing the problem (like a faulty left output from your mixer, monitoring controller, interface or power amp).
Next, it would also be worthwhile checking that all the screws and bolts holding the speakers and the rear connection panel into the cabinet are tight. If one or more of these work loose (and they do tend to loosen over time), that could be the cause of your resonant buzz or rattle. You need to be careful tightening the screws if they are into wood; you don't want to strip the threads! Before concluding that a monitor has a fried voice coil, check that its screws and wires are secure, as loose ones might be causing the rattle or buzz.Before concluding that a monitor has a fried voice coil, check that its screws and wires are secure, as loose ones might be causing the rattle or buzz.
Another possibility is that an internal connection wire or, perhaps, some of the wadding may be resting against the inside of the bass driver cone, so remove the bass driver carefully and have a peek inside to check for that too.
If you still draw a blank after checking these things, it's probably a burned voice coil. Testing with a sine-wave sweep is as good a way as any to identify nasty distortion, but you may well find that the problem only manifests above a certain volume level.
You could also try gently pushing the bass cone in and out and listening carefully for a scraping or grating sound: that's the melted coil‑wire insulation scraping in the magnetic gap and that means it's time for some new bass drivers. I'd recommend changing the bass drivers in both speakers (if you can still get replacement bassdrivers). If you only do one, it won't match the sonics of the old and well‑used one!
Hugh Robjohns
My left monitor appears to be buzzing somewhere in the high/mid-frequency range. When I pan the same material to the right speaker, the buzz isn't there. The trouble is that the left speaker sounds fine, as far as I can tell, except for this buzzing anywhere around that frequency.
I did accidentally send something horribly loud and abrasive through them last week (and they are 12 years old!), so I fear I may have ruined one. Do you have any advice as to how to test for damage? I've sent a test sine-sweep through and it's not doing anything at low levels, but I risk deafening myself going louder.
Via SOS web site
SOS Technical Editor Hugh Robjohns replies: It does sound as though you may have partially fried the voice coil of your left speaker, I'm afraid. However, there are a few less‑terminal possibilities that would still be worth checking.
First, try swapping the input to the left speaker with the right, just in case it's something upstream that is causing the problem (like a faulty left output from your mixer, monitoring controller, interface or power amp).
Next, it would also be worthwhile checking that all the screws and bolts holding the speakers and the rear connection panel into the cabinet are tight. If one or more of these work loose (and they do tend to loosen over time), that could be the cause of your resonant buzz or rattle. You need to be careful tightening the screws if they are into wood; you don't want to strip the threads! Before concluding that a monitor has a fried voice coil, check that its screws and wires are secure, as loose ones might be causing the rattle or buzz.Before concluding that a monitor has a fried voice coil, check that its screws and wires are secure, as loose ones might be causing the rattle or buzz.
Another possibility is that an internal connection wire or, perhaps, some of the wadding may be resting against the inside of the bass driver cone, so remove the bass driver carefully and have a peek inside to check for that too.
If you still draw a blank after checking these things, it's probably a burned voice coil. Testing with a sine-wave sweep is as good a way as any to identify nasty distortion, but you may well find that the problem only manifests above a certain volume level.
You could also try gently pushing the bass cone in and out and listening carefully for a scraping or grating sound: that's the melted coil‑wire insulation scraping in the magnetic gap and that means it's time for some new bass drivers. I'd recommend changing the bass drivers in both speakers (if you can still get replacement bassdrivers). If you only do one, it won't match the sonics of the old and well‑used one!
Subscribe to:
Posts (Atom)