Saturday, September 30, 2017
Friday, September 29, 2017
Q. Can I use an SM58 as a kick-drum mic?
I'll be doing a session with lots of mics and I'm going to be running out of gear choices without hiring, begging or stealing! For the kit, I don't really have all the right mics, so will need to compromise. Is it wise to use a Shure SM58 on kick drum? What can I expect?

The SM58 is better known as a vocal, guitar and snare mic than anything else — but can it be pressed into service as a kick-drum mic?

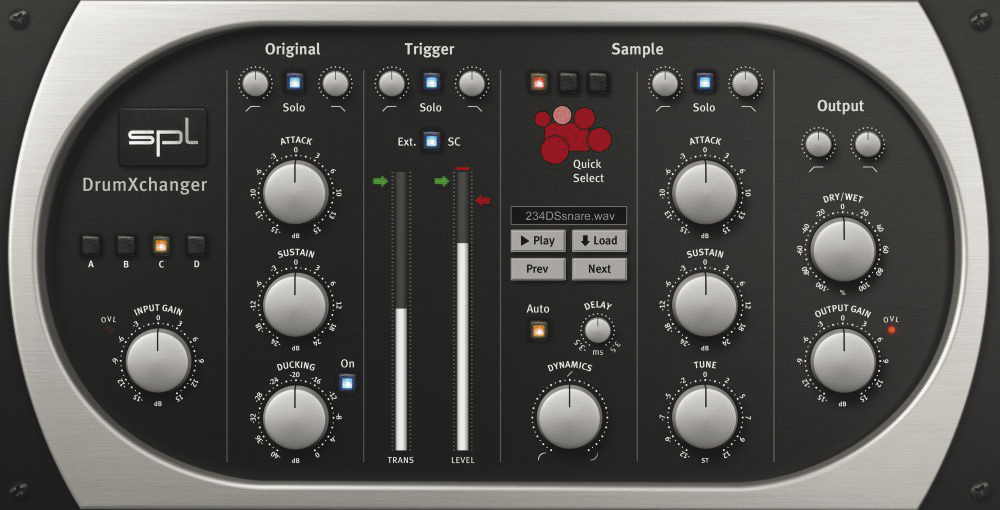
If you have to use a kick‑drum close‑mic that lacks low end, the neatest mix fix is usually to employ some kind of sample‑triggering plug‑in to supplement the sound, such as Wavemachine Labs' Drumagog, SPL's DrumXchanger or Slate Digital's Trigger.

Via SOS web site
SOS contributor Mike Senior replies: The first thing to say is that, although this mic (and, indeed, its SM57 cousin) is much better known for vocal, guitar and snare miking, there is also a good deal to recommend it for kick‑drum applications: its physical ruggedness; its ability to deal with high SPLs; and its presence-frequency emphasis, which can, in many situations, help the drum 'click' to cut through the mix, even when it's played back on small speakers. The biggest potential problem will be the low‑frequency response, which has been tailored to compensate for proximity effect in close‑miking situations and so falls off pretty steeply below 100Hz. However, there are several reasons why this needn't actually be a disaster in practice.
The first reason is that your microphone placement may well compensate for this, somewhat, especially if you're planning to use the mic inside the casing of the drum, where small changes in positioning can make an enormous difference to the amount of captured low end. It's also worth bearing in mind that lots of low‑end may not actually be very desirable at all, especially if the song you happen to be recording features detailed kick‑drum patterns that could lose definition in the presence of bloated lows. I often find myself filtering out sub‑bass frequencies at mixdown, in fact, as this can make the drum feel a lot tighter, as well as leaving more mix headroom for the bass part.
However, even if you do get an undesirably lightweight kick‑drum close‑mic sound, it's comparatively easy to supplement that at the mix: this is usually one of the simpler mix salvage tasks you're likely to encounter, in fact. One approach is to create some kind of low‑frequency synth tone (typically a sine wave, but it might be something more complex if you need more low‑end support) and then gate that in time with the kick‑drum hits. You can do this in most DAW systems now, using the built‑in dynamics side‑chaining system. I've done this in the past, but I tend to prefer the other common tactic: triggering a sample alongside the live kick‑drum using a sample‑triggering program (see our feature in last month's issue). There are now loads of these on the market, including the examples shown in the screens above.
Published April 2011
Thursday, September 28, 2017
Wednesday, September 27, 2017
Tuesday, September 26, 2017
Q. How can I learn to create drum parts?
I'm just starting out in learning to record audio but am beginning to expand on what I want to do. Though I'm now fairly competent at using my DAW of choice (Reaper), I'm finding it really difficult to create drum parts. What would be the most straightforward way for a complete beginner to get into and learn about this?
Sara Willis, via email
SOS contributor Mike Senior replies: In a word: loops. There are two basic things you have to contend with when putting together great drum parts. Firstly, you have to obtain good performances: whether you're wanting the sound of live drums or electronic drum‑machine timbres, the nuances of the performance or programming of the part play a vital role in creating a commercial sound in almost any style. Secondly, you need to be able to control the sonics well enough to build up a decent mix once all the other parts of your arrangement are in place. The reason I recommend loops as a starting point is that it simplifies the process of dealing with these issues. All you have to do is find a suitable loop and then learn how to adjust its performance or sonics where the unique circumstances of your music require it.

Just type 'sample' into the 'quick search' box at the top right‑hand side of the SOS home page to access an enormous archive of sample‑library reviews.
Finding a good library really shouldn't be hard. I've been reviewing loop collections for the magazine for ages now and I know that there are loads of really good ones available, catering for just about every musical genre imaginable. My first suggestion would be to go back through the magazine's sample‑library reviews: typing 'sample' into the 'quick search' field at the top right‑hand side of the SOS web site should pull them up out of the magazine's online archives for you. Anything with a four‑ or five‑star review is definitely worth investigating, but don't part with any cash before you've had a careful listen to the manufacturer's audio demos, and you should be as picky as possible in looking for exactly the right sonics for your needs. Don't just listen on your laptop's speaker or earbuds — drag the demo files over to your studio system, and if example loops are provided, try those out within a test project. This is what I regularly do as part of the review process, and it can be very revealing. Lining the demos up against some of your favourite commercial records may also help you narrow down the choices.
As far as the library format is concerned, I suggest you look for something based on REX2 loops, because these beat‑sliced files typically offer better tempo‑matching and rearrangement opportunities than the time‑stretching formats (such as Acidised WAV or Apple Loops). I don't think there's much sense in getting involved with any of the virtual instrument‑based libraries at this stage: while they can increase your flexibility in terms of sonics and programmability, they can also add a great deal of complexity to the production process, and I imagine you've got enough on your plate already with learning about all of this stuff! Often, loop‑library developers structure their libraries into 'suites', with several similar loops grouped together, and this can make it easier to build some musical variation into your song structure. There are also libraries that include supplementary 'one‑shot' samples of some of the drums used, and these can also be very handy for customising the basic loops, as well as for programming fills, drops and endings manually.

If you drag a REX2 file into Reaper's main arrange window, it'll automatically match itself to the project's tempo and present you with a series of beat slices. These slices make it easy to rearrange the performance, and also provide you with a lot of extra sonic options at mixdown.
Faced with a shortlist of good‑sounding REX2 libraries, the last consideration is whether the performances really sound musical. This is the most elusive character of a loop library and it's an area where the SOS review can provide some guidance. My usual barometer in this respect while reviewing is whether the loops make me want to stop auditioning and immediately rush off to make some music, so thinking in those terms may help clarify your thinking. It's also a good sign if the drum hits in the loop seem somehow to lead into each other, rather than just sounding like isolated events, because this can really make a difference to how a track drives along.
Once you've laid hands on some decent loops, you can just drag files directly onto a track in your Reaper project and they should, by default, match themselves to your song's tempo. Because each drum hit will have its own loop slice, it's quite easy to shuffle them around to fit existing parts. Just be aware that sounds with long sustain tails may carry over several adjacent slices. Map out a rough drum part by copying your chosen loops, making sure that Snap is 'on' so that the loops always lock to bar‑lines, but then be sure to also put in some work introducing fills and variations, so that the listener doesn't get bored. There are lots of ways of varying the loop patterns: edit or rearrange the slices; substitute a different loop from the same 'suite'; or layer additional one‑shots over the top. A lot of people think that using loops inevitably makes repetitive‑sounding music, but with most REX2 libraries there's no excuse whatsoever for letting this happen. (If you want to listen to an example of a drum part built with REX2 loops, check out my Mix Rescue remix from SOS October 2008 at /sos/oct08/articles/mixrescue_1008.htm, where I completely replaced the band's original drum parts in this way.)
The REX2 slices can also assist when it comes to adjusting sonics at the mix, because it's easy to slide, say, all the kick‑drum slices onto a separate track for processing. This is such a useful technique that I often end up doing it manually with loops at mixdown, even when they're not REX2 files! The Mix Rescue I did in SOS November 2010 (/sos/nov10/articles/mixrescue‑1110.htm) is a good example of this, and with that one you can even download the full Reaper remix project from the SOS web site if you want to look at how I implemented this in more detail.
Published January 201
Monday, September 25, 2017
Saturday, September 23, 2017
Q. Can I get rid of string buzz?
I've got a recording of an acoustic guitar that I'm loath to re‑record, but there are several sections in which string buzz is clearly audible. Can I remove this with a bit of clever processing?
Mike Fenton, via email
SOS contributor Mike Senior replies: As far as after‑the‑fact mix processing is concerned, I'm not sure I can think of any decent way to remove string buzz, I'm afraid. The problem is that, unlike a lot of other mechanical noises the guitar makes, there's not really any way to get independent control over it with normal plug‑in processing. (I suspect that even high‑end off‑line salvage tools such as CEDAR's Retouch might struggle to make much of an impact with this, in fact.) In the case of pick noise, for example, the transient nature of the noise means that it can be effectively targeted with transient‑selective processors such as SPL's Transient Designer or Waves' TransX Wide. For fret squeaks you can use high‑frequency limiting, or simply an automated high‑frequency shelving EQ to duck the high end of the spectrum briefly whenever a squeak occurs, because such noises are usually brief and occur as the previously played notes are decaying (therefore having less high‑frequency content to damage). String buzz, on the other hand, isn't transient by nature and usually happens most obviously at the beginnings of notes, where the noise spectrum is thoroughly interspersed with the wanted note spectrum.

It's relatively difficult to fix fret noises with processsing, due to the very specific nature of the transients produced. For this reason, it's always advisable to record several takes of an important guitar part.
All is not lost, however, because you still may be able to conjure up a fix using audio editing if your recording includes any repeated sections and the string buzz isn't common to all sections; you may be able to just paste clean chords or notes over the buzzy ones. The main thing to remember is to try to put your edits just before picking transients if possible, to disguise them, but you should also be careful that all notes sustain properly across each edit point too, because you may not have played exactly the same thing every time. If you know that string buzz is a problem for you, I'd recommend doing several takes of guitar parts, as this will increase your editing options. If the guitar part is important enough that a bit of string buzz really matters, you should probably be comping it anyway, to be honest, if you're after commercial‑sounding results.
Published February 2011
Friday, September 22, 2017
Thursday, September 21, 2017
Q. How can I prevent feedback?
When setting up for a gig we always suffer really bad feedback from
the singer's mic. We've tried positioning things differently, but it
doesn't seem to help. We're pretty new to this; how can we
counteract feedback?
Jo Ellison, via e‑mail
SOS Editor In Chief Paul White replies: Acoustic feedback is caused when sound from the speakers gets back into the microphones at a high enough level to cause the signal to keep increasing. This produces acoustic feedback as the signal cycles round and round the system. Positioning the main speakers well in front of the vocal mics and aimed so as to minimise the amount of sound bouncing back into the microphones will help, but there are other issues to consider. For example, if the wall behind the band is hard, it will reflect more sound back into the live side of the microphones. Imagine the room is made of mirrors and it'll be easier to establish where the problematic reflections are likely to come from. If you can hang up a thick fabric backdrop, it will help, as will positioning the main speakers so that most of the sound goes into the audience, and as little as possible points toward the walls and ceiling.
Feedback always starts at the point where the gain is highest and where the phase of the audio picked up by the mic reinforces what is coming from the speakers. If you apply EQ boost, there's more likelihood that feedback will occur at the boosted frequency, as that's where the gain is highest, but the same applies to microphones and PA speakers that have significant peaks in their frequency response curves. Choosing good-quality mics and speakers might help to minimise the risk of feedback. A mic with a gentle presence peak should be OK, but some cheaper mics have very pronounced peaks that can cause problems. You also need less gain if the singer has a naturally loud voice, so those with quieter voices need to work close to the mic. Quiet singers who stand back from the mic have no chance in smaller venues, where mics are invariably closer to the speakers than is ideal.
Stage monitors can be particularly problematic when it comes to feedback, so it pays to spend a little more on monitors that have a reasonably flat response. You also need to ensure monitors are aimed toward the least sensitive part of the vocal microphone, which, for a cardioid pattern mic, is directly from the rear. You may need to angle the back of the mic downwards to achieve this, but it will help. Hypercardioid mics, on the other hand, tend to be least sensitive around 45 degrees off the rear axis, so aim the monitor there.

The area directly behind a cardioid mic is the least sensitive, so positioning stage monitors there will reduce the risk of feedback. However, if you're using a hypercardioid mic, this is true of the area at a 45‑degree angle to the rear axis.

A third‑octave graphic EQ can help pull down troublesome peaks, but the type you find built into mixers, with only five or six bands, isn't very useful for dealing with feedback, as they change too much of the wanted sound. They can help balance the overall room sound, but that's about it. A better solution may be to connect an automatic 'feedback eliminator' hardware device to the mixer output. These are set up during the soundcheck by turning up the mic gain until feedback occurs, at which point the device measures the frequency and sets up a narrow filter to pull down the gain at that frequency. Most have several filters that can lock onto the main feedback frequencies, and they can help you gain a few more dBs of level before feedback becomes a problem. As the filter bands are so narrow, they have little effect on the overall sound. Most also include roaming filters that can lock onto feedback that occurs during performance, as it might if the singer moves the mic around.

Small venues of the type that so many up-and-coming bands play definitely make the fight against feedback harder, as they provide fewer opportunities for optimum positioning of PA speakers.
Finally, when setting up levels, establish a maximum safe vocal level, leaving a few dBs of fader travel in hand, rather than working right on the edge of feedback where the sound is ringing all the time. Then set up the level of the back line to match the vocals. It's no good setting up the backline first and then expecting the vocals to match it, because in most small venue situations the vocal level is the limiting factor. You'll also find that some venues are inherently worse than others for feedback and you just have to live with it.
Published August 2010
Wednesday, September 20, 2017
Q. Should I be mixing in mono?
I've read a lot of articles about the benefits of mixing in mono. So is pressing the mono button on your DAW's stereo output and turning off one of your stereo monitors the way to go? I've had a quick go from one speaker and mono switch, but it was a bit of a mess, to be honest! I've also read a lot on panning in mono, but I didn't think this would work.
Is it better to record in mono, pan, add effects, and mix to a single stereo master? The reason I ask is that when we recorded everything in mono it seemed to sit better than many stereo files fighting in the mix.
Via SOS web site
SOS Technical Editor Hugh Robjohns replies: There certainly are some advantages to mixing in mono. The main reason for checking the derived mono from a stereo mix is to make sure it still works for mono listeners, and there can be a lot of them. For example, a lot of portable radios are mono and all car FM radios automatically switch to mono whenever the signal suffers multi‑path problems or receives weak signals, which is surprisingly often in most places. Many clubs also play music in mono, and sometimes Internet files are converted to mono to reduce data bandwidth, or become near‑mono just because of the chosen codec.
So checking that the mix works in mono is a very sensible thing to do, and if you're going to do that, it is infinitely better to check mono on a single speaker, rather than as a phantom image across a stereo pair of speakers, because the latter over‑emphasises the bass end and stimulates more room reflections, which can be distracting and affect the perceived mix.
But what about mixing in mono? Well, it's generally much harder than mixing in stereo, but you'll get much better results for your effort. The fact is that when you mix in mono you can really only separate different instruments by using differences in their relative levels and spectral content. So achieving the right balance and applying the right EQ to separate sources, becomes a lot more critical: that's why it feels harder to do. But when it's right, it is very obviously right.

Even now that we have hi‑tech digital radio, a lot of listeners are still hearing a mono mix, as is the case for users of the Pure Evoke radio, currently one of the best‑selling DAB radios.
Conversely, when mixing in stereo you have the same level and tonal differences to help make the mix work, but you also have spatial position (panning). By panning sounds across the stereo image, you can make the mix sound great very easily, even if you have several near‑identical‑sounding sources. Yet, when that great‑sounding stereo mix is collapsed to mono, you will often find it no longer works, because those sources occupy the same spectrum and end up trampling all over one another.
However, if you can get the mix to sound good in mono first, it will definitely sound great in stereo too. I find it a lot easier and more satisfying to work in that way, although that's possibly partly to do with my formative BBC days working in mono. If you create the stereo mix first, it can be very frustrating afterwards to have to make it work in mono too.
Of course, the only problem with mixing in mono is what happens when you come to pan sources to create the stereo image. Panning a source will inevitably change its relative level in the two output channels. Depending on the panning law in use, this may also, therefore, affect the mono mix balance slightly. Since the mono balance is inherently more critical than the stereo balance, the result is that you end up having to work around the loop a few times. For example, you set up the initial mix in mono by adjusting the fader levels and, possibly, also using EQ to ensure each source occupies its own spectrum and doesn't trample over anything else. You then switch to stereo and pan the instruments to create a pleasing stereo image. This will usually modify the balance slightly, although you are unlikely to notice anything significant while listening to the stereo mix; it will still sound great. You then switch back to mono and, if you notice the mix has gone 'off' slightly, you can fine‑tune the fader positions to get the mix balance perfect once more.
Finally, check once again in stereo and print to master tape (or whatever!). In some descriptions of mono mixing, you'll come across the idea of finding the spatial 'sweet spot' for a source by adjusting the pan pot, while listening in mono. However, this is, quite obviously, completely bonkers! What you're doing in this case is fine‑tuning the mono mix balance by using the pan pot as an ultra‑fine fader, trimming the signal level by very small amounts. Sure, it may well make it easier to fine‑tune the mono mix, but there probably won't be much sense in the stereo image positioning when you finally do come to check the stereo mix. It's obviously far better to pan the sources while listening in stereo, so you can position them precisely where you want them, then revert to mono and fine‑tune the fader positions, if necessary, to make the mono mix work as well as it can.
Reverbs and some stereo effects can be tricky when you're trying to find a perfect balance in both mono and stereo. Almost all reverbs will sound much drier in mono compared to stereo, and so, usually, some compromise will be needed. If you adjust the reverb for a good sense of space or perspective in mono, it will often end up sounding a little bit too wet in stereo (although some people like it that way), and if you get the reverb sounding right in stereo, it will often end up a little too dry in mono. There's nothing you can really do about this; it's a fundamental issue with the way most reverbs are created and the way stereo works.
Narrowing the reverb width can make the differences less obvious — and some reverbs have a parameter to enable you to do this — but it also makes the reverb less spacious‑sounding in stereo. Some mix engineers like to pan mono reverbs with each individual instrument to try to maintain a better stereo‑mono balance, but it's a lot of extra work and I'm not convinced it sounds that much better anyway.
Published February 2011
Tuesday, September 19, 2017
Monday, September 18, 2017
Q. Can I get rid of string buzz?
I've got a recording of an acoustic guitar that I'm loath to re‑record, but there are several sections in which string buzz is clearly audible. Can I remove this with a bit of clever processing?
Mike Fenton, via email
SOS contributor Mike Senior replies: As far as after‑the‑fact mix processing is concerned, I'm not sure I can think of any decent way to remove string buzz, I'm afraid. The problem is that, unlike a lot of other mechanical noises the guitar makes, there's not really any way to get independent control over it with normal plug‑in processing. (I suspect that even high‑end off‑line salvage tools such as CEDAR's Retouch might struggle to make much of an impact with this, in fact.) In the case of pick noise, for example, the transient nature of the noise means that it can be effectively targeted with transient‑selective processors such as SPL's Transient Designer or Waves' TransX Wide. For fret squeaks you can use high‑frequency limiting, or simply an automated high‑frequency shelving EQ to duck the high end of the spectrum briefly whenever a squeak occurs, because such noises are usually brief and occur as the previously played notes are decaying (therefore having less high‑frequency content to damage). String buzz, on the other hand, isn't transient by nature and usually happens most obviously at the beginnings of notes, where the noise spectrum is thoroughly interspersed with the wanted note spectrum.
It's relatively difficult to fix fret noises with processsing, due to the very specific nature of the transients produced. For this reason, it's always advisable to record several takes of an important guitar part.
All is not lost, however, because you still may be able to conjure up a fix using audio editing if your recording includes any repeated sections and the string buzz isn't common to all sections; you may be able to just paste clean chords or notes over the buzzy ones. The main thing to remember is to try to put your edits just before picking transients if possible, to disguise them, but you should also be careful that all notes sustain properly across each edit point too, because you may not have played exactly the same thing every time. If you know that string buzz is a problem for you, I'd recommend doing several takes of guitar parts, as this will increase your editing options. If the guitar part is important enough that a bit of string buzz really matters, you should probably be comping it anyway, to be honest, if you're after commercial‑sounding results.
Published February 2011
Saturday, September 16, 2017
Friday, September 15, 2017
9 Everyday Questions About Tinnitus: Answered

1. What is Tinnitus
The word Tinnitus is a deviation of a 19th century latin word ‘tinnire’ that means to ring or tinkle from an imitative origin. Tinnitus is an awareness of a noise from inside the ear, which doesn’t originate from any external noise, everyone’s experience of Tinnitus is different, people hear lots of different sounds.2. How to Pronounce Tinnitus
Tinnitus is pronounced in many different ways, many people say it the way it is spelt tin-i-tus, but the proper pronunciation is tin-ni-tus, broken up into 4 syllables.3. How Tinnitus Affects Daily Life
Tinnitus is a Diverse and invisible condition, Millions deal with the burden of tinnitus every day, for most it is a minor distraction in their life, for others it is unsettling enough for their life to be disrupted. It is hard for any sufferer to get a concrete diagnosis. It manifests in many forms, for example the sound can be tonal or pulsating, irregular or constant or it can be acute or chronic, It is relative to the individual. Bad cases can lead to further health issues. Including sleep disruption, anxiety and even depression, interfering with work performance and affecting the individual’s social well-being.An American Tinnitus Association Study of over 1,000 tinnitus suffers asked ‘how much does tinnitus impact your life on a daily basis?’ 34% said it was annoying, but didn’t significantly impact on their life too much, but 18% said that it cause them sleep problems, 16% said trouble concentrating and 13% caused anxiety. Only 4% said that they barely noticed the tinnitus.
4. Tinnitus: Where is the Source
Many believe that the source of Tinnitus is part of the filtering network between our ears and our brain. The Medicaldaily.com website explains ‘’ This sophisticated auditory system that is intended for relaxation and pleasure, is also designed to alert you of any danger, the mechanism.The example that best illustrates this is, if you are in a room with lots of different conversations, you’re unable to focus on all of these sounds, but if your name is mentioned in close proximity, your hearing is focused on that conversation. Sometimes this filtering system can go wrong and the sounds that we would normally block out become stronger and more noticeable.
5. How Tinnitus Changed my Life
There are many stories online about how Tinnitus has affected people’s lives, here are some examples.Simon’s story on neuromonics.com is a common one, he first noticed it whilst in school and then it got worse after college, but he learnt to manage the Tinnitus.
There are many stories on reddit, as LifewithT describes, he became depressed when he developed tinnitus and explains that he was a heavy drinker with a busy work life. He learnt to live with tinnitus and it has “actually improved my outlook on life”
Again on Reddit, Skatingdark explains that there are not many examples of stories of people that have been cured of tinnitus. He found tinnitus retraining therapy a huge help and has recommended it to many friends that suffer.
A thread started by WendyS on Tinnitustalk Forum has the story of how Wendy developed her tinnitus and how she went from “being a very strong, component woman to someone who had to have someone with her everywhere she went”
All of these stories have a common theme running through them, the tinnitus effected their lives in a big way to start with, but when they managed and understood it, they found life went back to normal.
6. Where is Tinnitus Located in the Ear
It’s important to understand that tinnitus isn’t solely related to just the ear. The Auditory brain, as shown above, has many different filters and it is the connections and filters between the ear (auditory nerve) and the brain (auditory cortex) that causes/creates the sensation of Tinnitus.7. Causes of Tinnitus
There are many factors that appear to cause Tinnitus, Working in loud environments contributes to hearing loss and hearing loss is commonly linked to tinnitus, our brain compensates for the deterioration of the hearing by amplifying many sounds that we normally block out, Thus increasing the risk of Tinnitus. This is true also if you have recently had the flu or a cold, the auditory brain is more aware of sounds that it would normally block out. Stress and anxiety are frequently linked to causing tinnitus, but in actually fact they are normally a consequence of tinnitus or an aggravator of it, Also high blood pressure can cause blood vessels in the ear to pulsate, sometimes giving the symptoms of tinnitus. Tinnitus is so diverse that the Cause of it can be difficult to determine. It is widely acknowledged that Tinnitus is a result of a physical or mental adjustment that is not always related to the ears or the hearing.8. Which Medications Cause Tinnitus

It is true that some medications are a contributing factor to tinnitus. Very high doses of aspirin can bring on temporary tinnitus, but as soon as the medication has worn off, this normally subsides. This level is normally several times higher than that prescribed. Other drugs that have had links to tinnitus include Quinine (used for malaria) a few chemotherapy drugs and powerful antibiotics. It is often coincidental that people that take medication suffer from tinnitus as a side-effect.
9. What does Tinnitus Sound Like
Common descriptions from sufferers relate it to a ringing, buzzing, humming, grinding, hissing, whistling and many more, this can vary from really loud to low level of sound.Summary
The Key point to take away from this is that tinnitus is different for everyone, because the sound is local and different to the individual, it is very difficult to get a diagnosis, a cause or a full understanding of the extent of an individuals’ tinnitus. Tinnitus is not common, about 10% of the population suffer from it, it is often thought that Tinnitus is limited to the elderly, this is untrue, and all age groups are susceptible. If you think that you are suffering from Tinnitus, visit your GP and talk to them about it. Moving forward you should also not let the Tinnitus disrupt your life, worrying about it will only make it worse, keep doing the things that you enjoy and the tinnitus will become a background distraction or non-existent.Thursday, September 14, 2017
Wednesday, September 13, 2017
Tuesday, September 12, 2017
Q. How do I record drums in a church?
I have the opportunity to record in a church that is of modest size
with high ceilings and a lively acoustic. I'm thinking about using this
room to track drums for my new album. Would you advise recording there,
or would the acoustic just be too overbearing? I want a clean,
natural‑sounding recording for a folk band, so I was thinking this room
might offer the right sort of character.
Via SOS web site
SOS Technical Editor Hugh Robjohns replies: The limiting factor with most home project‑studio drum recordings is a combination of a generally dead‑sounding space, with little in the way of diffuse reflections, and a serious lack of height, which prevents the overhead mics being placed optimally. What you tend to get is a strong (but not diffuse) early reflection from the ceiling, which tends to degrade the quality of the sound captured — not only of the overheads, but sometimes the close mics too — and doesn't contribute in a nice way to the drum sound. The only solution is to make the recording space as dead as possible and then add artificial reverb to inject some life back into the drum sound, but the source often still sounds coloured and unrealistic.
A reverberant space often works well with drums because the diffuse early reflections add a welcome presence and scale to the drums without overpowering the direct sound. But typically we're talking about a modestly sized reverberant space here — a stairwell, for example — so that the early reflections are strong and the reverb time not excessive.
Recording in a typical parish church will provide the benefit of a very high ceiling, but most also have pretty lively acoustics with relatively long reverb times. This kind of acoustic character works well with some kinds of instruments and genres, but it's not a sound character I generally associate with folk music, which usually requires a more intimate treatment. All is not lost, though, and the benefits of the large space can still be used to your advantage if you are prepared to spend some time and effort controlling the acoustics and experimenting to optimise the arrangement.

If you've got the opportunity to record drums in a church, it may be tempting to just go for it and set up right in the middle of the nave, to take advantage of the large-space reverberation. However, this kind of natural reverb can be hard to tame, and choosing one of the smaller spaces a church has to offer, such as a porch or vestry, may well produce a more usable sound.
The first thing to do is identify a suitable recording location within the church. Setting the kit up in the middle of the nave is probably not going to work: you'll need somewhere more enclosed to generate some strong early reflections. An entrance porch or a vestry might provide a more appropriate acoustic, or perhaps setting up in the aisle between the choir stalls.
Once you've found somewhere that produces the right kind of early reflections, you'll probably have to try to tame the long reverb tails, and that will come down to the use of carpet and drapes. Suspending large duvets from hired‑in lighting stands will make a worthwhile difference if you experiment with their placement around the kit, to help shield the overhead mics, in particular, from the worst of the long reverbs. Remember that a cardioid mic is most sensitive to sounds from in front and around the sides, so rig the duvets (or whatever) in front and to the sides of these mics to try to stop reflected sounds from being picked up.
The low-frequency end of the reverb will be the most difficult to control — drapes and duvets won't do much at all — so be prepared to high‑pass filter the mics (especially the overheads) to reduce any tendency to boominess and muddiness!
Close‑miking will obviously provide the best direct/reverberant sound balance, and you can mix in one or more 'space' mics set up further down the church to bring a more reverberant quality to the balance. Compressing the 'space' mics quite heavily and mixing them in at a low level often works well.
Judging the subtleties of a miking situation like this on headphones is very tricky, so my approach would be to do an experimental setup and recording: multitrack each mic and try out several alternative techniques. Document everything carefully with measurements, photos and whatever else you need to be able to recreate the setups later. Then take the recordings back to your studio, experiment with balancing the mics and listen critically to see what works and what doesn't.
You can then either go back and experiment more to further optimise the setup, or if you find one of the arrangements delivers the sound you want, simply go back and record the tracks using the best rig from your experimental recordings.
Published November 2010
Monday, September 11, 2017
Saturday, September 9, 2017
Q. Is working with digital recordings harder than working with analogue ones?
In the past few years, it seems that I have to work much harder to
get things to sit properly in a mix — to get the vocal or horns to just
blend with the rest of the track, rather than feeling 'stuck on top',
for example. What has crossed my mind is that I rarely (if ever) seemed
to find this an issue when I was working purely in the analogue realm.
Was I being helped by the losses in the analogue system to blend the
sounds? Is it harder to blend multitrack recordings in the digital
world? I'm a musician, really, but I think I've improved as an engineer
over time, so I should say that I'm not a total klutz at this. I do
usually manage to get things to blend, but it does take effort. Do you
have any tips for improving the situation?
Via SOS web site
SOS contributor Mike Senior replies: There are a lot of good reasons why recordings made entirely in the analogue domain often seem easier to glue together at mixdown. The compression side-effects of the tape recording medium often help to tame over‑spiky transients (especially on drums), which can be difficult to tuck into the mix otherwise. The progressive high‑frequency loss that tape‑recorded signals suffer after multiple playbacks helps push sounds further away from the listener too; the brighter a sound, the more it tends to pop out of the mix.
Background noise is an inevitable side‑effect of working in the analogue domain — not just on account of the tape itself, but also because of contributions from all the other processing equipment — and this combined noise floor usually makes it easier to blend a mix. To quote producer Steve Churchyard (in Howard Massey's book Behind The Glass), "Tape hiss doesn't bother me at all, never did. It's like the glue that holds the record together”. A little added distortion is also unavoidable in analogue setups, and this can be turned to advantage by experienced recording engineers to make sounds fuller and more present. Such sounds don't need to be faded up as high in the mix and are, thus, easier to balance.
One other factor a lot of people forget regarding analogue productions is that compression is more often done while recording, to make the best use of the tape's dynamic range and the available gear resources, and then many of those parts may be further compressed at the final mix. This kind of serial compression is typically better at levelling out performance levels than a single, more heavy‑handed, processing stage, so that can also affect blend and the overall sense of naturalness.
There are other factors that contribute to the analogue sound, but that's enough to be going on with at the moment! Let's start looking at how you can try to get similar effects in the digital domain. The bottom line is that you can't expect to use all the same techniques you used for your analogue mixes when working on an all‑digital production. So, for example, I normally find that I do a lot more work with tape emulation, saturation, clipping and specialist transient processors when mixing digital recordings, in order to bring the typically less‑rounded transients under control. Tape emulations are, of course, an option here also.
Adding background noise artificially can also help achieve more analogue‑style blend, and if you don't fancy sourcing your own noise recordings, there are a lot of places you can find suitable samples. Most media sound effects libraries have a selection of what are usually called 'room tone' or 'room ambience' files, which are the sound of nothing happening in various common environments; not the most interesting sounds, but they really help to make tracks feel as if they're all occurring in the same place. Vinyl noise is another good option, and I've found good examples in many sample libraries. Spectrasonics' Retrofunk (www.spectrasonics.com) and Tekniks' The Mixtape Toolkit (www.tekniks.co.uk) spring to mind immediately, but there are lots of others. The Swedish developers Retro Sampling (www.retrosampling.se) have made background noise something of a speciality, and you can get whole CDs full of different vinyl noises from them, plus they also do freeware Audio Impurities and Vinyl Dreams VST plug‑ins, which give a small taster of what their product range has to offer. There are other plug‑ins worth a look too, such as Izotope's Vinyl (www.izotope.com) and Cubase's built‑in Grungelizer, but be aware that some of these don't output everything in stereo, and mono noise won't help the blend nearly as much in this application. One other freeware plug‑in that you might try is Tweakbench's Field (www.tweakbench.com), which provides a selection of mixable room tones./BodyI>

Retro Sampling's Audio Impurities Vintage Edition and Tweakbench's Field are two freeware plug‑ins that can feed subtle background noise to your mix bus, thereby subtly improving your apparent blend.

Finally, it's pretty easy to create serial compression digitally, given the practically limitless plug‑in slots most sequencers are endowed with. My basic advice here is to use slower and gentler compression settings for the first compressor in the line, just to even up the levels, and then use faster and heavier compression only further along in the processing chain. If you do it the other way around, the fast compressor will usually cause too many audible processing artifacts, while the slow compressor won't have much dynamic range left to work with.
Published August 2010
Friday, September 8, 2017
Thursday, September 7, 2017
Q. Is there an easy way to match the gain of different channels?
I've committed myself to recording a school orchestra in a couple of
weeks. Obviously, this will involve using stereo pairs of mics. However,
none of my preamps have stepped gain controls and, in fact, most of
them have very tiny knobs, so matching the gain on different channels by
eye is unlikely to work well. Is there a better way to match the gain
across different channels? Would it be better to take a small tone
generator and hold it against the front of the mic, or something?
Ceri Jones, via e‑mail
SOS Technical Editor Hugh Robjohns replies: A tone generator is one solution, if you can guarantee to get it the same distance from both capsules, but it's fiddly and not that reliable, in my experience.
There are several good alternatives, though, depending on what kind of mic arrays you're using and how easy they are to get to. It's also made easier if you have a Lissajous meter display (goniometer) like the DK‑Technologies MSD series, and a monitoring system that allows easy access to the side (stereo difference) channel.

A goniometer can help you easily match gain across channels if your preamps don't have stepped gain controls, but there are also cheaper methods.
The easiest approach is to roughly set the mic gains by ear during rehearsal. Then at the break, when the room is empty and quiet, get someone to stand in the front-middle of the stage and clap their hands repeatedly (or, if they're not shy, sing a constant note).
On a goniometer you'll see very clearly the stereo axis of the sound source, so, you can then turn down the louder channel (the side the goniometer trace leans toward) to bring the display back to the centre line. Turning the loud side down maximises headroom, of course, and is a safer way to go than bringing up the quieter side!
If you don't have a goniometer, a reasonably practical solution is to configure the monitoring to listen to the 'side' or stereo difference signal (polarity-reverse one channel and mono‑sum them).
If the two sides are equally matched, there should be a deep cancellation null, so by looking at the meters to figure out which channel is louder, wind that down until you pass through the null, and then bring it back up to provide the deepest possible null. Then restore the monitoring to normal stereo. This process works well for continuously variable gain controls that aren't closely matched, such as those you're describing.
Frustratingly, though, few monitor controllers have facilities to switch to hear the side signal, and few people appreciate the true value of goniometer metering displays, both making the situation you describe trivially simple to check and resolve.
Published August 2010
Wednesday, September 6, 2017
Q. Where's the best place to mount a large monitor screen?
I'm using a big desk with a shelf on the back as my studio
workstation. Being partially sighted, I need my screen fairly close in
order to see the details. I'm thinking about buying some studio monitors
to put up on the back shelf of the desk, but will the fact that my
screen is in front, albeit in the centre of the speakers, be a problem?
Would the problem concern stereo imaging more so than frequency
response? The screen is a 24‑inch model that is mounted on an arm for
maximum flexibility.

It's better for acoustics if everything, where possible, is placed symetrically in a room. If you require a large screen in a studio, for any reason, it's a good idea to place it between and behind your monitors.
Via SOS web site
SOS contributor Martin Walker replies: To get the flattest frequency response from your loudspeakers, you need to install some acoustic treatment to damp down the room 'modes' that make each room resonate at certain frequencies, depending on its dimensions.
On the other hand, to get the best stereo imaging, the left and right halves of your studio should, if possible, be a mirror image of each other, and you should place the loudspeakers symmetrically with respect to the walls and fit acoustic absorption at the 'mirror points' on both side walls and the ceiling. 'Early reflections' bouncing off these points will obscure the details in your mixes and make it more difficult to pinpoint where each sound is panned.
Even your gear should, ideally, be installed in a symmetrical fashion. For instance, avoid placing cupboards, shelves, desks or keyboards on one side of the room only, since the sound bouncing off them will result in an unbalanced stereo image that will muddle your imagery.
Moreover (and here's where we get to your specific query), you can get troublesome reflections from audio bouncing off other objects between your ears and the loudspeakers, such as mixing desks and forward‑mounted monitor screens. Maintaining a clear area in front of your loudspeakers is the secret of good stereo imaging, although, thankfully, most modern flat-screen monitors will result in far smaller acoustic problems than the old (and relatively massive) CRT monitors.
A quick way to hear what difference any object is having on your stereo image is to temporarily drape a duvet, or similar, over it while listening to a mono signal being played through both loudspeakers (solo acoustic guitar might be a good one to try). If, with the duvet in place, the phantom central image between your loudspeakers becomes better focused and more concrete, as if a physical player is sat in front of you, then that object is interfering with your imaging.
There are several possible ways to avoid such audio compromises. The easiest is to place your monitor screen further away, either between the loudspeakers or behind them. This generally means you need a larger screen, and some studios hang huge monitor screens on the wall behind the speakers so their clients get a good overview of what's going on. However, even with 20/20 vision, this approach is often not good enough for detailed editing, so a second, smaller, screen is generally mounted much closer to the operator. Keep this as low as possible so that it's out of the speaker's line of fire.
Another more specialised, but elegant, alternative that I've spotted in various studios is a monitor screen recessed into a hole in the desktop. An easy version of this is to remove your monitor stand and lay your screen at an appropriate angle on your desktop, well below the critical area in front of the loudspeakers.
Yet another approach is the one you've already adopted. Since your screen is "mounted on an arm for maximum flexibility”, you can simply push it back out of the way of the loudspeakers for critical listening. This is a great idea for any musician; if only we had a similar option for mixing desks!
Published October 2010
Tuesday, September 5, 2017
Monday, September 4, 2017
Q. How should I record an upright piano?
I have a pretty basic recording setup and, up until now, have just
been making vocal and guitar recordings using an Audio‑Technica AT2035
and an Edirol FA66 audio interface with Reaper. However, I've been
playing the piano a lot lately and would like to incorporate that.
I have access to an old upright that's in the corner of my mum's living
room. How can I achieve the best recording of the piano? Will I need
different equipment?
Fiona McKay, via email
SOS Editor In Chief Paul White replies: There are many different ways to mic the upright piano, but in a domestic room a pair of cardioid capacitor mics would probably be the best option, as they would exclude much of the room reflection that might otherwise adversely colour the sound. Aim each mic at an imaginary point about a quarter-piano's width in from the ends of the piano, as that helps keep the string balance even. If the piano sounds good to the player, you can use a spaced pair of mics either side of the player's head, but it is also common practice to open the lid and, often, to remove the upper front cover above the keyboard as well. With the strings exposed in this way, you have more options to position the spaced pair either in front of or above the instrument, and I'd go for a 600 to 800 mm spacing between the mics, adjusting the mic distances as necessary to get an even level balance between the bass and treble strings.
If a piano sounds good to the player, it's worth trying the recording from just either side of their position, placing the microphones 600 to 800 mm apart. However, it's also common practice to open the lid of the piano and place the mics above the exposed strings at that same distance apart.
If you're lucky enough to have a great‑sounding room, you can increase the mic distance to let in more room sound or switch to omnis. But in a typical domestic room I'd be inclined to start with the mics around that 600 to 800 mm distance apart. Also listen out for excessive pedal noise on your recording and, if necessary, wrap some cloth around the pedals to damp the sound.
SOS contributor Mike Senior explored this subject in some detail back in April of 2009. It's probably worth going to /sos/apr09/articles/uprightpianos.htm and giving it a read.
Fiona McKay, via email
SOS Editor In Chief Paul White replies: There are many different ways to mic the upright piano, but in a domestic room a pair of cardioid capacitor mics would probably be the best option, as they would exclude much of the room reflection that might otherwise adversely colour the sound. Aim each mic at an imaginary point about a quarter-piano's width in from the ends of the piano, as that helps keep the string balance even. If the piano sounds good to the player, you can use a spaced pair of mics either side of the player's head, but it is also common practice to open the lid and, often, to remove the upper front cover above the keyboard as well. With the strings exposed in this way, you have more options to position the spaced pair either in front of or above the instrument, and I'd go for a 600 to 800 mm spacing between the mics, adjusting the mic distances as necessary to get an even level balance between the bass and treble strings.

If a piano sounds good to the player, it's worth trying the recording from just either side of their position, placing the microphones 600 to 800 mm apart. However, it's also common practice to open the lid of the piano and place the mics above the exposed strings at that same distance apart.
If you're lucky enough to have a great‑sounding room, you can increase the mic distance to let in more room sound or switch to omnis. But in a typical domestic room I'd be inclined to start with the mics around that 600 to 800 mm distance apart. Also listen out for excessive pedal noise on your recording and, if necessary, wrap some cloth around the pedals to damp the sound.
SOS contributor Mike Senior explored this subject in some detail back in April of 2009. It's probably worth going to /sos/apr09/articles/uprightpianos.htm and giving it a read.
Published October 2010
Saturday, September 2, 2017
Friday, September 1, 2017
Q. How should I mount a pair of AKG C414s?
I've been trying to use a pair of AKG C414s in a coincident X-Y mode,
but am finding it physically difficult to mount the microphones. I've
seen references to vertically aligned and horizontally aligned methods,
but these terms imply different mounting arrangements to me. I've also
heard reference to a Blumlein technique, but I thought that utilises
figure‑of‑eight polar patterns, whereas I was planning on using cardioid
in order to maintain focus. Can you clarify the correct technique for
using X-Y with the 414s, please?
Via SOS web site
SOS Technical Editor Hugh Robjohns replies: Blumlein is a specific sub‑form of a coincident (often referred to as an X-Y) stereo microphone arrangement. Basically, X-Y is normally used to imply a stereo array with coincident capsules, whereas A-B normally means spaced microphones, although not everyone uses these terms in the same way. The physical angle between the two microphones in an X-Y array (the mutual angle) and their polar patterns is not defined in the umbrella X-Y term. More or less any mutual angle can be used, and any directional polar pattern, and it would still be an X-Y array. Blumlein is a very specific form of X-Y array. It uses coincident capsules with figure‑of‑eight polar patterns, and a 90‑degree mutual angle (although this is sometimes eased out to 80 degrees to alter the stereo imaging).
As for the correct X-Y mounting technique, there is only one arrangement for end‑fire small-diaphragm microphones, shown below in the first example.

Example 1: This is really the only suitable XY-mounting technique for end-fire small-diaphragm microphones.
However, as you have discovered, mounting side‑address large‑diaphragm microphones can often be a little more taxing and requires more versatile mounting hardware. Basically, the two microphone capsules have to be mounted such that they are coincident in the horizontal plane, and that means they have to be placed with one directly above the other. In this way, sound wave fronts from any source arrive at both capsules at the same time. Stereo imaging information is captured by the level differences imposed by the polar patterns and the fact that the mics are pointing in different directions; there are no timing differences between the left and right channels. So, ideally, the microphones should be mounted vertically with one above the other, as in the second example,

Example 2: Mics mounted vertically with one above the other.
or horizontally one above the other, as in the third.

Example 3: Mics mounted horizontally with one above the other.
Mounting the mics vertically one above the other generally requires either two stands or the creative use of some guitar clamps, although Microtech Gefell and AEA (among others) make suitable brackets for supporting mics vertically. Mounting the mics horizontally above one another can be achieved a little more easily with a wide stereo bar and some pillars or stacked thread adaptors to hold the mics clear of the bar.
An arrangement that's often used and is far more convenient, albeit with slightly less imaging accuracy, because the capsules are spaced slightly in the horizontal plane (and will therefore capture some small time‑of‑arrival differences, as well as the wanted level differences due to the polar pattern), can be seen in the fourth example.

Example 4: This technique offers slightly less imaging accuracy, but is far more convenient.
This format can be achieved with a short stereo bar very easily and, in practice, works very well. With a wider stereo bar to allow greater spacing between the mics, you can easily turn this into an ORTF stereo array (capsule spacing of 17cm with a 110‑degree mutual angle on cardioid patterns).
The one arrangement you should never use can be seen in the fifth example.
Example 5: This arrangement should never be used, as one microphone will acoustically 'shadow' the other. interfering with stereo imaging.
The problem with this configuration is that each microphone sits directly in the active area of the polar pattern of the other mic, forming an acoustic shadow for high‑frequency sounds, which will mess up the imaging fairly comprehensively.
Via SOS web site
SOS Technical Editor Hugh Robjohns replies: Blumlein is a specific sub‑form of a coincident (often referred to as an X-Y) stereo microphone arrangement. Basically, X-Y is normally used to imply a stereo array with coincident capsules, whereas A-B normally means spaced microphones, although not everyone uses these terms in the same way. The physical angle between the two microphones in an X-Y array (the mutual angle) and their polar patterns is not defined in the umbrella X-Y term. More or less any mutual angle can be used, and any directional polar pattern, and it would still be an X-Y array. Blumlein is a very specific form of X-Y array. It uses coincident capsules with figure‑of‑eight polar patterns, and a 90‑degree mutual angle (although this is sometimes eased out to 80 degrees to alter the stereo imaging).
As for the correct X-Y mounting technique, there is only one arrangement for end‑fire small-diaphragm microphones, shown below in the first example.

Example 1: This is really the only suitable XY-mounting technique for end-fire small-diaphragm microphones.
However, as you have discovered, mounting side‑address large‑diaphragm microphones can often be a little more taxing and requires more versatile mounting hardware. Basically, the two microphone capsules have to be mounted such that they are coincident in the horizontal plane, and that means they have to be placed with one directly above the other. In this way, sound wave fronts from any source arrive at both capsules at the same time. Stereo imaging information is captured by the level differences imposed by the polar patterns and the fact that the mics are pointing in different directions; there are no timing differences between the left and right channels. So, ideally, the microphones should be mounted vertically with one above the other, as in the second example,

Example 2: Mics mounted vertically with one above the other.
or horizontally one above the other, as in the third.

Example 3: Mics mounted horizontally with one above the other.
Mounting the mics vertically one above the other generally requires either two stands or the creative use of some guitar clamps, although Microtech Gefell and AEA (among others) make suitable brackets for supporting mics vertically. Mounting the mics horizontally above one another can be achieved a little more easily with a wide stereo bar and some pillars or stacked thread adaptors to hold the mics clear of the bar.
An arrangement that's often used and is far more convenient, albeit with slightly less imaging accuracy, because the capsules are spaced slightly in the horizontal plane (and will therefore capture some small time‑of‑arrival differences, as well as the wanted level differences due to the polar pattern), can be seen in the fourth example.

Example 4: This technique offers slightly less imaging accuracy, but is far more convenient.
This format can be achieved with a short stereo bar very easily and, in practice, works very well. With a wider stereo bar to allow greater spacing between the mics, you can easily turn this into an ORTF stereo array (capsule spacing of 17cm with a 110‑degree mutual angle on cardioid patterns).
The one arrangement you should never use can be seen in the fifth example.

Example 5: This arrangement should never be used, as one microphone will acoustically 'shadow' the other. interfering with stereo imaging.
The problem with this configuration is that each microphone sits directly in the active area of the polar pattern of the other mic, forming an acoustic shadow for high‑frequency sounds, which will mess up the imaging fairly comprehensively.
Published October 2010
Subscribe to:
Posts (Atom)