Saturday, March 30, 2019
Friday, March 29, 2019
Q. Which MIDI velocity curve should I use with my controller keyboard?
I've just bought a new MIDI controller keyboard that has a selection of velocity curves. How should I go about choosing which one to use, and why is this necessary?
Philip McKay via email

Many MIDI keyboard controllers feature a clutch of different velocity curves, such as these. From left to right, the linear setting is always a good starting point, but switching to the convex curve will give you greater control over louder notes, the saturated curve will deal with keyboards that won't otherwise generate maximum MIDI velocities, and the concave curve is the one to choose if the quiet end of the MIDI velocity range feels all 'bunched up' on your keyboard.
SOS contributor Martin Walker replies: Some keyboardists play harder than others, while keyboard controllers themselves can vary a great deal in their mechanical resistance, action and feel. If you come from a synth background, a weighted, hammer‑action keyboard may feel very heavy and ponderous to play while, conversely, if you're used to playing acoustic pianos, a lightweight, synth‑action keyboard may feel lifeless. However, the ultimate goal is always the same.
MIDI supports 128 different velocity values (from zero to 127) and, whichever velocity‑sensitive keyboard you choose, it should let each player generate this complete range of values smoothly as they dig into the keys, from soft to hard. This is the reason why most keyboards offer a selection of velocity curves.
Many modern sample libraries feature eight, 16 or even 32 velocity layers per note, and if your keyboard doesn't let you generate the full range of MIDI velocity values you may never hear some of these layers. This, in turn, means that your sounds may lack expression or sound dull or harsh, or it might mean that you never hear special effects programmed for high velocity values only, such as piano hammer noise, guitar harmonics or bass slaps.
It's generally best to start by trying the linear velocity curve that generates smoothly increasing velocity values as you play harder (see graph above). Some makes and models of controller keyboard do manage to do this over the full range but, in my experience, many don't generate any velocity over about 110, unless you hammer the keys really hard. The different curves stretch one or more velocity areas across the mechanical range. Don't get too hung up on the shapes themselves, it's more important to just play and see what velocity values you can generate.
You can choose the most expressive velocity curve by simply playing a favourite sampled instrument, such as a piano, but this can prove a tedious process. You may achieve the perfect response with 'loud' notes only to find that the soft notes now play too loud, or vice versa, or you may find that you only have the perfect response for that one instrument. It's better to be a little more systematic and monitor the MIDI velocity values themselves as you play, to check that you can move smoothly across the entire range. There are plenty of visual options for this purpose, including various sequencers that display incoming MIDI velocity as a level meter, or software utilities such as MIDIOX (see www.midiox.com for details).
Once you've chosen the most suitable preset curve for your playing style, a one‑off bit of final tweaking may make your keyboard playing even more expressive. For instance, my main controller keyboard smoothly generates MIDI velocities from 0 to 110, but struggles above this, so I just convert this input range to an output range of 0 to 127 using the MIDIOX Data Mapping function or a MIDI velocity-curve changer (see this one from www.trombettworks.com/velocity.php).
Most sequencers, and even some hardware/software synths, let you tweak incoming velocity values in this way, either using MIDI plug‑ins, such as VelocityCurveSM (www.platinumears.com/freeplugins.html for more information) or specialised built‑in functions, such as the Cubase MIDI Input Transformer. For a 'plug in and forget' hardware solution, you can buy a small box, such as MIDI Solutions' Velocity Converter (found at www.midisolutions.com/prodvel.htm), which is MIDI‑powered and offers 40 preset curves, plus a user‑defined one.
Some keyboards also include one or more 'fixed' velocity options that always generate the same MIDI velocity however soft or hard you play. These can be useful for playing sampled instruments with no velocity sensitivity, such as organs, and for step‑recording drum parts or simple synth tracks. A setting that always generates MIDI velocity 127 can also be invaluable for sound designers who need to ensure that their presets will never distort.
Published June 2010
Thursday, March 28, 2019
Wednesday, March 27, 2019
Q. How can I distribute my music online?
Having just completed a few tracks I'm really pleased with, I'd like
to take the plunge and start putting my music on the Internet. I've
heard that there are services that can put you on download sites, such
as Spotify, but I don't know where to start! What are my options?

There are several ways to distribute your music on the Internet. For example, AWAL will distribute your music to other web sites in exchange for a 15 percent cut, while Bandcamp allow you to sell your work directly, using Paypal.
Katy Bradley via email
SOS Video Media Editor Julian Harding replies: There are plenty of web sites out there for distributing your material digitally, but a couple of services stand out as particularly good value to me. The first is Bandcamp (www.bandcamp.com), which allows you to sell your music and merchandise via PayPal, without taking a cut of your profits. The layout is clean and clear, and the service is extremely simple to use, creating a whole variety of download formats from a single WAV or AIFF upload.
The fan can pick from MP3, Ogg Vorbis, Apple Lossless, FLAC and AAC download formats, which is quite enough choice for even the most obsessive audiophile and, by choosing to demand an email in return for downloads, you can easily gather a mailing list. You can also create albums and EPs on the site, give out download codes for promotional purposes and sell your t‑shirts and ironic mugs, or whatever merchandise you're currently peddling. One of my favourite features is the creation of MP3 tags from data you enter on the site. I've lost count of how many times I've sent someone a master, only to find that the title tag is 'Song 3 FINAL MIX mstrd (less limit)', or something equally non‑descriptive. This makes it a real plus to have conversion and tagging done at the Bandcamp end of things!
If you'd prefer to distribute your music through more traditional digital stores, such as iTunes, Amazon and Spotify, then AWAL (Artists Without A Label, found at www.awal.com) provide a relatively cheap service. They take a flat 15 percent cut from your sales and offer a non‑exclusive contract, which means that you can also sell the music elsewhere, for example on Bandcamp. The list of web sites on which your music can appear is very long, though some outlets cherry‑pick content for suitability, so your presence on all of them can't be guaranteed. Once sales start happening, you can receive your payment via cheque, bank transfer or PayPal; whichever is more convenient. Several well‑known artists use AWAL, including Moby and Thom Yorke, and many up-and-coming artists can be found in their catalogue as well.

There are several ways to distribute your music on the Internet. For example, AWAL will distribute your music to other web sites in exchange for a 15 percent cut, while Bandcamp allow you to sell your work directly, using Paypal.

Katy Bradley via email
SOS Video Media Editor Julian Harding replies: There are plenty of web sites out there for distributing your material digitally, but a couple of services stand out as particularly good value to me. The first is Bandcamp (www.bandcamp.com), which allows you to sell your music and merchandise via PayPal, without taking a cut of your profits. The layout is clean and clear, and the service is extremely simple to use, creating a whole variety of download formats from a single WAV or AIFF upload.
The fan can pick from MP3, Ogg Vorbis, Apple Lossless, FLAC and AAC download formats, which is quite enough choice for even the most obsessive audiophile and, by choosing to demand an email in return for downloads, you can easily gather a mailing list. You can also create albums and EPs on the site, give out download codes for promotional purposes and sell your t‑shirts and ironic mugs, or whatever merchandise you're currently peddling. One of my favourite features is the creation of MP3 tags from data you enter on the site. I've lost count of how many times I've sent someone a master, only to find that the title tag is 'Song 3 FINAL MIX mstrd (less limit)', or something equally non‑descriptive. This makes it a real plus to have conversion and tagging done at the Bandcamp end of things!
If you'd prefer to distribute your music through more traditional digital stores, such as iTunes, Amazon and Spotify, then AWAL (Artists Without A Label, found at www.awal.com) provide a relatively cheap service. They take a flat 15 percent cut from your sales and offer a non‑exclusive contract, which means that you can also sell the music elsewhere, for example on Bandcamp. The list of web sites on which your music can appear is very long, though some outlets cherry‑pick content for suitability, so your presence on all of them can't be guaranteed. Once sales start happening, you can receive your payment via cheque, bank transfer or PayPal; whichever is more convenient. Several well‑known artists use AWAL, including Moby and Thom Yorke, and many up-and-coming artists can be found in their catalogue as well.
Published June 2010
Tuesday, March 26, 2019
Monday, March 25, 2019
Q. How do normal DAWs differ from mastering workstations?
Why are there specific systems like SADiE, CEDAR, Sonic Solutions to
master with, as opposed to, say, Logic, Cubase and Pro Tools? To me,
they both seem to just be multitrack DAWs!

The capabilities of DAWs and mastering workstations have converged over the years. An example of this is in Pro Tools 8, which started off as an audio editing system, but now has very sophisticated MIDI facilities and plug‑in support.
Via SOS web site
SOS Technical Editor Hugh Robjohns replies: I think it's inevitable that DAWs of all kinds will converge in functionality over time. The evidence of that convergence is already plain to see in many cases. However, in the early days of digital audio editing and workstations, the complexity of these new technologies meant that manufacturers tended to specialise in specific areas of functionality.
The original MIDI‑based sequencers — such as Notator (now Logic), Cubase and their ilk — have all gradually added audio recording and editing tools, while the originally pure audio-editing systems — such as Sound Designer, SADiE, Sonic Solutions and Pro Tools — have gradually added MIDI facilities and plug‑in support. So the difference between systems is far less clear now than it once was.
However, the inertia of change has meant that some systems still retain strong specialisms and are favoured on that basis. For example, CEDAR started as a largely off‑line post‑processing platform for audio restoration, but its current incarnation includes sophisticated audio recording and editing facilities to improve the convenience of using it as an 'on‑line' tool.
SADiE started out, fundamentally, as a radio programme production platform. Its audio editing tools and workflows are geared up for very slick and versatile audio manipulation, which is precisely why it has been seized upon as the almost de facto music mastering system, essentially replacing the original king in that role, Sonic Solutions. However, there are other popular alternatives, such as Sequoia and Pyramix (in the professional sector) and very capable lower‑cost options, such as Wavelab and Adobe Audition.
In the mastering role, the most important features are very accurate and flexible editing facilities combined with all the behind‑the‑scenes tools for PQ creation, ISRC (International Standard Recording code) and so on, as well as the ability to generate the industry-standard DDPi mastering files. So generally these systems tend to have less well‑endowed MIDI facilities and internal or plug‑in processing, simply because they aren't required.
However, when it comes to the music production platforms, MIDI is obviously fundamental, so, while systems like Cubase, Logic and Digital Performer, for example, tend to have slightly more clunky audio editing tools, they do incorporate sophisticated MIDI features, very comprehensive internal signal processing, and support for plug‑in effects.
Pro Tools started out as an audio editing system, but has gradually acquired more and more sophisticated MIDI facilities and plug‑in support. This platform, perhaps, represents most clearly the idea of total convergence.
Published June 2010
Saturday, March 23, 2019
Friday, March 22, 2019
Q. How can I get ‘harsh’ vocals to sit properly in the mix?
I'm mixing a female pop/rock band and I'm struggling with getting the
vocals to sit in the mix. They were recorded with a Rode NT1A straight
into a Digidesign Digi 002 with the HPF switch in. The vocals are very
dynamic and I've tried a variety of things to tame them. My plug‑in
options are all the Pro Tools LE 8 crew, plus the Waves Musicians II
bundle (Renaissance Vox, Compressor, EQ and a few others). I've
experimented with serious volume automation, some EQ notching and
different compression settings, but to no avail. It's the big, held
notes that are the problem. I'm happy riding out the fast peaks, but the
long notes always come across as harsh. Is it a matter of some
well‑applied multi‑band compression or a side‑chained compressor
stamping down on the harsh frequencies?

Platinumears' freeware IQ4 dynamic EQ plug‑in can seem rather complicated to set up, but it's powerful enough to deal with some of the most intractable mix processing problems, such as harsh intermittent vocal resonances.
Via SOS web site
SOS contributor Mike Senior replies: This isn't that uncommon a problem and sounds to me like one of the textbook applications for real‑time EQ changes. The problem is that some singers can create very powerful momentary resonances in their throat and mouth while singing and these, effectively, cause the levels of very narrow bands of harmonics to shoot through the roof. With shouty rock singers such resonances are often in the 6-14kHz region and can be exacerbated by insufficiently damped capsule resonances in cheaper mics. On the other hand, I've worked with an opera singer who produced a similar problem with projection resonances in the 1-2kHz region, so you just have to use your ears (and perhaps a high‑resolution spectrum analyser too) to home in on the offending frequency regions.
You've already found that fader automation and compression won't get you out of this scrape, and that's because neither deals with the underlying frequency balance issues. The nasty‑sounding frequency peaks will still be there no matter what level the overall signal is squished to. Likewise, ordinary EQ isn't much help either, because you often need quite dramatic notch-EQ cuts to smooth out the harsh notes, and these make the rest of the performance sound like the vocalist is singing through their scarf.
Possibly the simplest solution is to 'mult' the harshest notes to a separate track with its own, separate EQ setting. However, while this is comparatively quick, it's rarely precise enough to deliver really good results. A better‑sounding solution is to identify the problematic resonant frequencies (there are usually two or three) and then automate very narrow peaking‑filter cuts to ride their levels independently of the vocal signal as a whole. Tedious? Enough to make you consider Harakiri with your USB dongle.
If you don't fancy this messy demise, you'll be glad to know that there's another solution, although it does require the use of a forbiddingly complex type of audio processing called dynamic equalisation. This is where the gain controls of an EQ act like the gain elements of a dynamics processor, producing a kind of cross between equalisation and compression/expansion. By using dynamic EQ, you could set up a handful of EQ notches to target the harshest vocal frequencies, but then set up each band's dynamics threshold such that the gain cuts only kick in when those frequencies become loud enough to be irritating. If that sounds a bit tricky to set up, you're not wrong, but the upside is that it can work really well if you spend a little time configuring all the band parameters so that they precisely target the exact frequencies you're most annoyed by.
On a practical level, you don't actually appear to have a dynamic EQ plug‑in to hand, so you'd need to acquire something specifically for the purpose. On the face of it, multi‑band compression might appear to be suitable for the task, as it also combines elements of EQ and compression into a single algorithm. However, in reality, you usually need to control much narrower bands of frequencies than multi‑band compressors can typically isolate. Probably the most cost‑effective option, therefore, would be to use the (admittedly, brain‑meltingly configurable) freeware Platinumears IQ4 VST plug‑in within FXPansion's £55 VST To RTAS Adapter, as this would also make other freeware VST effects available to you in future. (Go to www.platinumears.com and www.fxpansion.com for more information.)
Published June 2010
Thursday, March 21, 2019
Wednesday, March 20, 2019
Q. Should I be using dedicated word-clock connectors?
When clocking an audio interface using an external device, such
as a stand‑alone mic preamp with A‑D conversion, is it better to use the
dedicated word-clock (normally BNC) connectors, or will the clock
signal be just as good coming down the S/PDIF, AES3 or ADAT cable that
is carrying the audio signal?

If a clock signal is a perfect square wave, as shown here, clock timing will be jitter free. However, passing an AES3 signal down a capacitive cable distorts the waveshape and introduces a timing ambiguity called 'interface jitter'.Photo: Prism Sound
Sam Wood, via email
ASOS Technical Editor Hugh Robjohns replies: Theoretically, recovering the clock from a dedicated clock source via word clock should be easier and better — with less intrinsic interface jitter — than trying to extract an embedded clock from AES3, S/PDIF or ADAT interfaces.
The reason is that word clock is a really simple square-wave signal running at the sample rate. Cable losses will slow the transitions, so what falls out the end of the cable will probably be a little more rounded than what went in. But the important point is that the periods between each transition from high to low (and vice versa) will remain absolutely consistent. It's those transitions that define the sample points.
By contrast, AES3, S/PDIF and ADAT all embed the clock pulses within the audio stream by using a type of modulation process. The result is that the transitions depend on both the audio data and the clock data, so the transition rate varies. The inherent capacitance within the cable reacts with those transitions and the result is small, but varying, time shifts of the transition point. This process is called 'interface jitter', and it is an intrinsic part of that kind of digital audio interface. The diagram above, courtesy of Prism Sound, illustrates the effect.
Fortunately, interface jitter can be removed fairly easily using phase‑locked loops (PLLs) or other, often proprietary, techniques these days. Moreover, it doesn't actually matter in the case of transferring digital audio from one digital machine to another, anyway, provided all that is required is to identify each data‑bit value reliably.
Where interface jitter becomes important is in the D‑A conversion stage, or when clocking an A‑D converter from an external master clock. In both of these situations, the signal is being converted between the analogue and digital domains, and precise, jitter‑free sample-clock timing is, therefore, absolutely essential.
That's why it's best to run an A‑D from its internal crystal clock, rather than an external master clock, if possible, and why good D‑As go to so much trouble to isolate and remove interface jitter.
Published April 2010
Tuesday, March 19, 2019
Monday, March 18, 2019
Q. Do my gain settings have to be matched?
The way I mic up drum-kit overheads normally means that there is
a slight level difference between the left and right gain settings. It's
not more than 10dB at peaks, but it is noticeable. I'm using a pair of
AKG C414 XLS microphones that are perfectly matched for any other work
I do with them, so I don't think they're at fault, and I've also used my
tape measure to check that the overheads are equidistant from the snare
and kick. It's really odd because, sonically, the overheads sound the
same; neither one is more bassy than the other, which might have
suggested a boundary effect. I've not always got both mics pointing at
the snare, though, so this may account for some level difference, and
one of the mics is closer to the wall than the other (about 1m away),
which might also be a factor, although that mic is pointing away from
the wall.

This is the rear side of the AKG C414 XLS microphone, showing two of its three rocker switches. These are quite easily adjusted inadvertently when positioning the mic, so it's worth double‑checking the LED settings before you hit Record.
I'm just trying to ascertain whether my mic positioning is awry or whether it's normal to have overheads with different average levels like this. So when I'm setting up the preamps for my cardioid drum‑overhead mics, should the gain settings be matched or should the peak level be the same, even if that means I have different gain settings?
Via SOS web site
SOS contributor Mike Senior replies: A level difference of 10dB between the snare peaks in each overhead mic is quite a lot so, to be honest, I smell a rat here on the technical side. Without knowing the specifics of your mic placement, I think it's unlikely that the low‑level mic's polar pattern is having that large an effect.
You'd only expect a 6dB attenuation even for sounds 90 degrees off‑axis so, unless you've got the arse end of the mic pointing at the snare, I can't see that being the culprit. If you do have one mic pointing completely away from the snare and the other pointing directly at it, I'd instinctively raise an eyebrow anyway, as the tonal differences this would create between snare sounds on each channel would probably sound a bit odd in stereo. However, the proof is in the pudding, and if an unorthodox mic position such as this produces the goods for you then, by all means, just match the snare levels by mismatching the gain controls.
The room might be having some effect but, again, I'd be surprised if it was an effect of that magnitude, so I can't truthfully say I'd look there for answers, especially given that the tone between the mics seems fairly consistent to you. Perhaps if the room is fairly dead‑sounding and the drummer is blocking the sight‑line between the low‑level mic and the snare, you might expect some level loss, and this could conspire with the mic's polar pattern to achieve that kind of level difference, but I'm still suspicious that there's simply something technical amiss.
First off, I'd check filter or pad switch settings on the mics or preamps. Those new AKG mics have a lot of switch settings, and their rocker design makes them prone to inadvertent adjustment during normal handling. You also need to look quite carefully at the LED status indicators to check that the settings are as you expect them to be. My best guess is that you've put your thumb on the pad selector switch and knocked it down 6dB, at which point an additional 4dB level change is much more likely to be arising from your microphone positioning.
My other idea would be that maybe something is awry with a balanced cable or socket somewhere, because unbalancing a balanced line can lose you 6dB in some instances too. It's easy enough to check for this, though, as it's just standard studio troubleshooting. Try swapping individual components between the two analogue signal paths and if the level difference migrates between them, also, you can point the finger of blame at whatever it is you've just swapped over.
Published April 2010
Saturday, March 16, 2019
Friday, March 15, 2019
Solid-state Drives
The silent studio is a real possibility now
that solid‑state drives are offering unrivalled transfer rates, free
from mechanical noise. So why aren't we all switching over?

Solid-state drives, such as the popular Kingston model shown here, are an ideal way to minimise boot‑up and application launch times.
Most modern mechanical hard drives spinning at 7200rpm manage between 100MB/second and 150MB/second sustained transfer rates, and slightly less than 10ms access times as their read/write heads whizz about getting to the appropriate location on the magnetic discs. However, SSDs (solid-state drives) offer sustained transfer rates of over 200MB/second and amazing random access times of a fraction of a millisecond, which means that using an SSD to install Windows and its applications will give you significantly faster boot‑up and application launch times.
Solid-State Drives & The Musician
Rather like a USB flash drive (but without the bottleneck of its USB 2 connection), the SSD relies on Flash memory for its storage and, therefore, has no moving parts, making it more rugged. This aspect of its performance makes it attractive to musicians both on stage and in the studio; its lack of moving parts results in lower power drain and renders it completely silent.So why aren't we all swapping over? One reason is cost. For a similar outlay to a 2TB mechanical hard drive (that's 2000 Gigabytes) you're only likely to get a 64GB solid-state drive, which is about the minimum capacity you'd need to install Windows and a few applications.
This means you'll probably need two mechanical hard drives as well — one for audio streaming and the other for sample libraries — and, given that most audio applications rarely access the Windows drive or partition after their initial launch, this means the SSD is only offering you the advantage of a faster start‑up time, and no real‑time performance enhancements.
Another down side is that the memory cells of solid-state drives eventually wear out. Admittedly, though, they tend to be rated for tens of thousands of read/write cycles and, therefore, have a lifespan of many years.
Flash memory is also typically accessed in 512KB blocks, so if you only need to store a single kilobyte, this happens very quickly with an empty SSD. However, once the drive is partly filled, that same kilobyte of data might require a 512KB block with at least a kilobyte of empty space to be read into a cache, have the new data slotted in, and then the resulting 512KB block written back again. More overheads!
Installing a solid-state drive in your audio PC is currently considered a luxury but, as with all computer storage options, prices will drop and overall performance will improve. I'm sure it won't be long before we wonder how we managed without them, as the silent studio gets ever closer!
IndyGo FXTractor

Robin Schmidt's freeware Signal Analyzer is a great tool if you want to learn more about waveforms and harmonics.
Back in PC Notes June 2007, I discussed the new VST3 preset format first used in Steinberg's Cubase 4 (and now in its successor, Cubase 5). Along with Steinberg's MediaBay database functions, the VST3 format allows VST plug‑ins and instruments to be tagged with styles and characteristics, such as Acoustic/Percussive or Clean/Dirty.
Of course, all Steinberg's new bundled instruments and plug‑ins have sets of carefully tagged presets, and Cubase 4 or 5 will happily import presets in Steinberg's older VST2 FXP/FXB formats, so various helpful users, spearheaded by Jan Lanter of Lanter Audio, have subsequently carried out the donkeywork, converting a swathe of third‑party preset banks into the new VST preset format (http://projects.lanteraudio.nl/downloads/cubase).
However, Cubase 4 and 5 will only save presets in the new VST preset format, which has proved to be a real annoyance for many Cubase owners who want to share their presets with users of virtually every other VST‑compatible sequencer that only loads FXP/FXB. There's even a poll on the Cubase forums pleading for FXP/FXB save functions to be added to Cubase 5.
Fortunately, help is at hand from third‑party developer IndyGo, whose small FXTractor utility (www.indygo.de/fxtractor) allows you to drop VST preset files or complete folders onto its window and have them converted to FXP and FXB formats. It's still at an experimental stage, with no guarantees, but has been tested on Windows 2000, XP, Vista and 7. So if you've got VST presets that you need to share with other sequencer users, why not give it a try?
Shareware Spotlight
Robin Schmidt has some intriguing PC‑only shareware products on his web site (www.rs‑met.com), such as the Straightliner subtractive synth and the very flexible Echo Lab effect. He also offers a range of very useful freeware 'Music Engineering Tools', including a particularly useful MIDI Monitor that lets you filter out various MIDI data options. Anyone who has needed to examine the output of their MIDI keyboard or controller in the past, during a fault‑finding session, and got frustrated by an endless scrolling stream of FE Active Sensing messages emerging from it, can finally make them disappear for good!However, for me the most useful tool in Robin's collection is his new freeware Signal Analyzer. It does take a lot more CPU power in its spectrum analyser mode than others in my collection, but I think this is outweighed by the convenience of being able to switch instantly between frequency and time domains (i.e. spectrum analyser to oscilloscope). You can learn a huge amount by studying waveforms and which harmonics they generate!
Published April 2010
Thursday, March 14, 2019
Wednesday, March 13, 2019
Q. Which audio interface format is best for low latency?
I am about to set up a new rig for my friends. We're going to use Guitar Rig 3 and IK Amplitube Fender a lot, so we need an interface with very low latency. What hardware format do you suggest?
Via SOS web site
SOS contributor Martin Walker replies: Whether you have a Mac or PC, the best choice of interface depends on various factors. In general, the more tightly integrated the audio interface with the computer, the more likely you are to be able to run it at a lower latency, since there are fewer possibilities for interruption. If you're running a desktop computer, there may therefore be advantages to choosing a PCI or PCI Express (PCIe) soundcard, which may also give you tighter timing on its MIDI ports. If your computer has both types of slots available, PCIe is the more future‑proof option. If you want to take advantage of this closer integration with a laptop, nowadays your choice is limited to a few PCIe cards, since the older Cardbus slots are rarely found on recent models.
For many people, USB and Firewire audio interfaces are far more convenient alternatives, since you can quickly swap them between any desktop and laptop machine, but when your goal is really low latency be aware that some USB and Firewire models include small extra buffers to help smooth playback performance, which increases overall latency slightly. This may or may not be declared to your sequencer, which is why in my interface reviews I check the 'real world' latency to see if it's higher than expected.
You may also have to be careful about the make and model of controller chip found behind the Firewire ports on your computer, since some are not compatible with certain audio interfaces, and if you run into such problems you'll probably have to increase your buffer size (and hence latency) to avoid audio clicks and pops. Texas Instruments (TI) is the make most widely recommended by audio interface manufacturers, but you should consult the interface manufacturer's web site for specific chip‑set recommendations to avoid problems. If your computer has Firewire 800 ports, you have double the bandwidth compared with Firewire 400, but few musicians will actually need the extra unless they require more than about 56 simultaneous channels of 24‑bit/192kHz audio.
USB interfaces have traditionally been considered poor relations to their Firewire brethren, largely because earlier interfaces designed for USB 1.1 ports struggled for bandwidth when attempting stereo in/out at a 96kHz sample rate. However, today's Hi‑Speed USB interfaces can manage more simultaneous inputs and outputs than Firewire 400 devices, and have recently gained a new champion in RME, whose Fireface UC claims "revolutionary ultra‑low latencies”.

USB 2.0 audio interfaces have lagged in popularity behind Firewire models, but this could change with the introduction of RME's new Fireface UC and its "revolutionary ultra‑low latencies”.
However, there are two other key factors to running any audio interface at lower latency settings: driver quality, and how well your computer has been set up for audio purposes. The first of these is largely out of your hands, and while some manufacturers have gained a particularly good reputation for low‑latency performance, the lowest latency you can manage may vary between models from a particular manufacturer, and sometimes even between driver revisions.
More critical to achieving low latency in many cases is your computer. Well‑chosen hardware components and implementing recommended operating system 'tweaks' for audio (such as those published in SOS) can often result in you being able to use smaller audio buffer sizes, since these minimise the chances of any non‑audio component or task interrupting the smooth flow of audio. Overall, over the last few years I've been able to run most review audio interfaces across all hardware formats at buffer sizes down to about 64 samples (1.5ms latency at 44.1kHz), but this is largely because my PC is properly set up for audio purposes.
Published December 2009
Monday, March 11, 2019
Q. What do I need to start recording my own music?
As an acoustic musician, I'd like to start learning more about recording and mixing my own material. So far I have no equipment of my own and a budget limited to a few hundred pounds. What are the absolute basics that I'd need to do some vocal or guitar recording at home? As I currently own a PC, should I be thinking of extending my budget and moving to Mac instead?
Chris Simpson, via email
, a good first interface for beginners.")
For novice recordists, the cost of a setup can be kept low by home-made solutions like a 'coat-hanger and nylon stocking' pop-shield, and careful gear choices such as the Focusrite Saffire 6 (below), a good first interface for beginners.

SOS contributor Mike Senior replies: The good news is that a starter setup that will deliver respectable vocal and acoustic guitar recordings needn't set you back a tremendous amount of cash, especially if you already have a fairly modern PC. However, there are a lot of options available to you and it makes sense to find equipment that will remain useful to you if and when you expand the setup later on.
First off, you'll need a mic — the sound of a DI'd acoustic guitar doesn't usually cut the mustard in the studio, and most singers don't have a DI socket at all. (Plain selfish of them, if you ask me, but there you go.) A good first choice would be a large‑diaphragm condenser mic, and fortunately market forces have squished the prices of these in recent years, so there are some good deals to be had here. Out of choice I'd tend to gravitate towards established manufacturers with a history of R&D, and I'd also look for something with three polar patterns, too: omni and figure‑of‑eight patterns tend to sound clearer on budget mics and will also make the mic more future proof. A couple of recent mics that fit these criteria would be the Audio Technica AT2050 and AKG Perception 420 (retail prices are between £219 and £279 in the UK, but both are currently well under £200 on the street), and each has a decent shockmount included, which is helpful for keeping your recordings clean.
If the mic is primarily going to be for your own voice, see if you can try out a couple of contenders before you buy. Budget mics can be quite coloured‑sounding, and this can either work for you or against you, depending on whether that colour suits your unique voice. When auditioning, pay particular attention to 'S' sounds, as these quickly highlight high‑frequency harshness, something cheap condensers can be prone to and which causes problems with both vocals and acoustic guitars.
Along with the mic, you'll need a stand and an XLR signal cable. The UK's Studiospares do a good basic studio stand at £12, and they also stock spare bits for it, which should help extend its working life. Their leads are good value too, and I'd recommend their £13 five‑metre mic lead, as it has solid Neutrik connectors that can be re‑soldered if the lead needs repairing. (For my money, cheaper leads with moulded connectors are a false economy because they can be difficult to repair.) You'll probably need a pop shield for vocal recording too, and although you could also buy one of those from Studiospares, a bit of nylon stocking stretched over an old wire coat hanger should be perfectly up to that task at this stage.
As far as your budget goes, then, you're looking at maybe a couple of hundred pounds for that lot in the UK, if you shop around, which does seem like a big chunk of your change gone already. However, that befits the fact that the mic is the most important thing in the setup — it's what actually captures the sound after all! Your next most important piece of gear will be what you listen back to your recording with. Given the budget and your likely monitoring environment, I think there's little point in investing in studio speakers at the moment, so try to get hold of a decent pair of headphones instead — probably a closed‑back pair that can also be used for overdubbing without spill becoming problematic. We did a big round‑up of the main headphone contenders back in January 2010 if you want to read a range of views, but my tip would be the AKG K240 MkII, which is an excellent monitoring option and, although it's semi‑open‑backed, it still seems to deliver low enough spill levels for most overdubbing purposes. Those retail at £138, but are currently more like £80 on the street.
If you've already got a PC, there's little advantage to be had in changing to a Mac just for recording purposes at this stage. Neither platform should hold you back at all. What you will need, though, is an audio interface to get sound in and out of the computer, and some software with which to record. The interface will need to have at least one phantom‑powered preamp for your mic and an output for your headphones, but there's a lot of choice here and I'd look for something that has both a second mic input and a dedicated instrument input socket. The Focusrite Saffire 6 USB, M‑Audio Fast Track Pro and Presonus Audiobox all offer these features and you should be able to get hold of any of them for around £120 if you play your credit cards right. They all also include free software bundles, including a 'Lite' version of either Steinberg's Cubase or Ableton's Live recording application. The new Alesis Multimix 4 USB is even cheaper (you can easily pick it up on-line for around £75), but doesn't appear to offer any kind of software bundle. For my money, a Cockos Reaper license (which you may have seen me using in the Mix Rescue column) is a steal at $60 and knocks any 'Lite' software version into a cocked hat as far as recording and mixing are concerned.
According to the back of my envelope, that lot should set you back a few hundred pounds. Not a lot when you consider that a good engineer could probably produce a commercial record with nothing else!
Published March 2010
Saturday, March 9, 2019
Friday, March 8, 2019
Q. Will my gear be affected by freezing-cold conditions?
My studio gear is currently set up inside my garage, and lately it has been freezing cold inside. Though there is no surface moisture on the gear (so I am assuming that nothing is condensing), I am worried that my gear could be affected by sub‑zero temperatures overnight.

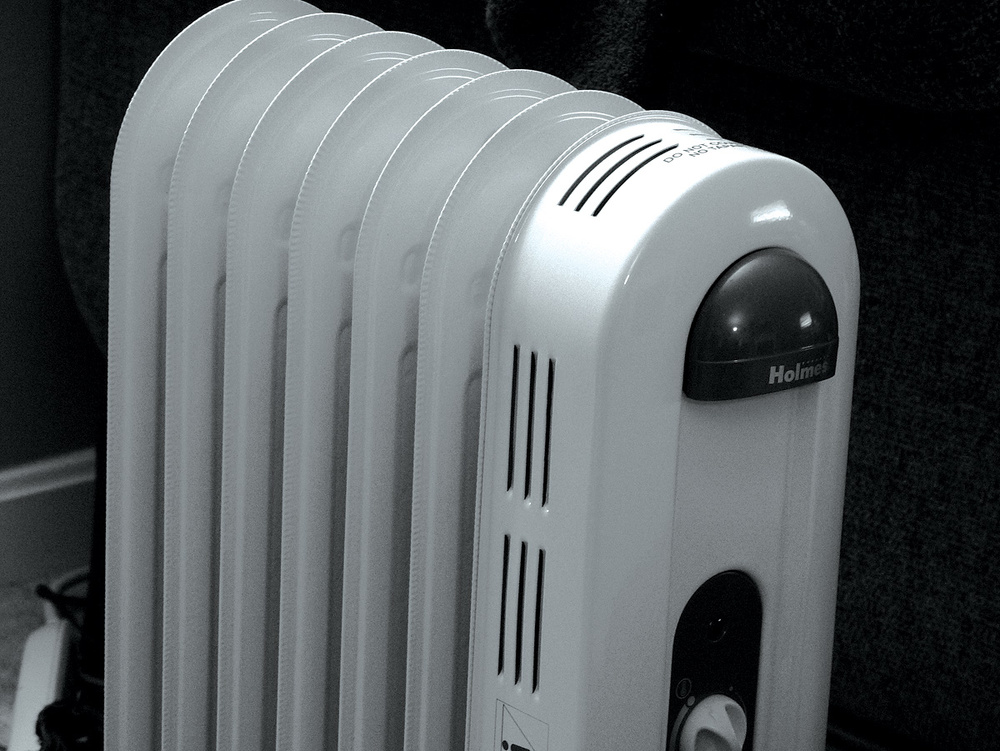
Walking into a very cold studio is never very inspiring, especially if the change in temperature once the room starts to warm up could damage your equipment. Investing in a heater to keep the studio at a reasonable temperature during the winter could be a very wise move.
Via SOS web site
SOS Technical Editor Hugh Robjohns replies: If you look at the specifications for any piece of electronic equipment (normally printed in the handbook or available on‑line), you will usually see a specification for the acceptable storage and operating temperature ranges (and sometimes a figure for acceptable humidity too). The range of temperatures in which a product can be stored is usually significantly wider than that in which it can be operated, and both are generally wider than the range of temperatures typically experienced in the UK.
So the short answer is that for most people it is unlikely that their equipment will suffer damage overnight just because of cold temperatures. Be aware, however, that a lot of plastics do become significantly stiffer or more brittle in the cold, so cables will be less flexible and plastic components are more likely to break. This is more likely to be an issue with tape and video recorders, or other machines with moving parts, than with computers and mixers, but worth bearing in mind all the same.
Humidity is usually a more serious problem, though, and you are right to be more concerned about that. Condensation forms when warm, humid air comes into contact with something much colder, taking that air below the dew point. I wouldn't expect to see condensation on the equipment in the morning because both air and equipment will be at the same temperature. The problem will come when the air in the room starts to heat up (because of the heat from your body, the room lighting and any equipment you switch on), but the equipment remains cold (initially, at least). The condensation that forms can cause all manner of electrical problems, ranging from potentially very serious electrical short-circuits at one extreme to annoying intermittent computer glitches at the other, and mechanical problems such as rust and corrosion.
The best approach is to keep the room comfortably above the dew point by having some form of safe low‑level background heating overnight. A night storage heater or an oil‑filled electric radiator is probably the best solution — and it's always more pleasant and inspiring to walk into a studio that has some residual warmth than trying to become motivated in a freezing‑cold room!
Published March 2010
Thursday, March 7, 2019
Wednesday, March 6, 2019
Q. Are matched pairs really that important?
Are matched pairs of mics for stereo recording really so important, given that my preamps won't always be perfectly matched? Even if they are, does it matter if I just crank one of the mics slightly higher, say? I have one Rode NT55 and am enjoying it. Would it not work well for stereo applications if i just bought another?
Via SOS web site
SOS Technical Editor Hugh Robjohns replies: Preamps actually stand a very good chance of being matched to far tighter tolerances than any mic ever could be. A preamp only needs to match its gain and frequency response. Modern electronics mean that the frequency response can be flat from a few Hz to many hundreds of Hz within a fraction of a decibel every time, and with a variable gain control, gain matching between channels can be as good as your nulling technique — and easily to within a fraction of a decibel, again.

Many factors are involved in producing matched pairs of microphones, and they're highly recommended for stereo recording.
Microphone matching is about much more than gain (which is easily corrected using the preamp gain control, anyway). It's also about frequency response, which can be affected by capsule age and condition, the way the capsule is mounted in the mic body, the condition of the protective grilles, and the tolerances of the electronics in the impedance converters of electrostatic mics. It's also about the linearity of the polar pattern: the sensitivity at different frequencies and different angles. This polar‑pattern precision is actually where the biggest differences occur between mics, and it is also what determines stereo imaging precision when you use the mics as a coincident pair.
There's a process for checking how well matched two mics are. You'll need a largish room, an assistant, and a reasonable monitoring setup.
1. Rig the two mics with one directly above the other, both facing the same way, and with their diaphragms aligned as closely as possible. The mid‑point between them should be at the same height as your assistant's mouth when standing.
2. Connect the two mics to a pair of preamps, set the gains of both preamps to their lowest (quietest output) setting, and monitor the outputs of the preamps, one routed to the left speaker and the other to the right. Check that both are working and ensure that there's no EQ or dynamics processing in either channel.
3. Get your assistant to stand directly in front of the two mics, a couple of feet away, and talk at a sensible level. Adjust the gain of one of the mic preamps (say, the left channel) to set a sensible level on the monitors.
4. Invert the polarity of the other (right) mic. Switch the monitoring to mono. Gradually increase the gain of that second mic (the right channel) until the signals from the two mics start to cancel each other out. Fine‑tune the gain of the second channel for the maximum null (ie. the quietest output). It probably won't disappear totally, but it should be better than ‑20dB at least, at all frequencies. If it isn't, the two mics aren't matched and aren't suited for coincident stereo applications.
5. With the on‑axis voice properly nulled, you can ask your assistant to circumnavigate the mics while talking constantly. If the two mics are perfectly matched in terms of their polar and frequency responses, the output should remain at least as quiet as the nulled on‑axis level. If the output becomes louder at any point — especially around the front half of the mics' pickup area — it's a very good indication that the mics aren't adequately matched for coincident stereo applications, and the result will be spatial errors and inconsistencies in the stereo signal. To get an idea of how bad that could be, remove the polarity inversion from the right channel, so that the signals from the two mics add constructively. With your assistant talking on‑axis to the mics again, you should hear loud, clear speech with a solid phantom image midway between the two speakers.
6. Switch the monitoring back to stereo. The image should not change; there should still be a solid phantom image dead‑centre. If it does move, something is horribly wrong with your monitoring chain.
7. While still listening in stereo, get your assistant to continue to witter away whilst walking in a slow circle around the microphones, maintaining as constant a distance from the capsules as they can. As the assistant circumnavigates the mics, you'll hear the level fall and rise, corresponding to the polar pattern of the mics. This is a useful test in its own right to check how frequency response changes with angle across the front, and where and how deep the rejection nulls are. For example, if the mics are cardioids, the level will fall smoothly from the front (12 o'clock) to about 3 o'clock — and you'll probably notice the HF response changing as the assistant moves off‑axis too. From the 3 o'clock position, the level will then fall faster towards the rear (6 o'clock), where you'll only hear room ambience and very little direct sound. The level will then build again as they return towards the front through the 9 o'clock position.
9. While the assistant travels around the mic, you should also listen critically for the stability of the stereo image. The two mics are facing the same way, and if they have identical polar patterns the image should remain rock solid in the centre. Any pattern differences at all will result in the stereo image pulling towards one side or the other, possibly only for small parts of the spectrum (for example, sibilances might appear to come from half left with a certain angle of incidence to the mic). You might well find you get image pulls around the rear of the mic, and that's not too important, but any obvious image shifts across the front half (the 9‑12‑3 o'clock region) means that the mics aren't suited for coincident stereo operations because their polar patterns are not sufficiently closely matched. If all is well, the mics can be used for coincident stereo recording.
Published December 2009
Tuesday, March 5, 2019
Monday, March 4, 2019
Q. Why did my mixes sound bad on a car stereo?
When I'm happy with a mix, I usually bounce it down and listen to it on my home stereo, MP3 player, car stereo, and round a mate's house on their stereo as well, to make sure it sounds good. I have some mixes at the moment that sounded terrific through all of the above, but then I got asked to play them through an iTrip device on a car stereo and they sounded rubbish: the vocals were really boxy and it really took a bite out of my pride in these songs. Should I revisit the mixes and try to compensate, knowing how good they sound on every other system I've heard them on? Do you know if the iTrip process has an audible effect on the music that can be used as a starting point, to compensate? I've never used one before.

If you find that your productions sound different when played via a portable FM transmitter such as Griffin Technology's iTrip, it could indicate problems with the mono compatibility of your mix.
Via SOS web site
SOS contributor Mike Senior replies: It sounds like you've been doing a pretty good job of checking your mix on different consumer systems, which is certainly good practice in itself, but it will only work properly for you if you know how those systems respond to known reference tracks, as well as to your own mixes. Even presuming that these different monitoring systems reveal everything you need to hear in your mix, you've still got to make subjective judgements about the balance and tone, and those need to be made within the context of the market your mixes are aimed at. If, for example, all your listening systems happen, in general, to emphasise the frequency extremes, then you may underplay these regions in your mix, unless your reference tracks alert you to this effect. The result: a slightly boxy mix as far as the public in general are concerned.
Although I've not heard the iTrip, I have heard a couple of these kinds of FM transmitter gizmos, and I didn't notice them doing anything particularly drastic to the mix itself — and certainly nothing worse than I'd expect of other real‑world consumer listening devices! It's more likely in your case that there was some EQ setting on the particular car stereo that was receiving the signal which didn't agree with your mix. Again, a quick blast of some of your reference tracks through the same chain would get to the bottom of that in a trice: if everything sounds boxy coming out of that system, then so should your mix!
However, you might find that the FM signal put out by that particular iTrip transmitter isn't very powerful (or maybe the unit is just low on battery power), in which case the FM receiver in the car might automatically have switched its reception to mono in response to the weak signal, thereby exposing a mono‑compatibility problem in your mix. I notice that all your listed systems appear to be stereo, so it's possible you've not checked the mix in mono. Try it out and see if you hear the same undesirable effects. If you do, then take a close look at any stereo effects on the vocals in particular. Budget stereo reverbs, especially, can really suffer in mono.
Published December 2009
Saturday, March 2, 2019
Friday, March 1, 2019
Q. How can I achieve a ‘dry’ sound?
I record and mix in my 'studio', which isn't too great acoustically. I can manage somehow when mixing, by working on headphones and doing lots of cross‑referencing, but the problem is that when it comes to recording I really hate the room sound on my vocals, and most of all on acoustic guitars, which I use a lot. The reverb tail is pretty short, but I'm still having a hard time getting a nice dry sound on my guitars, because I can't record dry! I know that the obvious solution is to treat the room, but the truth of the matter is that I can't do much better than this for now. So is there any way to treat a 'roomy' sound (on vocals and guitar) to make it sound drier? I know it is very difficult, or maybe impossible, especially for acoustic guitars, but any kind of suggestion, even for small improvements, would be very welcome.

A high‑resolution spectrum analyser such as Schwa's Schope lets you quickly and precisely home in on specific resonant frequencies that may be responsible for a coloured or uneven sound.
Via SOS web site
SOS contributor Mike Senior replies: Given that the reverb doesn't have a 'tail' as such, I reckon it's the reverb tone that's the biggest problem, so trying to use some kind of gating or expansion to remove it is unlikely to yield a useful improvement. You could help minimise the ambient sound pickup by using a directional mic for both vocals and guitar and keeping a fairly close placement. For vocals, very close miking is pretty commonplace, but for acoustic guitar you might want to experiment with using an XY pair of mics instead of a single cardioid, to avoid 'spotlighting' one small area of the guitar too much. That setup will usually give you a more balanced sound because its horizontal pickup is wider than a single cardioid on its own. In all but the smallest rooms, it's usually possible to get a respectable dry vocal sound just by hanging a couple of duvets behind the singer, and because I suspect that you've already tried this fairly common trick, I'm suspicious that room resonances are actually the biggest problem, rather than simple early reflections per se. Duvets are quite effective for mid‑range and high frequencies, but aren't too good at dealing with the lower‑frequency reflections that give rise to room resonances.
So given that room resonance is likely to be the problem, what can you do about it? Well, if you've no budget for acoustic treatment, I'd seriously consider doing your overdubs in a different room, if there's one available. If you're recording on a laptop, or have a portable recorder, maybe you can use that to record on location somewhere if you're confined to just the one room at home. I used to do this kind of thing a lot when I first started doing home recordings, carting around a mic, some headphones and a portable multitrack machine to wherever was available.
Part of what the room resonances will be doing is putting scary peaks and troughs into the lower mid‑range of your recorded frequency response, but the exact frequency balance you get will depend on exactly where your player and microphone are located in relation to the dimensions of the room, so a bit of determined experimentation in this respect might yield a more suitable sound, if not quite an uncoloured one. You might find that actually encouraging a few more high‑frequency early reflections using a couple of judiciously placed plywood boards might also improve the recorded room sound a little. A lot of domestic environments can have a bit too much high‑frequency absorption, on account of carpets, curtains, and soft furnishings.
After recording, you could also get busy with some narrow EQ peaks in the 100‑500Hz range, to try to flatten any obvious frequency anomalies. One thing to listen for in particular is any notes that seem to boom out more than others: a very narrow notch EQ aimed precisely at that note's fundamental frequency will probably help even things out. You can find these frequencies by ear in time‑honoured fashion by sweeping an EQ boost around, but in my experience a good spectrum analyser like Schwa's Schope plug‑in will let you achieve a better result in a fraction of the time. However, while EQ may address some of the frequency‑domain issues of the room sound, it won't stop resonant frequencies from sustaining longer, which is just as much part of the problem, and there's no processing I know of that will deal with that.
For my money, this is the kind of situation where you can spend ages fannying around with complicated processing to achieve only a moderate improvement, whereas nine times out of 10 you'll get better results much more quickly by just re‑recording the part.
Published January 2010
Subscribe to:
Posts (Atom)