Welcome to No Limit Sound Productions

Company Founded
2005
Overview

Our services include Sound Engineering, Audio Post-Production, System Upgrades and Equipment Consulting.
Mission
Our mission is to provide excellent quality and service to our customers. We do customized service.

Monday, September 30, 2019

Q. What do sample players do, and why do we need them?

By Martin Walker
I've been thinking about buying some sample packs, as I've read reviews of some that sound really interesting. However, a lot of them require specific players, such as Kontakt and Elastik. Can you explain to me what these players are for? Can I not just load the content directly into my DAW?
James Turpin via email

SOS contributor Martin Walker replies: There certainly are sample collections that are just that: a set of audio files that you can load into any DAW or audio editor, and this is the simplest and most appropriate format for some material. However, the problem with WAV or AIFF‑format samples is that if they don't come exactly as you need them, you may need some work to fit them into your songs. For instance, let's say you buy a pack of drum loops, and you really like one that runs at 135bpm, but you want to use it in a song that is at 128bpm. To make it fit your new tempo you'll have to use an audio time‑stretching function — assuming your DAW offers one of high enough quality, that is. Or say you want to use a bass riff that's already at the correct tempo, but is in the wrong key: this time you'll need to use pitch‑shifting, and, once again, you'll be relying on the quality of the algorithm to keep your riff sounding as similar as possible to the original when it's been transposed.

Sampled instruments may feature multiple samples for each note to capture all the changes in timbre, from low notes to high notes, and soft ones to loud ones. Once again, you could build up tunes by dropping samples of individual notes into your song at the appropriate times. But wouldn't it be easier if you could just play the appropriate notes on a musical keyboard and have some software choose the correct samples for you?

This is essentially what a sample player does: it takes care of all the behind‑the‑scenes selecting of samples from the set, plus any time-stretching or pitch-shifting needed, so that samples can be 'stretched' across the keyboard as required. Most also offer tempo‑sync functions so that drum loops, for example, get automatically stretched or squashed to lock to your song's timing.

Every sample player offers these basic features, and most modern ones can stream all that sample data from your hard drive as and when it's needed, so you can access many gigabytes of sample data in a song without needing to load it all into your DAW at once.A sample player (such as NI's Kontakt 4 shown here) does a lot more than play back samples. In this library from Heavyocity we can see how lots of samples have been mapped across the musical keys so you can easily play them in combination, while a set of custom controls has been specially programmed to tweak them to your taste.A sample player (such as NI's Kontakt 4 shown here) does a lot more than play back samples. In this library from Heavyocity we can see how lots of samples have been mapped across the musical keys so you can easily play them in combination, while a set of custom controls has been specially programmed to tweak them to your taste.
Many sampler 'engines' also offer their own unique sets of extras, such as filters that change the timbre of samples over time, envelopes that enable you to change the attack or decay times of each note, and effects such as reverb. They may also offer customised graphic interfaces for each instrument and special performance features (such as 'round robin' sampling of instruments, so that each time you play a note it sounds slightly different, just as real acoustic instruments do).

So there is often a huge amount of difference between auditioning the raw samples and hearing the end result via a sample player 'engine'. By supporting a specific sample player, a developer can not only use its special features, but may also get some protection against piracy by having their library specially keyed to a serial number or licence, whereas collections of samples can never be protected in this way.

Some developers do release their products across a range of formats, but the more special features of a specific sample player they use, the more likely a product is to only be released on that single format. However, most sample players, including NI Kontakt, Steinberg HALion, Ueberschall Liquid/Elastik and Yellow Tools ENGINE run on both Mac and Windows and within the majority of sequencer applications.


Published March 2011

Friday, September 27, 2019

Q. How can I link outboard to prevent degradation in quality?

By Matt Houghton
I have a few bits of outboard gear that I want to set up as external plug‑ins in Cubase. Should I be linking each bit of gear to different inputs and outputs of my soundcard (a Focusrite Saffire Pro 40), or should I just use a patchbay so that I can link multiple processors together in series? Presumably, doing it the latter way, I get less degradation of the audio signal as it's not passing through the Saffire's D‑A/A‑D each time?
Adding external effects with hardware can really open up your options in terms of adding character to your music. With good‑quality gear, you'd have to go through several stages of conversion to notice any degradation in sound quality.Adding external effects with hardware can really open up your options in terms of adding character to your music. With good‑quality gear, you'd have to go through several stages of conversion to notice any degradation in sound quality.Q. How can I link outboard to prevent degradation in quality?

John Corrigan via email
SOS Reviews Editor Matt Houghton replies: You are perfectly right in theory: yes, there is some distortion each time audio passes through your interface's A‑D or D‑A converter stages. So, if you're chaining multiple processors in series (say, an EQ and a compressor), then it's better to only pass through one stage of D‑A and A‑D conversion. But that's the theory and (as in all matters audio), in practice, it comes down to what you can hear.

With a good modern interface, like those in Focusrite's Saffire series, you have to go through many stages of conversion before you'll notice any audible degradation. This is especially true if you're using outboard to impart a bit of 'character' or 'flavour'; it's extremely unlikely that a couple of extra stages of conversion will be at all noticeable. If you're a mastering engineer then maybe you have good reason for worrying about this, but then you'd already know enough from listening to the difference that you wouldn't be asking this question! In my opinion, the benefits, in terms of saving time and being able to go with the creative flow of patching in your external effects as if they are DAW plug‑ins, far outweigh any theoretical disadvantage. Just remember to use and trust your ears! 


Published March 2011

Wednesday, September 25, 2019

Q. What does diatonic mean?

By Len Sasso
I know that the white keys on a keyboard form a diatonic scale, but what does diatonic really mean?

Rob Fowler
Finger on piano keyboard.

SOS Contributor Len Sasso replies: To understand the meaning of diatonic, it helps to think of a scale not as a collection of notes, but rather as a series of intervals. The definition of a diatonic scale is that there are five whole-tone and two semitone intervals in the series and that the semitones must always be separated by at least two whole-tones.

Using '2' to symbolize the whole-tone steps and '1' for the semitone steps, the major diatonic scale corresponds to the interval series 2212221. No matter what note you start on, following this prescription yields a major diatonic scale — the white keys starting on C is one example. It turns out that all possible diatonic scales are constructed by starting somewhere in the major diatonic scale and continuing until you reach the same note you started on. Those are generally referred to as the church modes: Dorian for 2122212, Phrygian for 1222122, Lydian for 2221221, and so on.
While the preceding definition is correct and functionally useful, it might leave you a little cold, as it does nothing to explain why those intervals are used or why the seven notes in a diatonic scale are chosen over the other notes in the 12-tone equal-tempered scale.

For reasons deriving from the physics and maths of sound, the strongest harmonic relationship aside from the octave is the perfect fifth, which makes G the closest relative of C, for example. Since C stands in the same relationship to F as G does to C, it makes sense that a scale centered around C should contain both G (called the dominant) and F (called the subdominant). The next closest harmonic interval is the major third. Together, the root, major third, and perfect fifth constitute a major triad, and it's not too big a stretch to imagine that you might want to construct a major triad on the three notes C, F, and G. Do that and you have the seven notes in the C diatonic scale.

There's still the question of why there are five other notes in the 12-tone equal-tempered scale, and the answer contains a hidden but important compromise. You can make music, which is naturally called diatonic music, with just the seven notes of the diatonic scale. And if you did that, they would in fact be slightly different notes from the ones you find in the equal-tempered scale. If you want to expand the system to accommodate diatonic scales in other keys, one natural way is to iterate the process of adding perfect fifths. This produces what is commonly called the 'cycle of fifths', but is actually a spiral of fifths that never really comes full circle. But if you make the perfect fifths just slightly flat, they do come full circle after 12 steps. Miraculously, you also wind up with notes that are close to the major thirds — they're a little sharp and a little more out of tune than the fifths, but still usable.

This compromise gives us the 12-tone equal-tempered scale (equal-tempered meaning all the intervals are the same). Relative to C, the extra five notes turn out to be where you find the black keys on the piano keyboard, and that's why the intervalic definition we started with works.


Published September 2003

Monday, September 23, 2019

Q. Do I need balanced patchbays?

By Mike Senior
I am currently setting up a home studio, which I'm hoping to eventually turn into a professional facility, based around a Soundtracs Topaz desk, three Egosys Wamirack soundcards and a Pentium 4 PC, with numerous synths, samplers, effects and other outboard gear. I'm now looking to wire everything together using patchbays. Bearing in mind that my console does not accommodate balanced outputs and insert points (the only balanced connections on the console are at the input stages of all channels and the effects returns), can I use unbalanced patchbays, thereby simplifying the patch lead requirements? If you are going to suggest a balanced patchbay setup, could you describe where to connect and disconnect the ground/screen connections to avoid ground loops.

SOS Forum post
Installing balanced patchbays (as opposed to unbalanced ones) makes dealing with hum much, much easier.Installing balanced patchbays (as opposed to unbalanced ones) makes dealing with hum much, much easier.

Reviews Editor Mike Senior replies: It sounds like you've already invested a good deal of money in the gear, and there's certainly enough there to produce high quality audio. However, if you're going to retain audio fidelity with so many pieces of equipment working together, I would try to balance as many of your analogue audio cables as possible.

Even in my more modest home setup mains hum and induced noise are problems (which have taken upgrading to balanced connections to sort out), so if you're ever hoping to use your studio professionally you don't really have a choice. Even in commercial studios a lot of time can be spent dealing with hum, so it's worth planning for it now, in my opinion. Unbalanced connections are fine for a smaller setup than yours, but, at the stage you're at, I reckon it's a recipe for disaster.

The great thing about balanced connections is that lifting the earth connections between equipment to break earth loops is comparatively easy — just disconnect the earth wire at one end of the signal cable — but with unbalanced gear the same trick very rarely works in practice and will often make things worse. If you're wondering how to decide where to make this disconnection in your system, Mallory Nicholls suggested that his preferred method was "to connect cable shields at equipment outputs and not at equipment inputs" in his Studio Installation Workshops in SOS September 2002and November 2002. So, disconnect the shield just before it reaches the equipment inputs. If you're using any moulded cables, then you might have to perform some modification on the patchbay, but this is not usually too difficult to work out — it's what I did, and it's worked very well so far!

To incorporate any unbalanced devices within the balanced system, you have two main choices: unbalance at the input to the unbalanced device — connect one of the balanced signal wires to the jack sleeve, along with the earth wire, and don't disconnect the earth wire elsewhere — or use a balancing transformer to do the interfacing. 

The second solution is more costly, but may be the only way to solve any hum problems which the first solution may create. Maybe you'll be lucky and not get any appreciable hum using the first system, but if you do get hum then have a look at the Ebtech Hum Eliminators — there's an eight-channel one for £295 which would probably isolate enough connections to sort remaining hum problems out. I've only needed to use a two-channel one to sort out a persistent hum in my system, but yours is much more complex, and all of it will be connecting to the central desk, which multiplies the potential for hum.


Published September 2003

Friday, September 20, 2019

Q. What do Solo, PFL and AFL do?

By Hugh Robjohns
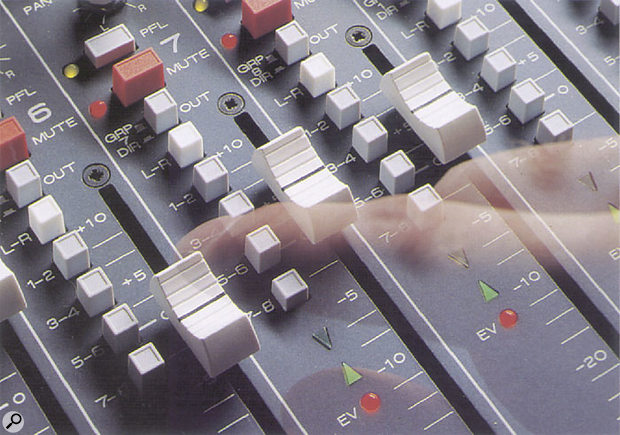
PFL button on a mixer.The Solo, PFL and AFL options on well-specified mixers allow the engineer to hear what's happening at different points in the channel's signal path.
Please can you explain the difference between 'soloing' a channel and using the other buttons marked 'PFL' and 'AFL' to listen to it. They seem to do very similiar but different things. Enlighten me!

Will Robinson

Technical Editor Hugh Robjohns replies: The PFL, AFL and Solo buttons found on the channel strips of professional mixing desks can be confusing if you're unfamiliar with their uses, not least because different manufacturers have different names for, and different ways of arranging these functions.

PFL stands for Pre-Fade Listen. It allows you to monitor the channel in question's signal level at a point immediately prior to the channel fader, and will therefore include any EQ or dynamics that might have been applied on that channel. Thus when setting up a channel's input gain using PFL, it's important to bypass any EQ and dynamics processing, otherwise you won't know what the actual headroom is at the front end. On mono channels, PFL is mono. On Stereo channels PFL should be stereo, but some cheap desks derive a mono PFL signal for both mono and stereo channels.

AFL, which stands for After-Fade Listen, is similar to PFL in function, but takes its signal from a point immediately after the channel fader, showing the level of the channel's contribution to the mix. AFL is also mono on mono channels.

Solo, more correctly known as Solo-in-Place (SIP), is an after-fade listen taken from after the pan control as well as the channel fader. It is therefore a stereo signal even on mono channels. The idea is to allow the monitoring of a channel signal when panned to its appropriate position in the stereo image. SIP is usually achieved by monitoring the main mix buss and muting all the channels other than the one you pressed the SIP button on. However, this means that you can't use SIP while mixing because it destroys the mix on the mix buss, muting aux channels as well as main channels. (PFL and AFL only affect the signal routed to the monitor outputs.) That's why SIP is often described as 'destructive solo monitoring'. Usually, you'll want to solo a channel and hear it with any associated effects returns, so selected channels can usually be made 'safe' from the SIP function, so that they continue to contribute to the mix when all the other channels are muted. A lot of desks have a single 'solo' button somewhere near the fader which can be configured to provide any or all of these functions.


Published September 2003

Wednesday, September 18, 2019

Q. Which sub-$230 audio interface should I buy?

By Matt Houghton
I've just bought an iMac and need a simple audio interface that I can connect via a Firewire cable. I want something simple and good quality to give me some decent guitar and vocal recordings, but only have around $230 to spend. Do you have any recommendations, and should I be looking on the second‑hand market?
Chris Lyons

SOS Reviews Editor Matt Houghton replies: Your question raises a few issues that need unpacking before making specific recommendations. Firstly, you don't need to think in terms of a Mac or PC interface, as most 'serious' budget interfaces will run on Mac or PC (Apogee and Metric Halo are the only companies I'm aware of that make their interfaces specifically for Mac but not for PC, and they come in above your budget). You've specified Firewire, but the fact that you're using an iMac means that you could consider either Firewire or USB interfaces. For the purposes you describe, either would be fine, unless you have other particularly bandwidth‑hungry devices running via the USB ports. The only other limiting factor, in terms of what will work with your computer, is going to be the version of Mac OS X you're using, and whether a given audio interface has drivers that support it.
Both the M‑Audio Fast Track USB and the Novation Nio come with bundled software, and at reasonable prices. The Fast Track USB comes with a version of Pro Tools M-Powered and would be a good choice for those on a very low budget for simple recording projects, while the Nio's I/O complement enables more flexible monitoring than some other budget interfaces.Both the M‑Audio Fast Track USB and the Novation Nio come with bundled software, and at reasonable prices. The Fast Track USB comes with a version of Pro Tools M-Powered and would be a good choice for those on a very low budget for simple recording projects, while the Nio's I/O complement enables more flexible monitoring than some other budget interfaces.

You also ask whether you should consider purchasing a second‑hand interface, presumably with the intention of getting more bang for your buck. 

Personally, I'd happily go second‑hand, but the usual caveats apply: make sure it's a legitimate seller, check things out before you buy and so on. More importantly, some older interfaces won't be supported by OS 10.6 (Snow Leopard), and that's worth bearing in mind even if you're running 10.5.x, as you may need to update at some point in the future. In other words, you can find a bargain, but you need to find out what your money's paying for!

If you're recording guitar, it makes a difference whether you plan to record acoustic or electric guitar with a mic, or electric guitar or bass via DI. The former requires two mic inputs to record guitar and vocals simultaneously, whereas the latter requires only one mic input and a separate instrument input.
Q. Which sub-$230 audio interface should I buy?

With this in mind, let's consider some specific interfaces. Some come with a bundled DAW of some sort, but as you'll already have GarageBand with your Mac, you may or may not think that important:
  • Line 6 UX1: I've seen this online for under $150, and not only does it offer an ​XLR mic input, it also features a dedicated high‑impedance (Hi‑Z) guitar input and Line 6's rather good Pod Farm amp and effects modelling software. Their UX2 is similar, although it offers more inputs, so you could record in stereo if you wished to. The 'street' price of the latter is at the top of your budget if you buy it new, but obviously will come within budget if you go second‑hand.
  • M‑Audio Fast Track USB: Although Pro Tools 9 now works with any audio interface, most M‑Audio interfaces still come bundled with a 'lite' version of Pro Tools 8, which makes them a good way to get into Pro Tools on a budget if you're keen to do so. At the time of going to press, you could get this interface bundled with Pro Tools M‑Powered Essential v8) for around $100 (street price).
  • PreSonus Audiobox USB: This interface offers two mic/line/instrument inputs, and can be found for under $150. It comes bundled with PreSonus' Studio One DAW software, which works on both Mac and PC.
  • ESI U46XL: The U46XL generally sells for under $200 and includes two stereo line inputs, as well as the mic and high‑impedance inputs you require. You also get a bundled copy of Steinberg's Cubase LE DAW.
  • Novation Nio 2/4 USB: This includes effects software, much of which is aimed at guitarists. It's available for around $199. As well as the two mic/instrument inputs, there are two stereo outputs, presented on both RCA phono and headphone jacks, which makes this interface rather more flexible than the others in the list when it comes to monitoring.
That covers the basics, and all the above offer better audio quality than is built into your iMac. But before you jump in head‑first, I'd recommend that you read the in‑depth article on the subject that appeared in SOS September 2008 (/sos/sep08/articles/audiointerfaces.htm). 


Published January 2011

Monday, September 16, 2019

Q. If speakers have to be 'anchored', why don't mics?

By Hugh Robjohns & Mike Senior
As I understand it, loudspeakers create sound and momentum, which needs to be absorbed in order for the sound quality to be accurate, so we ensure they are braced or fixed to their stands and not wobbling about too much. So surely a mic diaphragm, which is moved by incoming sound, will less accurately represent the sound if the mic casing is not sufficiently anchored. Given that we hang these things from cables, or put them in elastic shockmounts, can you explain to me why this principle doesn't apply?

Is it just to do with acceptable tolerances or is it a trade‑off between picking up vibrations from the stand and capturing the intended sound?

Paul Hammond, via email

SOS Technical Editor Hugh Robjohns replies: In a perfect world, both the loudspeaker and the microphone would be held rigidly in space to deliver optimal performance. However, we don't live in a perfect world. Sometimes a shelf is the most appropriate position for a speaker, but the inevitable down side, then, is that the vibrations inherently generated by the speaker's drive units wobbling back and forth will set up sympathetic resonances and rattles in the shelf, adding unwanted acoustic contributions to the direct sound from the speaker, and thus messing up the sound.We 'decouple' speakers with foam to prevent annoying low‑end frequencies leaving the speakers from reaching the surface they sit on. In the case of mics, we want to stop problem frequencies from reaching them, so we support them in shockmounts.

The obvious solution is, therefore, to 'decouple' the speaker from the shelf with some kind of damped mass‑spring arrangement optimised to prevent the most troubling and annoying frequencies (generally the bottom end) from reaching the shelf. This is often achieved, in practice, using a foam pad or similar.

With microphones, we are trying to control energy going the other way. We want to stop mechanical vibrations from reaching the mic, whereas we were trying to stop mechanical vibrations leaving the speaker.

Again, in a perfect world the mic would be held rigidly in space, using some kind of tripod, much like the ones photographers use for their cameras. However, in practice, we tend to place mics at the ends of long, undamped boom arms on relatively floppy mic stands which are, themselves, placed on objects that pick up mechanical vibrations (foot tapping, perhaps) and then pass them along the metalwork straight to the mic.

The obvious result is that the mic body moves in space, and in so doing forces the diaphragm back and forth through the air. This results in a varying air pressure impinging on the diaphragm that the mic can't differentiate from the wanted sound waves coming through the air, and so the mic indirectly captures the 'sound' of its physical movement as well as the wanted music.

The solution is to support the mic in a well‑designed shockmount so that the troublesome (low end, again) vibrations that travel up through the mic stand are trapped by another damped mass‑spring arrangement and thus are prevented from reaching the mic. If the shockmount works well, the mic stays still while the stand wobbles about around it, much like the interior of a car moving smoothly while the wheels below are crashing in and out of potholes!

The only potential problem with the microphone shockmount is that it can easily be bypassed by the microphone cable. If the cable is relatively stiff and is wrapped around the mic stand, the vibrations can travel along the mic cable and reach the mic that way, neatly circumventing the shockmount. The solution is to use a very lightweight cable from the mic to the stand, properly secured at the stand to trap unwanted vibrations.


Published February 2011

Friday, September 13, 2019

Q. What does the 'virtualization' PC BIOS setting do?

By Hugh Robjohns & Mike Senior
I was recently adjusting the BIOS settings on my PC, hoping to improve performance, and noticed the following option: 'Virtualization Technology — VMM can utilize hardware capabilities provided by Vanderpool Technology'.

What does this mean and, as a musician, should I be concerned with it?
Mark Cranfield, via email

SOS contributor Martin Walker replies: When Microsoft released Windows Vista, it was largely compatible with applications originally written for Windows XP, although some refused to run, and some of the earlier ones wouldn't even install. Since Windows 7 was built on the same code as Vista, it could have suffered from the same incompatibilities with older software, except that, this time around, Microsoft incorporated 'Windows XP Mode'.

This downloadable add‑on (www.microsoft.com/windows/virtual‑pc) runs in a separate window on the Windows 7 Professional, Ultimate or Enterprise desktop, much like another application, but, while in Windows XP Mode, you can access your CD/DVD drive, install applications and save files as if you were using Windows XP. This is because the add‑on is exactly that: a disk image of a pre‑installed and activated copy of Windows XP with SP3, along with 'virtualization' software. So, in effect, you are running the older operating system in a virtual environment inside Windows 7.

Once you've installed an application via Windows XP Mode, it will appear in both the Windows XP Mode list and the Windows 7 list, so in future you can open it directly from Windows 7. This can be a godsend to those who need to run some older applications, such as the PC version od Logic Audio 5.51, last updated in 2002.Here's an example of Microsoft's Virtual PC software helping the musician. Rain Recording's Solstice PC (reviewed in SOS October 2009) incorporates the 'RainZone', which is a virtual desktop environment incorporating web browser, email, chat and anti‑virus protection. As soon as you close down your Internet session, that instance of the computer disappears, along with any virus or other malware nasties, leaving your audio PC unaffected.

To run Windows XP Mode, you'll need at least 15GB of spare hard‑drive space, at least 2GB of system RAM and (until recently) a PC that featured HAV (Hardware‑assisted Virtualization) support. You'll also need Intel VT or AMD‑V functions in your processor, and an associated setting in your BIOS to complete the process by enabling these special functions. This is where your Virtualization Technology setting comes in.

Unfortunately, while most modern AMD processors include AMD‑V support, Intel's processor ranges are rather hit and miss, with some including VT support and some not. Thankfully, Tom's Hardware has a handy list (www.tomshardware.co.uk/windows‑xp‑mode‑virtualization‑intel,​news‑31047.html) for you to check. So, if a Virtualization Technology option appears in your BIOS and you think Windows XP Mode would be useful to you, leave it enabled: it won't make any difference to normal performance.

In March 2010, Microsoft relented and issued a Windows 7 update that removed the HAV requirement, so even if your PC doesn't have this hardware‑assisted support you can still run Windows XP Mode. Only install this update, therefore, if you can't currently run Windows XP Mode, since 'hardware‑assisted' is always the better‑performing option.


Published February 2011

Wednesday, September 11, 2019

Q. Why is my vocal clipping?

By Mike Senior
The Dbx 386 hybrid valve/solid-state preamp features the Dbx Type IV A-D converter, supposedly impossible to clip...The Dbx 386 hybrid valve/solid-state preamp features the Dbx Type IV A-D converter, supposedly impossible to clip...
I've been recording vocals using a Neumann TLM103 mic going through a Dbx 386 tube preamp, and using the Dbx's converters to send a digital signal into a Roland VS1680 multitracker. I understood the Dbx was virtually impossible to clip, but experience proves otherwise! Firstly, it's impossible to use the Dbx's 'Drive' tube emulation above its lowest setting without getting obvious red light peaking and distortion for any louder transients during a vocal take (I like to sing fairly close to the mic). 

Does this mean I'm not getting any tube warmth from the unit? Generally, due to this problem, I always use the 20dB pad which enables me to crank up the Drive dial a little, but not much. What is the purpose of its higher incremental notches if you can't really use them? Even with Drive set all the way down, and the digital metering on the output stage peaking between 12 and 16dBu but avoiding the red light district, there are still obvious frequencies in my voice which cut through the supposed soft limiting facilities of the Dbx type IV converters to produce distortion. Sometimes I have to do drop-ins of single vowels, vainly trying to grab a clean one at a comparable level to its neighbouring words. What am I doing wrong?

Phil Godfrey

Reviews Editor Mike Senior replies: I own a Dbx 376 and use it for all my vocal recording, and I'd suggest that you definitely don't want to be lighting that input Peak LED — that lights when the input is clipping, and clipping is quite a different thing to valve warmth. Given that your TLM103 has a fairly high output level of 21mV/Pa, if you're giving your performance a bit of welly close up to the mic then you may well find that you have to have the input gain all the way down.

I also work very close to the mic — like you, I have the Drive control all the way down for most of my louder numbers. This isn't a problem, though — you're still driving the valve, simply by dint of the raw level coming from the mic, it's just that you don't have to add any gain on the Drive control to do it. The valve 'sound' for recording purposes is very understated in quality equipment, and you don't need to try too hard to get the benefits of the valve — you'll get all the warmth on offer just by running the valve comfortably within its normal working range. You don't need to overdrive the valve, as you would in a guitar amp.

You also asked what use the upper notches of the control were if you always sang too loud for them. The reason for having them is so that low-output mics, such as dynamics and ribbons, can also be boosted into the optimum operating range for the valve. Think of the Drive control more like an input gain control, and that should clarify things a bit. I'd also be tempted to leave the Pad out unless it's absolutely necessary — it'll just be adding extra components into the signal path, and that's not necessarily desirable.

So, if you're setting up your Drive control right, there remains the question of the gain management in the rest of the chain. The first thing to realise is that it is possible to get nasty distortion out of the Dbx Type IV compression if you push it too hard, even if you don't theoretically get digital clipping. The best tactic, in my opinion, is to treat the converter just as you would any other and leave plenty of headroom. 

In this case, without compression, the majority of the signal will probably be hitting the -16dBFS mark, although this depends on your own performance dynamics. The most important thing is that you try to avoid making the -4dBFS light come on at all. Set the channel up while rehearsing so that only the -8dBFS light ever comes on. Because of the way in which the Type IV conversion process works, the moment the -4dBFS light comes on, the converter is effectively limiting the signal, so if (once you've set things up) you cook things a little hot in the middle of a take and the -4dBFS light comes on, you'll only be limiting the spikiest peaks. Type IV is great at peak limiting, but that's all it should be used for — use a compressor to reduce the dynamic range if necessary. Your description of your metering levels ("the digital metering on the output stage peaking between 12 and 16dBu but avoiding the red light district") shows me that you're running the output too hot: the 12dBu and 16dBu lights correspond to the -8dBFS and -4dBFS lights when the meter is switched to read the digital level, so if these are coming on most of the time then you've strayed too far into the danger zone. Also, bear in mind that even the digital output metering in the Dbx 386 is analogue, so the real peaks in your audio signal will probably extend beyond the meter reading. And because of the Type IV process, the output meter will only hit the 0dBFS light if it's seriously abused, so just avoiding the red light does not necessarily guarantee clean audio.

If you're getting distortion through the Roland VS1680 even on unclipped material, double-check that Dbx's sample rate is set correctly and that you're clocking the VS1680 from it — if the Roland is set to run from its own internal master clock then you may encounter a variety of strange spits and pops.
When digital and analogue gear is used in the same system, setting up the gain sensibly throughout the recording chain can be a bit of a minefield. However, it's worth taking the time to get it right, because otherwise all your recordings will suffer. You certainly shouldn't have to be dropping in words to avoid clipping — that's something you should be doing for artistic reasons to get the best possible performance.


Monday, September 9, 2019

Q. What's the difference beween morphing and crossfading?

By Len Sasso
Is there any real difference between morphing from one sound to another and crossfading? In many cases, the two sound very similar.
Anna Silman
SOS Contributor Len Sasso replies: Morphing and crossfading are really two entirely different processes and apply to different situations. Crossfading takes place between two audio files, typically non-destructively in a sequencing environment or destructively in a sample editor. The effect, of course, is that one sound fades out as the other fades in.
Crossfading between two different sounds.Crossfading between two different sounds.

Morphing takes place between two groups of settings for an audio device, either hardware or software. In that case, one sound also dissolves into another, but the intermediate sounds are not simply a mix of the starting and ending sounds.

If you have sequencing software and a synth plug-in that can be automated, here's an experiment to quickly convince yourself that there really is a difference.

Set up a basic oscillator and lowpass-filter patch without any envelope applied to the filter cutoff. Record rather long clips with the filter wide open, then with it relatively closed (but with the oscillator still audible). Now crossfade between the clips over a fairly long period. Next use animation to slowly sweep the filter cutoff across the same range. Compare the crossfade with the animated filter, which amounts to morphing between the open and closed states. Of course, morphing usually involves many more parameters, and the results are correspondingly more complex and interesting.