Thursday, February 29, 2024
Wednesday, February 28, 2024
Cubase: Archiving Projects
By John Walden
 Making a clean and compact backup of your current project is easy in all versions of Cubase.
Future-proof your projects. We examine the archival options for users of Cubase Elements, Artist or Pro.
While archiving your projects is perhaps not the most exciting aspect of working with Cubase, you'll one day thank your younger self for having put in the effort, so in this month's column I'll examine the archival options for users of Cubase Elements, Artist or Pro. Archiving isn't just about saving your project to another hard drive; it should ensure that you have a backup copy should the original project be lost or become corrupted. It should also ensure that you can access your project even without the current versions of Cubase or the plug‑ins you used.
The first step is to decide on the balance between your desired degree of future-proofing and the time and effort required to achieve it. I tend towards pragmatism rather than perfectionism, and will focus on the former here. But hopefully there will be enough ideas here that you can develop a more comprehensive strategy if you prefer.
All Backed Up
A sensible first step is to create a self-contained backup copy of a project that would restore the project on your own host system in the event of data loss. It's a two-step process and can be done in an identical fashion in Pro, Artist and Elements.
 allows you to render your virtual instrument tracks to audio, albeit one at a time.") Using the Audio Mixdown dialogue (shown here in Cubase Elements) allows you to render your virtual instrument tracks to audio, albeit one at a time.
Using the Audio Mixdown dialogue (shown here in Cubase Elements) allows you to render your virtual instrument tracks to audio, albeit one at a time.
First, execute the Media/Prepare Archive command. This will check whether all files referenced by your project reside in the project folder, and will place copies of them in there if not. Second, from the menu, select File/Back Up Project, and you'll be prompted to specify a new folder for the backup copy. A few tickbox options dictate exactly what gets placed in the new folder. Minimise Audio Files (only copy those portions of any audio files actually used on the timeline) and Remove Unused Files will help keep your backup compact. Provided everything else (plug‑ins, sample content locations) remains the same on your host system, this backup project should open fully intact and ready to go if your original working copy is lost.
The Future Is Now
While useful in the short term, the above process won't protect you from plug‑ins that might go missing in the longer term. The most straightforward insurance against this problem is to render all the project's audio and virtual instruments tracks as audio files, with all channel-level processing included. If you like, you can do the same with all the channel processing bypassed, so you have a version of your audio files with any edits, for example, but free from processing, which is handy if you want to revamp your project in the future.
What follows will work in all versions of Cubase. It's a little clunky, though, and users of Pro have a better option in the Export Audio Mixdown dialogue, on which more later. First, save a copy of your project with a suitable 'version for future-proofing' name. If the Freeze button isn't already visible, right-click on any track in the Track List to open the Track Controls Panel and make it visible for both Audio and MIDI tracks. Track freezing is actually designed for reducing CPU loads, but it also happens to create an audio render of the frozen track, and places this in a new folder (sensibly named Freeze) in your main Project folder. The render file 'captures' both the audio and the results of any channel processing, but there is a catch. In order to keep the file sizes compact, the Freeze function only captures those sections of your track where something is actually happening, and without a little further intervention before freezing, the format of these renders doesn't really meet our 'archiving' needs.
 If you are not using Cubase Pro, a workaround combining the track Freeze and Audio Mixdown dialogue features can let you create an audio-only render of all audio and virtual instrument tracks within a project.For audio tracks, the workaround is simple. First, find a short (a single bar or beat) section of one of your audio tracks that contains silence. Second, copy this clip to the very start of every audio track that doesn't already start at bar 1, beat 1. Third, select all the audio events on a track (or tracks; you can handle multiple tracks simultaneously) and from the file menu execute Audio/Bounce Selection. This replaces all the separate audio events on each track with a single contiguous event starting at bar 1, beat 1. Finally, if you now Freeze each audio track, the Freeze files will all start from bar 1, beat 1 and can be dragged into a new project.
For virtual instrument tracks, a different workaround is required, and must be done one track at a time. In the MixConsole, make sure the output of every virtual instrument track is set to the main Stereo Output. Next, bypass any plug‑ins on the Stereo Output bus (so you don't end up capturing a 'mastered' version of the instrument's audio). Then set the left locator to bar 1, beat 1 and the right locator to a point just beyond the end of your project.
Finally, one VSTi track at a time, solo the track and execute the File/Export/Audio Mixdown command. In the Audio Mixdown dialogue box, specify a filename to reflect the track's contents and point the File Path to the Freeze folder (which, assuming you've already dealt with your audio tracks as described above, will already be there). In the After Export section, deselect the Create Audio Track and Insert To Pool options (so you don't get extra tracks or audio file entries cluttering up your project) and hit Export Audio. Repeat as required for each virtual instrument track.
Then there's the MIDI: the audio might give you all you need, but you may want to consider archiving the MIDI information used to trigger any virtual or hardware instruments so that you can, for example, choose different voices or layer different parts and so forth at a later date. To do this go to File/Export/MIDI File. You'll find a few options here, so you should feel free to explore them, but the defaults should suffice.
Go Pro?
Cubase Pro makes this all much easier as it allows the simultaneous export of multiple tracks (any track type that uses audio) over a time range defined by the left and right locators, so every audio file created starts at the same time point and is exactly the same length. You can define a dedicated folder for the exported files and a naming scheme that can number and name the tracks. (Note that I've also deselected the Create Audio Track and Insert To Pool options.)
 Cubase Pro's Audio Mixdown includes batch processing, making it easier to create a render of all the audio and virtual instrument tracks within a project.
Perhaps the only catch is that you have to choose stereo (the default) or mono bounces; you can't do both at once. So either choose to live with stereo (no real hardship, unless you're trying to create a particularly compact archive) or perform the export in a couple of passes, dealing with stereo and mono (tick the Mono Downmix box) separately. Either way, Pro makes this process incredibly efficient, and for users of other Cubase versions, this might be reason enough to upgrade.
Peace Of Mind
Yes, it's fiddly, but if you've followed all these steps, you'll have access not only to a backup of your project, but also a version of the project's tracks where you can drag and drop all the files to bar 1, beat 1 of a new project. You'll have a pretty good working version of the original audio, the processed audio, the MIDI information — including the project tempo — and to virtual instrument tracks. Together, these files should meet pretty much any need when it comes to resurrecting a project, be it tomorrow or many years down the line.
Whichever route you took, it's now time to copy your archive to an external drive, and ideally somewhere off-site too. Next time, I'll expand on these ideas and look at additional export options to help ensure a smooth workflow when collaborating with other musicians or mix engineers. Until then, keep your data safe.
Tuesday, February 27, 2024
Monday, February 26, 2024
Exporting Cubase Projects
Last month we looked at backups and basic future-proofing of projects made in Cubase Elements, Artist and Pro, from the perspective of personal data security and peace of mind. Some different considerations can apply, though, when you want to export your project to share it with collaborators. In this article, I'll consider the sort of data export processes that this typically requires, whether your collaboration involves working remotely with a musical partner, sending your project to a professional mix engineer, or perhaps dealing with a mastering engineer. To avoid confusion, I'll highlight any overlaps with the data-security side of things that I explored last month.
With Or Without You
 If sending a mix engineer your raw tracks, resetting the MixConsole can save a lot of time.If you and your collaborator both use Cubase and the same plug‑ins, the Back Up Project process described last month may be all you require. And if you each use different DAWs but your collaborator will only be adding a few overdubs, last month's audio render process (including all the channel-level processing) would give them plenty of scope to create a cue mix.
When sending your project to a mix engineer, though, an audio render of each audio and virtual instrument track, without any of your own channel-level or mix-bus processing applied, and all starting at bar 1, beat 1, will almost always be the format of choice. Before applying the rendering approach described last month, you could first bypass any insert effects and Channel Strip processing on the tracks you're exporting, but in this context a 'mixer reset' will be quicker and probably more effective.
To do this, first save a new copy of your project with a suitable 'for the mix engineer' name. Then, from the Functions drop-down menu in the top-right of the MixConsole (left of the Racks menu), select Reset MixConsole Channels and choose 'all channels'. This will zero the MixConsole, rather like putting all the controls of a hardware mixer back to their default position. It removes all insert plug‑ins, including those on the Group, FX and Stereo Output tracks, and resets all Channel Strip settings, including the EQ. It will pan every track to the centre, and set all faders to the 0dB (unity gain) position. Then you can render all of the audio and virtual instrument tracks to provide a clean slate for your mix engineer.
All Out Drums
Multi-channel VSTis can require more work, the most obvious candidates being drum instruments like Groove Agent (GA) SE. By default, such instruments have internal mixing options and present only one stereo output to Cubase, but a mix engineer will usually want separate tracks for each virtual mic.
 As shown here for Groove Agent SE, you can configure your multichannel virtual instruments so that separate audio renders can be made for each sound.
The first step is identical in all versions of Cubase: you need to configure your virtual instrument to use multiple outputs, and inside the VSTi route each 'mic' to the desired output track. Taking GA SE as an example, you can see how I've set things up in the screenshot. I used the drop-down menu to activate five additional outputs — these manifest themselves as Tracks in the Project window and MixConsole. Right-clicking on a drum pad in GA SE pops up a further menu where you can route individual pads to any one of these outputs. It's also sensible to ensure that any default insert or send effects in your VSTi's internal mixer are bypassed (unless they're integral to the sound you want the mix engineer to work with).
 Once you have your VSTi configured for multichannel output, Pro and Artist make it easy to generate audio renders for each channel.Then you can render audio for each of these new outputs. In Elements, simply follow the (repetitive, yet effective) process I described last month: solo one output channel of your VSTi at a time, and use Export Audio Mixdown to render each one in turn. Artist and Pro make this step easier: select the main Instrument track in the Project window and execute the Edit/Render In Place command. For the 'Render Settings', selecting 'Dry' will bypass any channel-level processing to ensure your mix engineer gets unprocessed audio. Audio from each of the VSTi output channels will appear on new audio tracks in the project, and the audio files will reside (by default) in the Project's audio folder.
Note that Cubase's Export/Audio Mixdown command allows you to export only mono or stereo, but not both simultaneously, and some mix engineers prefer mono files for mono parts, so you may have to do two export passes.
Stemming The Flow
Your export needs will be different for mastering. Most commonly, you'll supply just a final stereo mix, via Export Audio Mixdown (perhaps with and without any stereo-bus processing you've used). An alternative scenario is when the mastering engineer will be working with 'stems', and you're asked to supply stereo submixes of drums, bass, guitars, keys, vocals, backing vocals, etc. This is easier if you've already used Group Channels while mixing: in Elements and Artist, each Group Channel can be soloed in turn and rendered via File/Export/Audio Mixdown; Pro's multichannel batch export capability lets you generate a stereo audio render for all Group Channels simultaneously.
 Cubase Pro's batch processing options in the Export Audio Mixdown dialogue allow instrument group stems to be created with ease.If you don't normally use Group Channels, a little more care is needed when creating stems. A visual reference can be helpful, so colour-code all the project channels by instrument group (red for drums, blue for bass, etc). Then, one colour-coded section at a time, solo just the tracks within a single instrument group and perform an Export Audio Mixdown process to create an audio file for that stem. This process will work in all versions of Cubase.
Don't forget to bypass any master-bus processing while you do this — it's intended to apply to your full mix rather than individual stems from that mix. You're OK leaving master-bus EQ intact if you've been mixing through it, but always make sure any dynamics processors (compressors, expanders, limiters) are bypassed.
Time For MIDI
Moving raw MIDI data between collaborators is generally straightforward; all versions of Cubase can export a standard MIDI file, and this will contain data from the Tempo track. This might be useful if, for instance, a collaborator will be trying to create a better MIDI-based drum performance in a third-party instrument based on what you created with GA SE.
 Cubase Pro supports both AAF and OMF export and import — neither's a perfect format, but some collaborators might request these formats.If your collaborator is importing into another version of Cubase, they should start without a new project open and use the MIDI File Import menu option. This creates a new project and ensures the tempo data is imported alongside the other MIDI data, and they can then import any audio into that project. In other DAWs, though, your collaborator may need to check some preferences/settings. For example, in Logic Pro, they'd need to enable the Import Tempo option under Preferences/General/Notifications. This kind of detail aside, the most time-consuming aspect of MIDI imports will usually be configuring virtual instruments to match the desired playback character. Notes will be fine, but control parameters (even velocity mapping) and any keyswitching can vary enormously.
Industry Standards?
I've deliberately avoided mention of Open Media Framework (OMF, available in Cubase Pro only) and Advanced Authoring Format (AAF, available in Artist and Pro). Both are standard industry formats, intended primarily for the exchange of audio and video data between different applications, but they each have limitations. Neither is anywhere near being a complete 'audio, video, MIDI and plug‑ins' solution.
So unless a collaborator specifically requests OMF or AAF, I'd stick with project backups, rendered audio and exported MIDI. These low-level formats are reliable, straightforward to use and will, I suspect, have a longer shelf life too.
Saturday, February 24, 2024
Friday, February 23, 2024
Cubase 11 now available

The latest version of Cubase has just been announced. The update applies across all editions (Elements, Artist and Pro), and adds a wealth of features and extra content.
Common to all versions are:

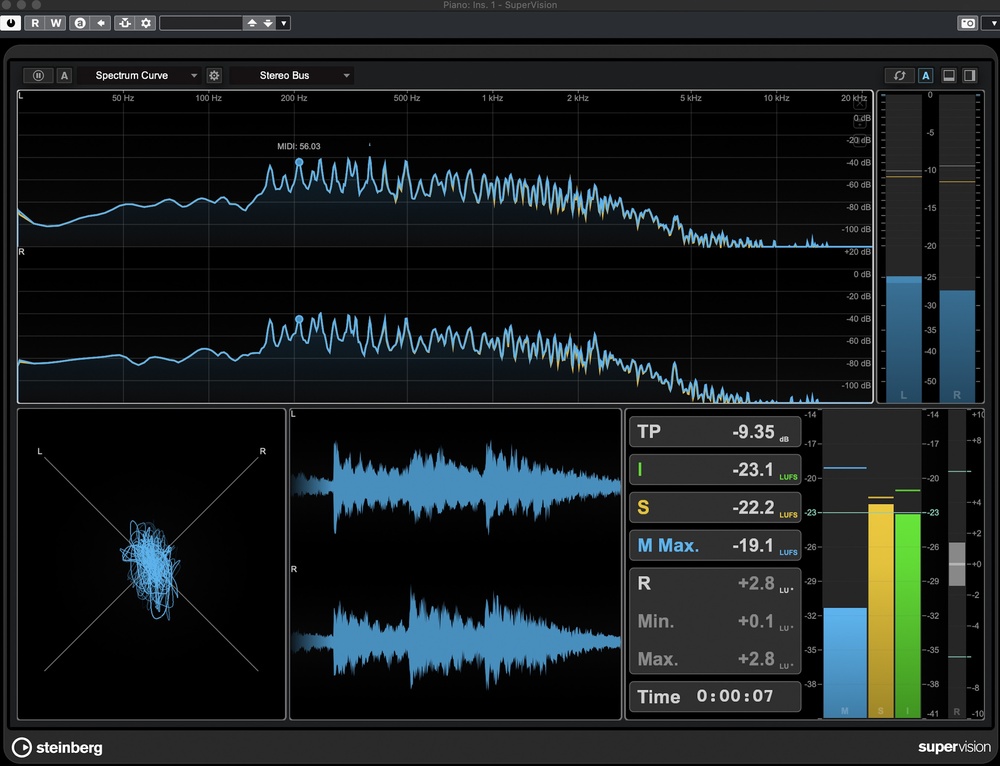
Both the Pro and Artist versions additionally benefit from a new high-res metering and analysis tool called SuperVision. This provides precise visual feedback over audio levels, spectral content, phase coherence and waveform shape.
Operational enhancements to both Pro and Artist include a new Marker Lines feature for faster project navigation; Pitch Visibility, which shows you the pitch of a clip or sample at a glance; an enhanced Range Selection tool; and improvements to the ARA workflow.
 In terms of new tools, those two versions also benefit from a new four-band stereo-width processor called Imager, and also come with a copy of SpectraLayers One, a streamlined version of Steinberg's spectral audio editor.
The flagship edition, Cubase Pro, has yet more new tricks up its sleeve that will doubtless please professional composers who need to work fast. The process of exporting projects and stems has been given a major overhaul, with advanced options now letting you choose exactly what to export — even including aux effects and master-bus processing when exporting a single track or group. You can also set up an export queue, so that all the stems you create and select will be merrily exported, one after the other, at the click of a mouse.
Cubase Pro's Frequency EQ has also been given a boost, and now lets you switch each of its eight bands into dynamic mode, so that the filter nodes will move according to the input signal. It now also supports multiple side-chain inputs, meaning you can trigger different frequency bands according to different input signals.
The Score Editor has been enhanced too, with more notation settings and editing modes, and support for the SMuFL font format, which makes popular Dorico fonts available in Cubase for the first time.
Owners of Avid/Euphonix controllers, meanwhile, will be delighted to learn that EuCon support has been added to Cubase 11 Pro.
The entry level Elements edition now supports audio side-chaining, while the Artist version of Cubase has also been granted a few extremely useful extras, including ARA 2 and VariAudio 3 support and unlimited audio and MIDI tracks.
There are many more additions and features to speak of, which you can find details about at the link below, but we'll leave you with pricing and availability info. Cubase 11 will cost €559 for the Pro version, €329 for the Artist edition, and just €99.99 for Elements (upgrade paths for users of earlier versions are available). Cubase 11 is available to buy now from the Steinberg online shop, and is authorised, as ever, via a Steinberg eLicenser USB key.
Thursday, February 22, 2024
Wednesday, February 21, 2024
Cubase: String Theory Part 2
 Merge MIDI In Loop can be used to render the notes created by Arpache SX and Transformer to regular MIDI clips for each string part.
Last month we ‘faked’ some string‑arrangements. Now it’s time to add a human touch.
Last month, we used Cubase’s Chord Track, Arpache SX and Transformer MIDI plug‑ins to create an almost‑passable five‑part string arrangement. However, we left off with the ‘performance’ sounding a little robotic, and perhaps a little too busy as well. So this month I’ll explore some more ‘fake it’ options that can create a better impression of ‘human’ parts.
As our quest for realism requires us to edit the MIDI performances, you must first render the MIDI note data that’s being created on the fly by the Arpache SX and Transformer. To do this, go though each track in turn: solo the track and action the Merge MIDI In Loop command (in the MIDI menu). As you do this, enable the Include Inserts and Erase Destination options to ensure both that the replacement MIDI clip contains the results of both Arpache SX and Transformer, and that the original sustained notes are deleted. Finally, bypass or remove the instances of Arpache SX and Transformer.
Thin On The Ground
Five arpeggiators can generate lots of notes, so start by thinning out the parts a little. For example, the cello and double‑bass are often played more sparsely than the other strings. Suitable arpeggiator settings (for example, quarter‑note rather than 16th‑note step sizes) may already have helped, but further note muting may be required. It’s more common for the violas and violin parts to be a little busier but, even so, thinning these out a little can work wonders, especially if it helps the sequence ebb and flow between the different instruments.
 Prudent thinning out of the arpeggiator note data can create more interesting rhythmical interplay between the different string lines.
Note‑thinning can also be used to create a more distinct rhythmic feel. For example, simply muting some notes in a continuous 16th‑note pattern can change the rhythmical emphasis of the part. This can be enhanced further if, in some sections of the sequence, you let different instruments emphasise different beats, while at other points you have instruments playing in unison.
Once satisfied with your thinning, unwanted muted notes can be deleted. To save doing this manually for each note, select all the MIDI clips and, from the MIDI menu, navigate to Logical Presets/standard set 1, and select the ‘delete muted’ option. It’s a really neat time‑saver!
While editing, another useful feature is the Key Editor’s ability to overlay multiple MIDI parts: you can see and edit, for example, the MIDI notes for both the 1st and 2nd violin parts in one window; enable the Key Editor’s Event Color controls in the toolbar if you want to see each part in a different colour.
The Art Of Articulations
Performance articulations are important if you want your virtual string performance to sound convincing. The HSSE3 Pro Large Strings VX preset used for my worked example includes two spiccato (short note) articulations; f and ff (loud and very loud). These suit the performance style I was attempting so, in most of the parts in my arrangement, I used the ff articulation on the first and third beats of a bar and the f articulation elsewhere, for some subtle variety and rhythmic emphasis.
 For Cubase Pro users, the Expression Map system can be used to add and edit any required articulation changes.
For Large Strings VX, the keyswitches (MIDI notes outside the playable range of the instrument) for spiccato f and ff are D#0 and E0. Adding either note to the MIDI sequence means that from that point on any notes in the instrument’s playable range will play back using the corresponding articulation. For Cubase Pro users, the Expression Map feature is a more elegant articulation‑switching option. See the SOS January (https://sosm.ag/cubase-0110) and February 2010 (https://sosm.ag/cubase-0210) columns for more on this but, essentially, articulations can be displayed and their use sequenced in a Key Editor controller lane. There is a catch, though: while the Large Strings VX preset is supplied with an Expression Map, most third‑party VSTis are not. Still, creating one yourself is a straightforward, one‑off job, and there are some downloadable third‑party Expression Maps on Steinberg’s website too.
Less Perfection!
 and some subtle randomisation to velocity and timing (bottom) to improve the realism of the performance.") The Logical Editor can be used to add accents on the beat (top) and some subtle randomisation to velocity and timing (bottom) to improve the realism of the performance.
The Logical Editor can be used to add accents on the beat (top) and some subtle randomisation to velocity and timing (bottom) to improve the realism of the performance.
Some subtle velocity and timing variation can also help things feel more real. This can be accomplished with manual edits and in some cases (eg. adding a velocity data crescendo at the end of a phrase) this is the easiest method, but Cubase also offers some shortcuts. For example, in many forms of music accenting notes that fall on the beat can clarify the rhythmic nature of the performance: a Logical Editor preset will do this for you. With the desired MIDI clip(s) selected, from the MIDI menu, select the Logical Presets/experimental/downbeat accent (4/4) option (it assumes your time signature is 4/4). The settings this applies are shown in the screenshot; open this preset in the Logical Editor and you can adjust these to taste.
To my surprise, I found that the current collection of Logical Editor presets lacks a simple ‘humanise’ option, but the commands required to create your own preset are simple, as shown in the final screen. In the upper pane, the preset selects all objects in the selected clip that are notes. It then applies two actions, defined in the lower pane, which apply a small amount of randomisation to each note’s velocity (cryptically labelled Value 2!) and start position. Adjust the values if you want more or less ‘humanisation’.
Top Tunes
If you wish, without manual editing, to add a more defined top‑line melody or counter‑melody (counterpoint) to your arp‑inspired string arrangement, the StepDesigner MIDI plug‑in is worth exploring. StepDesigner makes it easy to experiment with adding and subtracting notes to/from a short sequence, and put a Transformer plug‑in after StepDesigner and whatever changes you make in the step sequence can be automatically corrected to a key/scale combination. Once you have something you like, Merge MIDI In Loop can again be used to render the result as a conventional MIDI clip for further manual refinement.
For more semi‑automatic approaches to top‑line melody creation, Cubase has plenty more to offer. In particular, you might like to dip back into the Cubase workshops from November 2019 (https://sosm.ag/cubase-1119) or November 2013 (https://sosm.ag/cubase-1113).
Next Steps
In my main example, I started with a sequence of simple sustained chords, divided the chord notes between various string sub‑sections, and then applied some arpeggiator ‘magic’ to create single‑note performances for each instrument. But other starting points can also deliver interesting results. For example, rather than split the notes from the chord sequence before applying the arpeggiation, you could start by applying a single instance of an arpeggiator to the full chords. Transformer can be used again, to keep everything in the desired key/scale, and once you have something promising, Merge MIDI In Loop can create a conventional MIDI clip with all the notes from the arpeggiator. The notes from this clip can be copied to each individual string‑instrument track for manual editing. For comparison, I’ve included another audio example using this alternative starting point; you’ll find all examples at http://sosm.ag/cubase-1220. The two approaches have generated different, but complementary musical, outcomes from the same chord sequence starting point.
![]() cubasestringtheorypart2audio.zip
cubasestringtheorypart2audio.zip
I’ve kept things simple here to demonstrate the workflow, but if you want to attempt a full orchestration, there’s nothing to stop you applying the same ‘fake it’ approach to the brass or woodwind sections. That said, if the results are going to have a chance of sounding authentic, our arp‑based cheats will need to be applied with some sensitivity to the roles and ranges the various instruments generally play, and to that end a little knowledge can go along way — so I’ll point you once again to Dave Stewart’s ‘The Sampled Orchestra’ series (https://sosm.ag/the-sampled-orchestra-pt1) and leave you to do some homework!
Tuesday, February 20, 2024
Monday, February 19, 2024
Cubase: String Theory Part 1
 To pull off this ‘string fakery’ trick, you’ll need a set of multi‑articulation strings sounds. Cubase Pro’s Large Strings VX is a usable ensemble patch, but plenty of good‑quality alternatives offer more flexibility, including Spitfire Audio’s free BBC Discover library.
Cubase can help you write and arrange realistic string parts.
Credible string arrangements can add a real touch of class to your productions. Dave Stewart’s four‑part Arranging For Strings (part 1: https://sosm.ag/string-arranging-pt1) and nine‑part The Sampled Orchestra (part 1: https://sosm.ag/the-sampled-orchestra-pt1) are great places to start learning, but in the meantime Cubase offers some tools that can help you get ideas down quickly. There’s lots of ground to cover, so I’ll cover this subject in two tutorials, Part 1 this month and Part 2 next.
Cubase includes some impressive virtual instruments, but multi‑articulation (performance‑style) orchestral sounds are thin on the ground. Still, the Large Strings VX preset in the Halion Sonic SE Pro soundbank that comes with Cubase Pro is very usable. It includes eight articulations, and while it’s an ensemble patch (all strings at once, rather than in separate instruments) it’s good enough for the examples that follow.
If you want a more capable library with separate string instruments, a third‑party option I can recommend is Spitfire Audio’s BBC Discover. It’s inexpensive anyway but free if you’re prepared to sign up and wait two weeks. It’s a super‑compact taster of the full version of their BBC Symphony Orchestra library, and includes separate bass, cello, viola and violin patches, each with long, spiccato, pizzicato and (with the exception of the double bass) tremolo articulations. If you want something more fully featured than this, and are prepared to pay, check out the aforementioned Dave Stewart series for some recommendations.
Strike The Right Chord
Once you’ve chosen your instrument(s), add some tracks to a Cubase project. Even if, as here, you’re using an ensemble patch, create separate tracks for double bass, cello, viola and first and second violins, as this is how they’d conventionally be arranged/scored in a real orchestra.
For the example, I aimed to create a kind of rhythmic performance based on short (staccato) notes. But whatever performance style you want, the starting point when ‘faking it’ like this can be the same: a single MIDI part with some simple, sustained chords to define the chord sequence. These can be played in, or created using the Chord Pads (www.soundonsound.com/techniques/strike-chord).
 Cubase’s Chord Track allows you to explore your initial chord‑progression options and then makes it easy to create a clip with the sustained MIDI notes you need to get started.
For my example, I used the Chord Track (see June 2013: www.soundonsound.com/techniques/re-chord-industry) to create a simple four‑chord sequence, using an HSSE acoustic piano preset. Once happy with the sequence, I selected the piano track and executed the Project/Chord Track/Chords To MIDI command. This created a MIDI clip on the piano track containing block chords derived from the Chord Track.
String Roles
Generally, each string subsection in an orchestra will play one note at a time. By combining the notes from each subsection, a full chord can be voiced. If more notes are needed, a subsection may play divisi (divided in two, each half playing a different note), but this halves the impact of each note. You can break such conventions when using virtual instruments, but I’ll aim for realism here (as you must do if writing parts that will later be played by a real string section).
Your next task, then, is to allocate the notes of each chord across the five string subsections. An easy starting point is to assign the highest note to the first violins, the second highest note to the second violins, the next to the violas. The lowest goes to the double‑basses, but can be doubled an octave (or perhaps a fifth) higher by the cellos. For our block four‑note chords, it’s easy to copy the MIDI clip to each of the respective string MIDI tracks and then delete/mute the excess notes in each copy, leaving only the notes required for each subsection.
Check that the notes are in a suitable octave for the real instruments: A7‑G3 for the violins; A6‑C3 for the violas; A5‑C2 for the cellos; and G4‑E1 for the double basses. For my example, I ensured the notes were in the lower/mid portion of each instrument’s range, leaving me some room to tweak.
Inspiring Arps
 and double‑bass (lower) parts. The MIDI clips in the background show the eventual output from the arpeggiation process for each of my five string parts.") Arpache SX offers plenty of creative options. Shown here are settings for my viola (upper) and double‑bass (lower) parts. The MIDI clips in the background show the eventual output from the arpeggiation process for each of my five string parts.When a little velocity and volume automation is added, and appropriate articulations are used, the sustained single‑note parts for each subsection can combine to make perfectly acceptable string ensemble chords. But it’s not much of a ‘performance’, so for something that’s rhythmically and harmonically more adventurous, you can turn to a MIDI arpeggiator plug‑in or, better still, several of them.
Arpache SX offers plenty of creative options. Shown here are settings for my viola (upper) and double‑bass (lower) parts. The MIDI clips in the background show the eventual output from the arpeggiation process for each of my five string parts.When a little velocity and volume automation is added, and appropriate articulations are used, the sustained single‑note parts for each subsection can combine to make perfectly acceptable string ensemble chords. But it’s not much of a ‘performance’, so for something that’s rhythmically and harmonically more adventurous, you can turn to a MIDI arpeggiator plug‑in or, better still, several of them.
There are several possible options here, but one is to place individual instances of your arpeggiator on each of your string tracks. For the example, I did this with Cubase’s Arpache SX and followed each instance with a Transformer MIDI plug‑in. The latter’s Transpose To Scale function is essentially a MIDI note pitch‑correction processor, and here it ensures that Arpache SX’s output will always remain harmonically correct. (Of course, ‘wrong’ notes can sometimes sound cool too, so you can always experiment with bypassing Transformer to see what happens.)
The key to coaxing something interesting from this setup is to use different settings on each instance. In the screenshot, the upper instance of Arpache SX is used for the viola. A Step Size of eighth‑note triplets is combined with an Up Transpose setting, one Repeat and a Pitch Shift setting of 5. This results in a fairly brisk sequence of short notes from each of the sustained notes going into the arpeggiator. In contrast, for the double‑bass, I used a quarter‑note triplet setting with the Transpose off. This produces a less busy but still rhythmic performance, in which the pitch simply follows that of the input. When the two parts are combined, their rhythmic interaction is pleasing, and there’s also some melodic content.
 Transformer’s scale‑based MIDI pitch‑correction can make experimenting with arpeggiator settings much easier.
Hand‑built By Robots
By applying these principles across all five string tracks, with suitable experimentation (and a bit of luck), your arp‑fuelled string section will hopefully now play something that: (a) is rhythmically interesting; (b) has harmonic movement that follows the chord changes; and (c) remains in the correct key/scale. The performance might sound a little robotic and perhaps a little on the busy side, so next you’ll probably want to turn your attention to some manual editing. And that’s where we’ll pick up next month.
In the meantime, check out the audio examples (https://sosm.ag/cubase-1120) that illustrate the steps we’ve taken so far and, by way of a teaser, also reveal how the same arrangement will sound after a little more tweaking.