By John Walden
Using a gate to create rhythmic performances from sustained sounds is a classic dance-music trick, but the same approach can work in almost any contemporary music style.
Drums and percussion dominate the rhythmic elements of many modern musical styles. Sometimes, however, it's nice to let other instruments help drive things along, and there is plenty of musical fun to be had by making the harmonic content also do some rhythmic work. Of course, there are all sorts of ways of approaching this — including something as a simple as a well-strummed acoustic guitar — but, for the techie geek in all of us, the MIDI Gate plug-in (which has been around in Cubase for some time) provides some interesting creative options.
 The MIDI Gate plug-in is great for creating rhythmic effects from a sustained sound.
The MIDI Gate is, in essence, a noise gate that is applied to an audio track. However, it is triggered to open and close by MIDI data routed from a MIDI track, rather than by an audio signal. While the plug-in has a number of uses, it provides an excellent tool for taking a sustained sound and chopping it up in a way that provides rhythmic interest or reinforces other rhythmic elements in the project. These possibilities can be further enhanced with judicious use of one or two of Cubase 4 's other plug-ins. Let's get some rhythm...
Source Material
In order to experiment with the MIDI Gate, some suitable audio source material is required. While this could be almost any sort of performance, a good starting point is a sustained synth sound (a pad or lead sound, for example) or other sustained sound such as an overdriven guitar. These can be playing a single note or chord or, for something a little more interesting, a progression of notes or chords, each of which is sustained prior to a pitch change. The audio samples on the SOS web site at www.soundonsound.com/sos/ jun07/articles/cubaseaudio.htm contain examples based on a heavily overdriven guitar sound, but the same processing could just as easily be applied to other sustained sounds.
What-a-Gate
One feature that many users (especially those who can remember studios when they were dominated by hardware rather than software!) would like to see appear in Cubase is side-chaining. Side-chaining allows the response of an effects processor to be influenced not by the audio signal it is processing but by an alternative audio input. One of the more common applications of this might be in 'ducking' (that is, lowering the level of) a backing track when a voice appears. A compressor with a side-chain input can be used for this. The compressor is inserted onto the backing track, but the side-chain input is fed from the vocal track. Whenever the vocal is present, the compressor is set to kick in and automatically lower the level of the backing track by a suitable amount. This is often used with voiceovers in adverts and ensures that the vocal — the most important element of the sales message — remains clear and is not in danger of being lost beneath the backing track.
 In Note Off mode and with the Velocity To VCA set at maximum, triggering is controlled by the length of each MIDI note and its velocity.Side-chain inputs are also a common feature on hardware noise gates and, as described above, one common application is to create a rhythmic performance from a sustained sound. So, while Cubase does not, by default, include a means for triggering either a compressor or a gate plug-in from an external audio source (although it can be done — see the 'Side-chained Melody' box for details), in MIDI Gate, it does provide a way of triggering a gate via a MIDI track.
Page 48 of the Cubase 4 Plug-in Reference PDF manual does a good job of describing how to configure the MIDI Gate plug-in, so there is no need to go into too much detail here. In essence, it is placed as an insert effect on the audio track that is to be processed. A MIDI track is then created and the output destination of this track is set to the audio track containing the MIDI Gate. Any MIDI data held on this MIDI track (either recorded or played live) is then fed to the MIDI gate to control its behaviour.
The MIDI Gate plug-in contains a single switch and six rotary controls. The Hold Mode switch determines how the gate responds to the length of the MIDI note that triggers it. In Note On mode (when the Note On button is grey), the gate stays open for the length of time determined by the Hold and Release controls, and the length of the MIDI note plays no part. In contrast, in Note Off mode, the gate remains open for the length of the MIDI note, with the Hold and Release settings applying only once the Note Off message has been received.
Once a MIDI Gate has been inserted into an audio track, it becomes available as a possible output for any MIDI track.
The Attack, Hold and Release settings are all fairly self-explanatory. As might be expected, if you want your MIDI performance to have absolute control over how the gate behaves, setting all these controls to zero while in Note Off mode will mean the gate opens instantly when a MIDI note triggers it, and closes equally quickly once that note finishes. When applied to a sustained audio sound, this provides a means of 'chopping' the sound — opening and closing the gate — with as much precision as you include in your MIDI performance.
The three lower controls all allow MIDI velocity to influence the operation of the gate. Positive values of the Note To Attack or Note To Release controls cause higher MIDI note velocities to extend the Attack and Release times of the gate respectively, while negative values mean higher velocities open or close the gate more quickly. However, perhaps the most interesting control is Velocity To VCA. At a setting of zero, the volume of the audio is unaffected by the MIDI note velocity (that is, the audio volume is determined entirely by the volume of the original audio track and its settings). However, with increasing values of the Velocity To VCA control, MIDI note velocity exerts an influence on the audio volume of the gate output. This can be particularly useful when using MIDI Gate to 'chop' a sustained sound into rhythmic slices, as it provides a means of adding some volume variation to the resulting performance.
Hand Chop
MIDI Gate can, of course, be triggered by a 'live' MIDI performance or via a recorded MIDI part. The former provides the most creative fun, even if such a live performance is then recorded for some detailed editing. The most straightforward starting point is to select Note On mode with a very short Hold setting (about 0.1) and all other controls set to zero. Any MIDI notes then open the gate for a short, fixed time period with no MIDI velocity control. Essentially, the rhythm of the MIDI notes dictates the rhythm of the 'chopped' audio. Depending upon the sound being used, this can create a percussive element or, if the audio contains strong harmonic content (sustained chords or long notes within a slow moving melody line), a staccato rhythm part can be generated.
A different response is created by selecting Note Off mode, Velocity To VCA to maximum and all other controls to zero. Now, the length of the audio slices is controlled by the length of the MIDI notes and the MIDI velocity controls the audio volume. This provides plenty of performance options, but also means that a little practice might be needed (or some post-performance MIDI editing) to achieve the required performance.

Drumming Up Trouble
A common trick when using a noise gate with an external side-chain input is to feed that input from a drum track (for example, a hi-hat, snare or kick drum mic) so that the noise gate operating on the sustained sound is triggered by the drum sound. Heard with the drum sound, this obviously synchronises tightly with the drum track, while if the drum track itself is muted and only used to trigger the gate, it can be used to replace an element of the drum mix with an alternative sound but the same rhythmic pattern.
Providing you are working with a MIDI-based drum track, this same process can be emulated using the MIDI Gate plug-in. All that is required is to copy the MIDI parts from the drum track to a second MIDI track and, as before, set the output of that track to direct data to the MIDI Gate plug-in. By using Cubase 's MIDI editing features, the MIDI data can be edited to produce the required result. For example, all MIDI notes except those that trigger the hi-hat could be muted. Again, some experimentation with the Note On and Note Off modes and the Hold and Velocity To VCA controls can produce a variety of effects.
Pedal Power
While there are plenty of possibilities offered by MIDI Gate in the approach described above, it is easy to add a further dimension with some additional processing. One classic option (or cliché, depending upon your viewpoint!) is to add a filter-based plug-in to the audio track after the MIDI Gate. This can add some nice timbral movement to the sound. While Cubase includes some nice filter plug-ins that can be automatically synched to the Project tempo (such as the Step Filter or Tonic plug-ins supplied in earlier versions of Cubase), for simplicity, the WahWah plug-in is well worth some experimentation.
Here, a MIDI hi-hat part with variable velocity is being used to trigger the MIDI Gate plug-in.
As its name suggests, WahWah is intended to emulate the sound of a stomp-box wah-wah pedal — although it does contain more controls than most stomp-boxes. The user can specify the frequency, resonance (width) and gain for both the 'lo' and 'hi' positions of the pedal control. The filter sweeps between these two settings as the Pedal control is tweaked and the slope of the filter can be switched between 6dB or 12dB. The screenshot shows a good starting point for further experimentation, with the lo and hi Width controls set at a fairly neutral 50 and the lo and hi Gain both set at zero. The gentler 6dB filter slope also makes for a more subtle (and easier to control) effect.
The settings for the lo and hi Frequency controls influence how radical the filter sweep effect is between the extremes of the Pedal control's range. While the best values for these settings will depend very much on the nature of the audio material being processed, in this example, I've used a fairly narrow range (400 and 2400Hz respectively) and this represents a nice compromise: plenty of 'wah' but not so much that even small movements of the Pedal control produce a huge change in the tone of the audio.
For some extra fun, add in an instance of the WahWah plug-in and control it via the Modulation Wheel (as here), or via MIDI velocity.
Of course, the best bit is when the Pedal control gets tweaked. Clicking on the label beneath this virtual knob will display a pop-up from which a number of controller options are available (personally, I tend go with the Modulation wheel). As with the MIDI Gate, once WahWah is placed as an Insert effect on the audio track to be processed, it becomes available as an output destination for any MIDI track. This should now result in two MIDI tracks that can potentially alter the way our audio track is heard — one controlling MIDI Gate and the other the Pedal of the WahWah plug-in. If you select both these tracks in the Track List, your MIDI keyboard will send data to both tracks, and combining both MIDI note and Modulation wheel data in a single performance provides control of both the gate and filter effects. The audio samples on the web site demonstrate the kind of results that are possible from this fairly simple (and non-CPU-intensive) combination.
If you want to add some additional ear candy, including an instance of the AutoPan plug-in in the Insert effects chain for the audio track is an obvious next step. With the Sync option switched on, the Rate of panning can be set to create either a subtle sweep between the speakers or a more rapid (and more noticeable) movement. The Width setting controls how far the sound travels between the left-right extremes.
It Takes Two
Combining multiple tracks that have been sliced via MIDI Gate is also perfectly possible, but this does need to be carefully done, as you can have too much of a good thing: it is very easy to go overboard and end up with a mix that is all tricks and has no focus. For example, two or more different sounds being sliced and bounced around the stereo image, while perhaps fine for a short, sharp special effect (perhaps a couple of bars linking two main song sections), is likely to be very distracting if placed alongside a lead vocal in a chorus or verse section.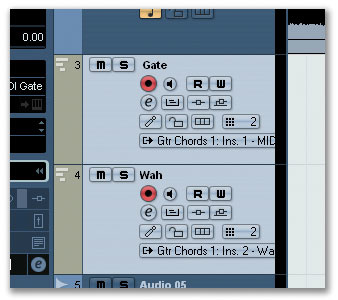
If you select both MIDI tracks, you can control the MIDI Gate plug-in (via MIDI notes) and the WahWah effect (via the Modulation Wheel) simultaneously.
A more subtle approach is to take the same sound source and place it on two audio tracks, each with an instance of MIDI Gate and an appropriate MIDI track to control it. Each audio track could, if required, also have an instance of WahWah and AutoPan inserted. Providing some suitable restraint is employed, this opens up a number of creative possibilities, including some quite complex rhythmic and stereo effects.
Finally, a further, more experimental application of the general approach outlined, above is to take a MIDI drum track and separate out each of the main elements (kick, snare, hi-hat and so on) onto different MIDI tracks. These can then be used to trigger a MIDI Gate inserted to the equivalent number of audio tracks with each audio track containing a different sustained sound and, depending upon the audio sound sources, this can provide an interesting alternative to a traditional drum kit.
Published June 2007
No comments:
Post a Comment