With Cubase, you can implement an innovative parallel compression technique first conceived by producer Andrew Scheps.
We’ve discussed parallel compression a number of times previously, but if you need an introduction, read Hugh Robjohns’ excellent article in SOS February 2013 (http://sosm.ag/latest-squeeze). Parallel compression can be implemented in different ways to achieve slightly different things, though, and this month I’ll discuss how you can implement producer Andrew Scheps’ ‘rear bus’ technique, which derives from his time working on a Neve console that was designed for quadraphonic sound. Scheps would use the console’s ‘rear bus’ — a second stereo bus that was intended for the rear speakers in a quad system — as a sort of ‘global’ parallel compressor bus. He would often send multiple instruments to a single compressor placed across this ‘rear’ bus, rather than treat each source to its own parallel processing. An FX Channel with a compressor insert serves as our ‘rear bus’.
Using a single ‘master’ parallel compression bus in this way yields different results from those achieved by setting up multiple parallel compressors. The main difference is down to the interaction between the multiple sources you’ve fed to the parallel compressor, and how the compressor then reacts to whatever element happens to be loudest at any point. In the right mix, and set at the right balance with the uncompressed output, this interaction can create some interesting, almost ‘automated ducking’ effects. Combined with more conventional parallel compression, this can give a mix a certain sense of movement, as elements ‘pop’ gently in and out of the mix. A second benefit is that a single parallel compressor bus is used to accommodate a significant number of the overall mix elements; compared to a more conventional approach, you therefore end up with fewer parallel compressor busses to keep track of, and don’t need to use so many compressors.
The Bus Route
So, if you fancy trying this technique, what’s the best way to set it up in Cubase? The starting point is simple: create an FX Channel with a compressor in one of its insert slots. The stock Cubase Compressor plug-in works well enough for initial demonstration purposes, but feel free to experiment if you have access to something more ‘esoteric’. (We’ll come back to the limitations of Cubase’s compressors later.)
In most parallel compression contexts, a low threshold (so gain reduction is almost much always being applied), fast attack, medium release and a 3:1 ratio make for a decent starting point, though more (much more) extreme ratios can be dialled in; you need to let your ears be the judge as you balance the compressed and uncompressed signals.
Next, create a send from each track you want to be part of the parallel compression processes, almost as if the compressor were an artist for whom you’re creating a bespoke foldback mix. Scheps was reportedly always willing to experiment here, but let’s get the basics sorted before you try anything too sophisticated. A good ‘all in’ approach is to send everything except the drums (or the drums and bass), as this both focuses the compression more on the mid range and will allow your overheads and cymbals to ‘breathe’. A quick way to do this is to select the chosen channels and use the Quick Link function to set up a send from them all simultaneously; be sure to disengage Quick Link when you’re done.
 With suitable starting-point settings, the stock Cubase Compressor plug-in can serve on your ‘rear bus’.
In configuring the sends from each track, there are three things you need to ensure. First, leave all the send levels at zero gain (the default value). Second, ensure that the sends are all post-fader (also the default). You can check this in the Mix Console, but you’ll need the Channel Settings panel for something else in a minute, so it makes sense to use that here; you can toggle between pre- and post-fader settings by clicking the appropriate button as you hover your mouse over the send label. The combination of these first two settings ensures that the send level from each track is dependent on the channel fader itself, so send levels to the compressor will match the main fader balance.
 The Channel Settings window can be used to set all the send settings for each channel to the ‘rear bus’ including, in Cubase Pro at least, ensuring the pan of the send is linked to the pan of its host channel.
If you’re using Cubase Pro, rather than one of the ‘lite’ versions, you can configure the third setting in the Channel Settings panel. (Don’t worry if you don’t have Pro, as while this stage is useful it’s entirely optional.) From the drop-down menu in the top strip, toggle the Link Panners option on for each track. When you next adjust the main pan of the track, the pan of the send will be linked to it, rather than being left at the default centre position. This has two useful consequences. First, it ensures that the pan position of the track is matched in the stereo image of the parallel compressor channel. Second, as I’ll explain later, it means you can experiment with independent compression of the left and right channels of the parallel compressor.
In The Blender
As with any parallel compression approach, it then becomes a simple task of blending the parallel compression bus in to taste alongside your master stereo bus. There are no hard-and-fast rules but a good starting point is to gradually raise the parallel compressor’s fader until its contribution sounds obvious, and then back it off slightly.
What’s interesting about this approach is the way in which the various sounds contributing to the bus compete with each other. It can result in some interesting changes in their respective volumes and, while perhaps more noticeable in a busier mix with lots of different sound sources feeding the compressor, the end result is not unlike lots of small automation moves having been added, introducing some really nice micro-dynamic variations to an otherwise static-sounding mix. It’s an effect which might not be appropriate for every mix, but when it works, it’s really rather cool — so don’t write it off if it doesn’t work the first time you try it!
Along Came Two Busses
Providing you mix without any plug-ins on your main stereo master bus, you can route your parallel compression bus to the master. This would replicate the signal routing used by Andrew Scheps, even though, in our case, all the audio is eventually being passed to a single stereo output. However, lots of DAW/sequencer users (myself included) often place a plug-in or three on their master bus, which means your parallel compressor bus will receive a further (often unwanted) stage of processing, as it’s blended with master output. The workaround is to configure a Group Channel — a ‘master, not-parallel-compressed bus’, for want of a snappier name — and to route the output of every track to that, rather than directly to the main stereo output bus. Any processing you want to add to the main (not parallel-compressed) mix can be applied here. Both the ‘unparallel bus’ and the parallel compression bus are then routed to the main stereo output channel, where their signals are summed without further processing. It sounds more fiddly than it is!
 Melda Production’s MCompressor is a free compressor that offers unlinked ‘dual-mono’ operation.
There’s More!
A number of variations could be built around this ‘rear bus’ approach, but one interesting one is to compress the left and right channels of the parallel compressor bus independently —in other words, use a dual-mono compressor rather than a stereo-linked one. You still use identical compressor settings on each channel, but this way you prevent a loud sound that’s panned hard right (for example) from ducking a quieter one that’s panned hard left. And once again, treating the left/right channels independently can introduce some interesting small-scale movement.
If you’re to avoid complex routing scenarios in Cubase’s Channel Settings window, this requires that you have a compressor plug-in that supports a dual-mono configuration, and unless I’ve missed something, that is something none of the stock Cubase compressor plug-ins offer! The easiest workaround is to find a compressor that does offer independent left/right channel processing. In the screenshot shown here, I used the freeware Melda Production MCompressor. While working as a stereo or mono compressor, it also offers the option to just process either the left channel (allowing the right to pass uncompressed) or visa-versa.
With two instances of MCompressor inserted on the parallel compression bus, one set to compress the right channel only and the other set to process the left channel only, you are then ready to experiment. (If you’d prefer a single plug-in for dual-mono compression, you could check out the VladG’s more colourful-sounding freebie Molot.)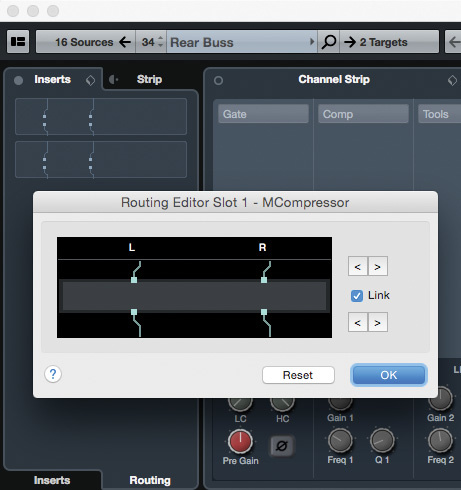
Louder Or Better?
Like all parallel compression approaches, this method has to come with a health warning: as you blend in that overly compressed parallel buss, your mix will become louder, and our ears are easily fooled into thinking louder is better — even when it isn’t! So, before you shout ‘result!’, plenty of A/B comparison is required to check whether the contribution from the parallel compression is really helping the mix rather than just adding level. And if in doubt, you can use Cubase’s in-built LUFS meter to make sure you’re comparing like with like.
Published July 2016
No comments:
Post a Comment