Welcome to No Limit Sound Productions

Company Founded
2005
Overview

Our services include Sound Engineering, Audio Post-Production, System Upgrades and Equipment Consulting.
Mission
Our mission is to provide excellent quality and service to our customers. We do customized service.

Wednesday, May 31, 2017

Q. How can I reduce drum spill from piano mics?

Q. How can I reduce drum spill from piano mics? 
Miking the sound hole...

I'm trying to reduce drum spill when I record my jazz trio (piano, bass and drums) at home. The drum overheads — Oktava MK12 cardioids — don't pick up too much of the surrounding sounds, but recording the baby grand is more problematic. The two Studio Projects C3s (switched to their cardioid pattern) pick up way too much spill, even though I've tried to reduce it. The piano opens opposite to the drums and is surrounded by absorbers, but even more separation would be desirable.

SOS Forum Post
Getting the mics as close as possible to the piano  will minimise the amount of other sounds that the mics pick up. Miking the soundhole (top), or placing the mic on a soft cloth atop the soundboard will help with this, but you may encounter balancing problems, as the sound from the strings closest to the mics will seem louder.  
Getting the mics as close as possible to the piano will minimise the amount of other sounds that the mics pick up. Miking the soundhole (top), or placing the mic on a soft cloth atop the soundboard will help with this, but you may encounter balancing problems, as the sound from the strings closest to the mics will seem louder.  

SOS contributor Mike Senior replies:

This is one of the trickiest spill problems to deal with in the studio. At pro sessions, in multi-room studios, the piano or drums will often be recorded in a separate isolation room to resolve the issue. Given that you don't have the luxury of a separate booth, it's probably going to be easiest to try to isolate the piano.
Assuming that you're close-miking inside the piano with the lid fully up, then enclosing the whole piano-plus-mic setup by draping it in heavy blankets is a well-worn tactic, but you should extend the enclosure all the way to the ground for the best isolation. The piano's own dust cover can lend a hand here, especially if it's thickly lined.

Partly or fully closing the piano's lid is common in live environments, and can provide even better spill rejection. But the lower the lid, the closer the mic positions have to be, often making it difficult to record a balanced sound, as some strings will be much closer to the mics than others. A closed lid also introduces boxy resonances and complicates running leads to the mics. A tip here is to prop the lid open with an unread copy of Stephen Hawking's A Brief History Of Time (surely a plentiful resource), leaving just enough room for cables.

Within these constraints, your choice of close-miking techniques is still fairly wide. Boundary microphones would perhaps be a better alternative than large-diaphragm capacitor designs, given their more slimline design, which allows them to be gaffered unobtrusively to the underside of the piano lid. The excellent off-axis response and lack of proximity effect also recommend boundary microphones over large-diaphragm cardioid microphones, especially if you're asking them to capture a balanced picture of the strings from very close up.

Another alternative when the lid is closed is to mic up the soundboard through the soundholes in the piano's frame. Small table stands can be useful for this, but you can also try resting the mics on pieces of foam or cloth. For more piano-miking tips, surf to www.soundonsound.com/sos/jan08/articles/pianorecording_0108.htm.

If you are faced with extreme spill problems, but still need a clear recorded sound, then you have to start getting a bit more creative. If you're handy with the DIY, this idea from Elton John's producer, Gus Dudgeon, could provide some inspiration: "I found the thing to do was take the [piano's] lid off, and then get a carpenter to build the shell of another piano, upside-down. So, in other words, on top of the original frame of the piano we built another one about three times as deep, so physically the piano was now about ten feet tall, and it was padded inside. We had two holes at the side, and we just poked the mics in there, and then you could get the mics high above the strings."

However, having said all this, I think you might be looking for more separation than you actually need. Particularly for jazz, some spill between the instruments will do you a certain amount of good, binding everything together in a way that means you won't have to use much in the way of reverb. It's more important that the spill sounds good than that it is really low in level. If you have any leeway to experiment, try switching your piano C3s to omni and reposition mics, players and gobos to make the spill on each mic sound as pleasant as possible. If there's too much ambience, deal with that in the room using foam, duvets, or something similar. Check how the mics interact when mixed, and adjust mic positions or polarity inversion for the best sound. I think you'll get a more natural result with this approach, both because omni mics will pick up more of the large piano and bass instruments, and because omni patterns will pick up more neutral-sounding spill than cardioid patterns.

If you're going to be creative with your use of spill, take some advice from Alan Parsons (engineer of Pink Floyd's Dark Side Of The Moon) and try moving the piano as close as possible to the drums, counter-intuitive as this may seem. Although you pick up lots of spill, it doesn't make the room sound overly large and the spill is delayed very little when compared to the signal from the drum close mics. If you really have a problem with too much room ambience, you could try setting the piano mics to a figure-of-eight pattern. This will generally give better-sounding spill than the cardioid pattern when using budget large-diaphragm condensers.


Published May 2008

Monday, May 29, 2017

Q. How can you keep your gear in good order?

The crack team of Paul White and Hugh Robjohns have traveled the world solving readers' problems. Here, they down the Hob Nobs and answer some of your equipment queries in our Q and A mini-series, Sound Advice.

Hugh: Rackmounting is a good idea. There are plenty of affordable racking systems around, or if you have some simple DIY skills you can buy the racking strips and create your own. For portable equipment, proper flightcases are essential. The cost is easily justified against the cost of repairs to unprotected equipment. There are several different levels of protection available, including sophisticated floating double-rack cases (ideal for delicate devices like computers), traditional wooden cases, cheaper plastic forms, and soft bags. I mount rarely-used equipment in plastic cases, as this affords excellent protection while they are stored, and keeps the dust out!

Q. How can you keep your gear in good order?
Paul: Cables tend to receive a lot of abuse, so in my studio I have a row of large coat hooks on one wall and try to keep different types of cable on different hooks. The mains leads, for example, are kept separate from the balanced jacks — minimising the chance of using the wrong lead. Once a year I wipe the jack plugs with a rag soaked in Deoxit, to remove grease and improve conductivity. You can also spray this directly into XLRs and patchbays, but keep it away from capacitor mic capsules.

Hugh: Coil your cables properly. The worst thing you can do is wrap the cables between palm and elbow. This will force kinks into the cable, causing the cable screen to open up, thus increasing the susceptibility to interference. The required technique takes a while to master, but it is well worth the effort if you value your cables. The basic idea is to introduce a half twist as you form each loop of cable, but if you always make the twist in the same direction you end up with a neatly twisted cable! The better way is to twist forwards on one turn and backwards on the next — the 'over-under' technique — resulting in no net twist.

Paul: Most studio leads are short enough that they are easy to coil without kinking, and those little pink Velcro straps that you can get from DIY stores and stationers are ideal for keeping them tidy. Leave these permanently fixed to the cable for future use.

Hugh: Long, thin cables tend to get tangled very easily and this can be avoided if the cable is neatly coiled. Bring the two ends of the cable together, and then wrap the pair around your fingers, leaving about six inches of the looped end. Wrap this length around the middle of the coil formed on the fingers to hold it all together, with the last couple of inches of the loop pushed through one end of the coil The cable will now remain neatly packaged. When you need it, hold the two cable ends in one hand and retrieve the looped end from the coil in the other, if you then pull, the whole thing will unravel without tangles.

Paul: For live recording I use a lot of XLR cables. The easiest solution to keeping these tangle free is to connect them end to end, then wind them onto a garden hose reel. You can buy 'proper' cable drums but a decent hose reel works fine and costs rather less. As Hugh often points out, a further benefit is that you can put a cable tester across the ends of the reel and check all of the cables at once although you'll have some searching to do if there is a faulty one in there.
Q. How can you keep your gear in good order?  

Hugh: For less frequently used cables and adaptor leads, I find it best to keep them stored in large transparent zip-lok bags, and to keep those bags in a plastic container box. The cables don't get tangled this way, and they are much easier to find when needed.

Paul: It is good practice to put mics away when they are not in use. Capacitor mics should be treated gently and ribbon mics should be treated like eggs. Don't slam the lid of a wooden mic box, as the high SPL generated can damage more sensitive models. And to be really safe, only switch on phantom power after the mic is plugged in.

Hugh: Mics should be stored in a clean, dry environment. You can use the manufacturer's original shipping boxes, or invest in a case to store multiple mics more conveniently. Camera cases, with diced foam inserts, can accommodate a range of different mics securely. A good idea is to throw in a few silica-gel sachets to control the humidity when the case is closed, but don't forget to check your mics regularly and dry them out periodically. If you want to keep the mics on the stands in the studio, it's a good idea to cover them with a loose plastic bag. This will keep the dust off and also protect the mic from sudden wind blasts. Don't seal the bag at the bottom — leave it open so that the air is free to circulate. If you seal the bag, changes in ambient temperature could cause condensation inside the bag.

Paul: Other enemies of gear are damp and dust. If your studio is in a shed or garage, buy yourself a dehumidifier. Dust is easily tackled by putting a towel or old sheet over your desk when not in use, but don't forget to use the vacuum cleaner. Judging by some of our Studio SOS visits (mentioning no students in Leeds), the vacuum cleaner is often the least well-understood piece of technology in the studio! Fluffy, antistatic dusters are also wonderful for shifting dust from complicated surfaces such as mixing desks and outboard racks.


Published May 2008

Friday, May 26, 2017

Q. Why don't my synth basses sound good on a hi-fi?

I'm mixing a project which has a number of synth parts that sound great in my studio, but I've just been listening to some rough mixes on my home hi-fi system and things are not good. Firstly, the sounds go very low and are quite bass-heavy, and they distort my normal hi-fi speakers despite coming over great on my studio monitors. Also, some of the instruments just do not sound like they do in the studio. I'd go so far to say that lumps of the sound just aren't there on the hi-fi.
How should I deal with these sounds? My studio speakers (HHB Circle 5s) probably go down to 45Hz, but my hi-fi only goes down to 65Hz and I can't assume a listener will have studio-class monitors or a subwoofer, so I need to tailor the mix so it translates on a range of systems. But I don't want to lose my sounds!

My room has no fewer than six bass traps, and splayed walls and ceilings, so I can't see that it's a room issue. Besides, normal mixes of acoustic/rock music translate fine. In case it's helpful, my music is mostly electronica.

SOS Forum Post

SOS contributor Mike Senior replies: Given that acoustic and rock music already translates pretty well, I think the problem is likely to be to do with the way your monitors are dealing with sub-bass frequencies. Acoustic and electric bass instruments are unlikely to give the kind of powerful fundamental frequency to each note that a synth can, so the capabilities of your monitoring in this area may not have been pushed particularly hard until now.
Stuffing ported monitors (HHB Circle 5s in this case) with socks or fabric will attenuate low frequencies emitting from the cabinets. This will make their output bass-light, but you'll be able to judge the low-mid frequencies better as a result.  
Stuffing ported monitors (HHB Circle 5s in this case) with socks or fabric will attenuate low frequencies emitting from the cabinets. This will make their output bass-light, but you'll be able to judge the low-mid frequencies better as a result.

For a start, I wouldn't assume that you have no room problems in your control room, despite your acoustic treatment. Your room design and bass trapping will be helping matters, but it's phenomenally difficult to control the frequency range below 50Hz, so you are still likely to have some sub-bass unevenness around the room. For this reason, I'd at least stroll around the room a little when comparing your sub-bass levels against suitable reference material, as this may help give you a more average view of the levels.

Room modes are only one thing that could be causing you problems. Unless you have your speakers on solid stands, sub-bass may be wobbling the stand about and affecting the low-end response. The heavier and more well-rooted your speaker stands are (and the better the speakers are stuck to them) the better your bass accuracy will be. Using speaker-stand spikes to get through carpet, filling hollow speaker stands with sand, and putting non-slip matting under your speakers are all tactics that can help. Also, if you have a boarded (as opposed to concrete) floor, then it could easily be resonating at low frequencies, as could any large furniture surfaces, affecting the perceived sound.

The ported design of your monitors may also be a partial culprit here too. Although porting is often used by manufacturers to increase the bass output of smaller speakers, the side-effects of the port resonance can make mixing bass instruments a real nightmare. For a start, the port's main resonant frequency is probably around 35-40Hz, and anything at this frequency will ring on quite dramatically. The resultant length changes make it very difficult to judge balance. Another side-effect of the port is a very steep roll-off below the port's resonant frequency, and I think this might be encouraging you to use too much sub-bass. I'd guess that the distortion you're getting through your hi-fi is a result of its consumer-grade amplifier struggling to cope with lots of inaudible sub-bass.

The ports on the Circle 5s are also rather slot-shaped, which is likely to produce a fair amount of turbulence (and therefore noise) which will tamper with your perception of sub-bass volumes. Then there are low-frequency compression and distortion effects from the port as well, which could lead you to think that your synth sounds have more low mid-range than they actually do. Given that bass sounds are primarily audible from their low mid-range on smaller speakers, that's probably part of what's making the comparison of your studio and hi-fi monitors confusing. There's also the fact that your hi-fi speakers are almost certainly ported as well, but at a different resonant frequency, which doubles up the problems...

The real question is, how can you work around all this? Well, I've already alluded to walking around the room and referencing against commercial material for coping with room modes, but there are other things you can try too. For a start, try running the sine wave sweep file from SOS January 2008 (www.soundonsound.com/sos/jan08/audio/sinesweep.mp3) through your Circle 5s at a realistic volume, because it can reveal a surprising number of things.

First of all, if you look at the speaker-cone excursions, you'll almost certainly find that they start quite wide, then seem to get narrower as the tone frequencies rise, before widening out again. The excursions narrow the most at the resonant frequency of the port, and this frequency will be where the port-related problems are likely to be most problematic when mixing. If you can begin to get a feeling for how the port resonance sounds, you can go some way towards mentally compensating for it when you're mixing.

The sine tones will also give you an idea as to whether you still have room-mode problems; any level peaks/troughs will be pretty clearly audible. Plus, sine waves are so pure that floor or furniture resonances and port noise will show up much more starkly than when listening to complex music.

Another tactic I'd try is occasionally blocking your monitors' ports with a pair of old socks, or a J-cloth, as is being used in the example above left! This'll probably give you a rather bass-light sound (the speaker's frequency response was designed with the port's bass boost in mind, after all), but I have found that with a lot of ported monitors it also makes the balance of bass and mid-range frequencies much easier to judge reliably.


Published March 2008

Tuesday, May 23, 2017

Q. Do you have any soldering advice?

I have a vast amount of mic cable and a load of three-pin Neutrik NC3FX female connectors ready for soldering (there is no need for male connectors as the other ends are going to my patchbay). I've done a limited amount of soldering in the past and just wondered if there were any handy tips? I've got all the tools, including a 'desolderer' and a multi-clamp to hold things in place.
SOS Forum Post
It always helps to tin any wires before soldering joints. Use a little solder on the twisted strands to lightly coat the wire. 
It always helps to tin any wires before soldering joints. Use a little solder on the twisted strands to lightly coat the wire.

 Make sure that your connector is securely fastened in a vice or clamp to stop any movement while you solder. 
Make sure that your connector is securely fastened in a vice or clamp to stop any movement while you solder.

 Leave any mistakes to cool before using a desolderer to clean the joint of any old solder, and then start again. 
Leave any mistakes to cool before using a desolderer to clean the joint of any old solder, and then start again.  

Technical Editor Hugh Robjohns replies: Wiring XLRs is one of the easier DIY challenges to tackle once you have a little experience under your belt. The solder contacts are large and fairly tolerant of over-heating, while cable trimming and dressing aren't too critical either. It's a good way for novices to get started and build their confidence in soldering and cable preparation.

The first step is to thread the cable through the strain-relief collar. It's immensely frustrating to have to unsolder a perfect connection just to put the collar back on, so don't forget! If you're planning to use slide-on cable identification markers, then put these on before the collar.

With the cable threaded through the collar, strip off the outer sheath and prepare the individual wires. It's best to use a proper wire stripper for this, and it's a good investment to buy the best self-adjusting type you can find. Using the wrong tool could damage the insulation and/or nick the wires. The former risks short circuits, the latter risks breakages and open circuits.

With the wires trimmed to an appropriate length and stripped, it helps to 'tin' them. Twist the strands tightly together, heat each wire, and feed in a little solder so that it flows and coats the metal. Don't get it too hot, though, as the insulation is likely to melt or shrink.

It's good practice to then introduce some insulation sleeving over the screen wire, to prevent short circuits inside the connector body. You can buy bags of pre-cut rubber sleeves that make the job neat and tidy, and they also allow for easy re-working if you need to repair the connection at a later stage. Heat-shrink sleeving can be used, but makes the job of repairs slightly more difficult. Also, at this stage, decide which of the two core wires will be denoted as 'hot' and which as 'cold' — make a decision and stick to it!

Next, fix the connector into a small vice or multi-clamp in such a way that allows you to access the three pins, and then tin each of them. If you don't have a vice or clamp, then you could use a cable tester, or a similar device (the heavier the better to stop things moving around too much while you are working), as long as the connectors are fitted somewhere convenient. Also, I find it helps to point the female end of the connector slightly uphill, otherwise the solder disappears inside the terminal!

Identify the pin numbers (these are usually embossed beside each pin on both the inside and outside of the connector) and remember that the male and female connectors are mirror images of each other. For that reason, it makes sense to wire all the connectors of one sex first, and then all those of the opposite sex. If you alternate between wiring male and female connectors, it is inevitable that you will end up wiring at least one backwards!

Once you have correctly identified each pin, offer the 'cold' wire from the cable to pin 3 (it's the the one in the middle). Hold it steadily in place while you heat both the wire and the terminal, and then feed in some solder. As soon as the solder melts, remove the heat and hold everything still until it cools and the solder sets — it should be just a few seconds.

The key is to be be as quick, clean and precise as possible. Don't keep jabbing at the solder joint. If it isn't right, do the next joint and come back to any problem later once it has cooled. Use the solder-sucker (desolderer) to clean the joint of any old solder and start again.

Repeat the process for the 'hot' wire on pin 2, and then the screen wire on pin 1. I don't recommend linking pin 1 to the connector shell as it usually causes more trouble than it's worth, but there is a central tag for that purpose if you should require it.

If you're happy with the solder joints, fit the plastic insulation and cable clamp sleeve. Slide the whole thing into the metal shell (being careful to align the rib and notch), ease the release button into place and screw the end-gland up tight. Always test the cable to make sure that it's wired correctly (with particular attention to pin 1/pin 3 reversals). In the case of patchbay wiring, it pays dividends to label the cable ends in some meaningful manner, making it easier to replug things later.


Published June 2008

Saturday, May 20, 2017

Q. Can I spray-lube my crackly pots?

I've got a problem with one of the gain knobs and both of the bass knobs on my Rane TTM56 DJ mixer. They've been used quite a bit over the last couple of years and have recently started crackling whenever I adjust them in any way. Usually, if I'm getting bleed or crackle from a fader I'll use some sort of spray lubricant, like WD40, but I'm not sure if this will work with EQ knobs. I've often heard people mention contact cleaner for use with connectors, so I assume this kind of thing could work for my pots? Has anyone had similar problems, and if so could you offer any advice?

SOS Forum Post
Caig's Deoxit D5 is a contact enhancer that's an excellent choice for cleaning connectors, as it improves conductivity and — unlike many other lubricants — doesn't leave a sticky film. Deoxit can also be used on crackly pots, and while it won't actually restore them to full health it could buy you some time while you look for a replacement pot. 
Caig's Deoxit D5 is a contact enhancer that's an excellent choice for cleaning connectors, as it improves conductivity and — unlike many other lubricants — doesn't leave a sticky film. Deoxit can also be used on crackly pots, and while it won't actually restore them to full health it could buy you some time while you look for a replacement pot.  

Editor In Chief Paul White replies: We get a number of enquiries as to the best way to clean faulty socket contacts or crackly pots, and there are many commercial contact cleaners available. However, you should be aware that most ordinary contact cleaners have a greasy base and tend to leave an oily film on the surface being treated. So, although you may notice an improvement in the short term, you often find that dust builds up on the sticky surface and may eventually make the problem even worse than before. Most connector contacts can be cleaned to some extent by repeatedly inserting and removing the connector (Studiospares market an abrasive dummy jack plug that does the job more effectively), although the normalising contacts found in patchbay and insert point TRS jacks aren't in direct contact with the plug, so they don't tend to respond to this treatment. My preferred treatment for awkward connectors is to use Caig's Deoxit D5 spray, a contact enhancer that reacts with the metal surfaces of the connectors to improve conductivity, but without leaving a sticky film. You can also use it, sprayed onto a cloth, to wipe jack plugs clean as part of your routine maintenance. Avoid getting it near the capsules or internal electronics of capacitor mics, though, as it can compromise the operation of the extremely high impedance circuitry used there. Almost every large music store in the US stocks Deoxit, but in the UK you may have to order it from a studio supply company or track it down on the Internet.

Compressed air can sometimes remove dust that may be causing a pot to be crackly. However, the problem may not be dust: most pots have a carbon-based resistive track, and the action of the metal wiper contact eventually wears away some of the carbon, which can also generate crackling. If you use a cleaner/lubricant spray on a badly worn pot this carbon can mix with it, to create a greasy carbon-dust sludge. In the long term, replacing the pot is your best option, but a spray of Deoxit D5, or even off-the-shelf contact cleaner, may buy you some time. You need to be able to get to the back of the pot and spray into it where the three contact lugs exit the casing, so the flexible tube that comes with these sprays is useful here. Don't try to spray the top of the pot, hoping some will run down the shaft and into the mechanism, because that part of any pot is pretty well sealed.

Finally, a lot of dust-related problems can be avoided by covering mixing consoles and patchbays with cloths when not in use.


Published July 2008

Thursday, May 18, 2017

Q. What is the best way to record Guitar and Vocals at the same time?

I do a lot of recording and music production with acoustic musicians. If a piece of music has acoustic guitar and vocals, the musicians often like to do the singing and playing together in the same take, rather than separately record the guitar track and then overdub the vocals. Doing it this way does keep the live and natural feel but I always get vocals bleeding into the guitar channel, however carefully I position the mics. I use an SE large-diaphragm mic for the vocals and an AKG C1000 with a cardioid pickup pattern for the guitar. I love the sound of the C1000 — but is there a similar small-diaphragm condenser that is hypercardioid, to reduce the amount of bleed?
John Ablitt
An omnidirectional mic with an absorber behind it, placed slightly beneath and to the right of an acoustic guitar (from the player's position) can produce good results on singing guitarists, with minimal spill from the vocal mic. 
An omnidirectional mic with an absorber behind it, placed slightly beneath and to the right of an acoustic guitar (from the player's position) can produce good results on singing guitarists, with minimal spill from the vocal mic.  

Editor In Chief Paul White replies: Hypercardioids can be useful but are quite critical on positioning and tend to be less forgiving if the player moves around when performing, so I try to avoid using them in the studio whenever possible. They also have a vulnerable spot directly at the rear, where they can pick up unwanted sounds, so you must be careful where you aim the back of them.

I record a lot of acoustic players who want to sing at the same time, and providing the level of spill is low enough to allow you to get a good balance, it isn't usually a problem — as long as the spill isn't too coloured by the room sound. Hanging improvised acoustic absorbers around the playing area can help, the ubiquitous duvet being an obvious budget solution.

I'll often use an omni mic with an absorber behind it to capture the guitar sound — usually with the mic position below and in front of the the guitar body to the right of the player. Imagine the guitar is a Fender Strat and you're aiming the mic to look right down the jack socket from nine inches away and you won't be far off. The benefit of an omni mic is that the positioning is less critical, there's no bass boost if you work close up, and any spill comes across as more neutral sounding. That said, a cardioid can also produce perfectly acceptable results when used in much the same way.

Small-diaphragm condenser models generally work best for the guitar and large-diaphragm models for the vocals. You can still use your usual condenser mic for the vocals, ideally hung inverted just above the singer's mouth level and fitted with a pop shield. Try to get the singer to work fairly close up — six to nine inches or so — as this will keep the level of spill to a workable minimum. I find that this method still leaves you with some guitar spill in the vocal mic, but the guitar mic tends to pick up less spill from the vocals, as the position below the guitar puts it at a reasonable distance from the singer's mouth. This particular miking method also puts both mics at roughly the same distance from the guitar strings, so you shouldn't suffer any significant phasing when the two mic signals are mixed.

The other classic approach is to use figure-of-eight mics for both guitar and voice. The benefit of a figure-of-eight mic is that it is completely 'deaf' 90 degrees off-axis, so if you set up each mic so that the side axis points directly towards the sound source to be rejected, you'll get good separation — with the caveat that you have to take care to reduce unwanted sound getting into the rear of the mic. Duvet screens can help with this and commercial screens such as the SE Reflexion Filter also work well behind figure-of-eight and omni mics — as long as you don't get them too close to the mic. In all cases, maximising the physical distance between the mics as much as possible will reduce spill.


Published August 2008

Monday, May 15, 2017

Q. Do I need a Neumann?

If microphones tend to suit some voices better than others, do I really need a high-end vocal mic rather than a much more affordable mid-priced model?

I've noticed that many people mention how any given microphone will suit some voices and not others. However, they seem to make such comments more readily about the budget range of microphones, and I don't see big names like Neumann getting tarred with that brush. Is there an element of brand snobbery here? Or are mics such as those made by Neumann and Microtech Gefell designed so that they flatter everyone's voices?
 
SOS Forum Post
 
SOS contributor Mike Senior replies:
Q. Do I need a Neumann?You may find that the Rode NT1A  (left) sounds as good as a Neumann U87 on your voice.  But it may not, so it's important that you try before you buy. 
You may find that the Rode NT1A (left) sounds as good as a Neumann U87 on your voice. But it may not, so it's important that you try before you buy.

I've done quite a few multi-microphone shoot-outs for workshop sessions that I've run, and I think that my experiences might shed some light on your question. What I've found is that vocal mics roughly divide into three categories. In the lowest band are the mics that actually sound pretty ropey on every voice. These are mostly in the sub-£150 range, and in my opinion you need to step very carefully if that's your budget, to avoid getting your fingers burnt. It's not that there aren't any respectable mics in this price range, it's just that there are many dodgy ones too.

Then there is the second category. This comprises mics that sound passable on many things, great if the mic happens to suit the instrument or voice you're recording, and pretty horrid if it doesn't. This describes most of the mid-price mics I've tried, and even some of the more expensive 'character' mics. What is characteristic of this category of mic is that its sound is usually tailored in some way, either deliberately for a specific recording application, or because of design shortcomings. If you buy a mic in this category, you need to be prepared for it to sound terrible on some occasions and simply respectable for a fair amount of the time. However, if you're just recording one singer and it happens to sound fantastic on them, then you've obviously got yourself a bargain. This is why we so often recommend experimenting with various different vocal mics when you start working with a new singer. You also need to be careful when using 'category two' mics in any situation where you're likely to pick up appreciable levels of off-axis sound (room ambience or spill from other instruments), because these mics often give an undesirable tonality to off-axis sounds.

The third category of mic doesn't so obviously tailor the sound, instead capturing it fairly neutrally. This is where I'd put mics like the Neumann U87 or the B&K 4000 series, for example. The technical demands of producing such mics generally make them pretty expensive. The thing about mics in this category is that they tend to sound only 'very good' (if that makes sense) when the original sound source isn't stellar. In multi-mic shoot-outs, for example, I've found that at least one less expensive mic will usually out-perform the 'category three' mics (according to audience consensus). This is because the category two mic will happen to change the character of the sound source in flattering ways — perhaps compensating for that sound's inherent deficiencies. However, what I've also found over time is that category three mics never deliver an unacceptable result. Category two mics, in contrast, tend to appear at all positions in the hierarchy, from first choice to last, depending on the particular combination of sound source and room being used. To my mind, one of the most important things you're paying for with a high-end mic such as the U87 is that they will reliably give you very good recordings every time.

If the sound source you're recording already sounds fantastic, then the category three mic will tend to perform better when compared with the category two mic — it is likely to get closest to that glorious sound within the room. Furthermore, premium mics benefit from a great deal more engineering, partly developed to even out the off-axis sound. So if you're recording in a situation where spill may get into the vocal mic off-axis, then the differences between categories two and three begin to become much more apparent. There are now a lot of affordable mics that will give you a reasonable close-miked vocal recording when you work on-axis, and with a bit of acoustic treatment. However, if you put most of these mics out in the middle of an ensemble, their off-axis colorations can quickly let them down by compromising the effect of the other instruments with dodgy-sounding spill.


Published May 2008

Friday, May 12, 2017

Q. Can you identify my discs?

Following a recent lesson I had taught on music technology history, one of our teaching assistants mentioned that she had found some five-inch discs at home in her loft.
Q. Can you identify my discs?They appear to be thin steel discs coated in what seems to be thick varnish. The groove is clear to see but the material has cracked in places. I tried to get my Technics deck to play them but they are too small and the arm returns too soon. I have a gramophone, but I think that the arm and needle could scratch the surface off.
David Cooke's mystery aluminium discs.
Do you think that they could be some sort of home recording? Perhaps pre-tape, or at least pre-consumer tape machines? Possibly even 'end-of-the-pier' booth recordings?

David Cooke
Technical Editor Hugh Robjohns replies:
I think you are right, David. These look as though they are the kind of discs that might come from an end-of-the-pier or music shop automatic booth recorder, dating back to the 1940s, at a guess.


David Cooke's mystery aluminum discs.


It's all well before my time, of course! So, I made a few enquiries of my elders and betters (many thanks, Pete), and was told that five-inch discs such as these were made in automatic booth recorders. The discs play at 78 rpm and the recording was usually cut directly into bare aluminium. However, some discs were made with coated aluminium, as these pictures appear to show. The coating was either acetate or a type of gelatine that was water-soluble (and easily damaged, as you can imagine). It's hard to tell from the photo which type these are, but the obvious shrinkage and peeling means that they need to be transferred fast if the material is of some value, as this deterioration will almost certainly accelerate.

Something else to bear in mind is that a lot of these records were made using the old 'hill and dale' groove technique. This technique used vertical groove modulation, rather than the side-side modulation format that became the norm for commercial discs (or the 45/45 format used in modern stereo microgroove records).
Again, it's hard to tell from the photo, but the grooves on the pictures make me think that these are hill and dale recordings (unless the light is playing tricks).

Published May 2008

Tuesday, May 9, 2017

Sample Clearance

By Richard Salmon
Using someone else’s recording in your music without permission can lead to disaster. We explain the ins and outs of copyright law, and guide you through the process of clearing your samples.
Sample Clearance
To sample or not to sample? This is the question many a DJ, producer, and songwriter must grapple with on an almost daily basis. Sampling is fun, and in the era of the ubiquitous digital audio workstation, very easy to do. But is it always a clever move from a legal and business perspective? In this article we’ll consider how to go about sampling within the law, how to avoid getting sued, and consider some of the pitfalls of falling foul of copyright law.

What’s The Problem?

Sampling involves the incorporation of another sound recording into your own new record. A producer may sample an underlying element in a record — for instance a string or bass line, perhaps borrow a drum loop, or even lift several bars wholesale from a classic soul record — and write a chart–friendly melody over the top.

The creative act of sampling is nothing new. Much of the Beatles’ late–’60s output owes a great debt to the sound–collage and tape–splicing artistry of production legend George Martin. Nor should sampling be a worry, when the primary source of the sample is self–created. Be it a vocal drone, birdsong recorded and cut up into your dance tune, or as in the case of the Nile Rogers’ inspired vocal stutter, ‘No... No... Notorious’. Rodgers had sampled Duran Duran’s vocals and edited them into an immediate radiotastic hook, as he’d already done on 1984’s pitch–shift sampled intro to ‘The Reflex’. Modern–day producers such as Timbaland and Pharrell Williams aren’t averse to incorporating their own homegrown beat–box elements into major airplay hits. The Williams–produced ‘Rock Your Body’, for instance, is liberally peppered with Justin Timberlake’s own down–the–mic percussive elements.

The legal headache, as far as the producer, artist or songwriter is concerned, stems from using another person’s original sound recording without prior permission, since this constitutes copyright infringement. The act of sampling without permission infringes copyright in three distinct ways. Firstly, it is a breach of copyright in the original sound recording. Secondly, it is a breach of copyright in the underlying music and lyrics, and thirdly, it constitutes an unauthorised use of one or more of the performances in the original work, such as a guitar riff, vocal hook, or drum part. In addition, the moral rights of the original artist may be infringed, if sampling is undertaken in a way that the artist objects to, or if the artist isn’t credited.

Sense and Substantiality

In UK law, under the Copyright Designs and Patents Act 1988, in order for infringement to take place a ‘substantial part’ of a copyright work must have been used. Substantiality in UK law differs somewhat from its US counterpart, the doctrine of ‘substantial similarity’. Moreover, US copyright law permits the defence of ‘fair use’, which has been invoked in a number of recent cases, although not always successfully (see ‘Case Dismissed’ box).

Regarding the question of whether a ‘substantial part’ has been copied, the UK case of Produce Records Ltd vs BMG Entertainment Ltd (1999) established that a 7.5–second sample of ‘Higher And Higher’, a track originally recorded by the Farm and owned by Produce Records, constituted infringement when appropriated by veteran Latino duo Los Del Rio, for their summer hit ‘Macarena’. BMG settled the case out of court, thus avoiding trial, with the major label appearing to concede that Produce had an arguable case.
Robbie Williams blends into the crowd at a  Stoke City home match. 
Robbie Williams blends into the crowd at a Stoke City home match.

In Ludlow Music Inc vs Williams (2000), a two–line lyrical ‘sample’ of the song ‘I’m The Way’, written by Loudon Wainwright III and published by Ludlow Music, formed the basis of a copyright dispute, when Robbie Williams used very similar lyrics in his own song ‘Jesus In A Camper Van’ — there was no use of the original recording, so the dispute only concerned copyright in the song itself. At considerable expense to the record label, the judge ruled that the Robbie song be removed from all future pressings of his album I’ve Been Expecting You. Robbie also lost out on 25 percent of the publishing income on ‘Jesus In A Camper Van’ to Ludlow Music, a figure said to be somewhere in the region of £50,000.

Despite the fact that the judge actually described Loudon Wainwright’s own song as a parody of an earlier Woody Guthrie song, he was of the view that the extent of the copying was substantial, “although not by much”. Compare the following lyrics and decide for yourself! Loudon Wainright’s lyric goes:
Every Son of God gets a little hard luck sometimes, especially when he goes round saying he is the way.

The Robbie lyric went:
I suppose even the Son of God gets it hard sometimes, especially when he goes round saying I am the way.

Over the pond, the recent US decision by the Sixth Circuit in Bridgeport Music vs Justin Combs Publishing (2007), confirmed copyright infringement liability against Sean ‘Diddy’ Combs and his Bad Boy record label. This case concerned the title track from The Notorious BIG’s 1994 album Ready To Die, which sampled the song ‘Singing In The Morning’ by ’70s funk outfit the Ohio Players. The Biggie record sampled just five seconds of horns from ‘Singin’ In The Morning’, but very bad boy Diddy had failed to obtain a licence for its use.

The song’s copyright owners Bridgeport Music and Westbound Records sued for infringement, with a US jury awarding $733,878 in damages to Bridgeport, and punitive damages of $3.5 million to Westbound. Allowing common sense to prevail, the trial judge overturned the award, ruling instead that Bridgeport should receive $150,000 in statutory damages, with Westbound receiving $366,939 in actual damages. Still, that works out at over $100,000 per second of music — a brief yet very costly mistake!

Dr Dre, another big name from the US urban scene, has also spent his fair share of time in the legal spotlight. In 2003, Indian composer Bappi Lahiri and Saregama India Limited sued Dre and Universal Music for $500 million, over the use of an unlicensed sample on ‘Addictive’, the debut single from Truth Hurts’ album Truthfully Speaking. Dre was also slapped with an injunction preventing the continued sale of the record, which by then had already shifted over 200,000 copies.

Dre and his producer DJ Quik had used a sample of an old Hindi song, ‘Thoda Resham Lagta Hai’, without permission from the Indian copyright holder Saregama. The plaintiffs alleged that in addition to ‘borrowing’ the distinctive vocals, Dre and Quik had helped themselves to the hook, the melody and the rhythm.
Dre has also recently incurred the wrath of one Madge Ciccone. Madonna’s publishing company are up in arms over Dre’s alleged copying of her 1983 hit ‘Holiday’ on the single ‘Not Today’, featured in the film Barbershop 2. They are demanding a refund of £7m from Dr Dre and his collaborators, artists Mary J Blige and rapper Eve. The publishers allege that parts of ‘Not Today’ include “several obvious instances of reproduction”.

Know Your Rights

Not all court cases go in favour of the copyright holder (see ‘Case Dismissed’ box), but it’s always advisable to obtain a licence and permission from the copyright holder before sampling another’s work. Moreover, what may be acceptable in one country may constitute an outright infringement of copyright in another, and defences such as ‘fair use’ are not universally available everywhere. This needs to be borne in mind when releasing records internationally. So which rights should you be concerned with when sampling?

Even if you believe you can process, edit, or otherwise disguise a sample in the mix, you still need permission to sample. This means that the producer or artist must first gain sample clearance from the record label for use of the original sound recording and featured performances. Usually, you will also need permission from the publisher(s) for the use of the underlying composition (ie. the words and music). If copyright wasn’t originally assigned to a record label or publisher, then you’ll need to track down the respective copyright owners — or their heirs, if deceased — and seek their permission instead. Where, for example, a song has a number of co–writers or publishers, this is no easy task.

Alternatively, you could employ a sound–alike company to recreate the sample you’re after (see the ‘Recreation Grounds’ box). In this case you wouldn’t be infringing an original sound recording copyright, and would only require one set of permissions from the publisher of the music and lyric.

It’s ironic that in an era of rampant piracy and the downloading of ‘free’ music, those making records still need to clear and pay for samples — whereas the end consumer can enjoy an entire album free of charge. Still, as a business–to–business activity, sampling is a lucrative business for those companies sitting on valuable copyrights, and in corporate–speak, can often give rise to valuable ‘synergies’.
Kanye West, like many hip–hop stars, has used sampling extensively in his work. 
Kanye West, like many hip–hop stars, has used sampling extensively in his work.

Witness the recent release of Sean Kingston’s ‘Beautiful Girls’. Not only did Sony/ATV–signed writer Jonathan Rotem help write and produce the track, but the song sampled the Sony/ATV–owned Ben E King classic ‘Stand By Me’. The fusion of old recordings and modern technology helps publishers to safeguard future revenue streams by creating such chart–friendly hybrid copyrights. Rapper Kanye West has also topped the charts with his latest album offering Graduation, but much of the album’s royalties will actually find their way into the pockets of ’70s acts Steely Dan and Elton John, thanks to West’s bountiful sampling of these artists.

Should you fail to clear the original sample before releasing your own record, you may be faced with a number of unwelcome legal consequences. You could be sued for damages for copyright infringement and face an injunction stopping you from continued sale of any infringing copies, as well as having to recall and destroy any CDs or DVDs incorporating uncleared samples. Your record label could even lumber you with the costs of this remedial work.

Clear Conscience

If you produce or remix records for other artists, it’s usually your responsibility to clear any samples introduced during the recording process. The artist or their label will probably make you contractually responsible for doing so as a pre–condition of accepting delivery of the final record. Where the record label asks or insists that you include a particular sample, you should request that they pay for the related clearance costs. In other cases, sampling will add to the overall recording cost, and may be deducted from your earnings unless agreed otherwise.

If you already have a record deal, then you’ll need to address the issue of whether any sample clearance fee, royalty payment or advances paid to third–party copyright holders should be recoupable from your own royalty earnings, or whether the record company should split all or some of the expense. Some labels take the view that sampling costs are part of recoupable recording costs, whereas others take a softer line. However, it’s never advisable to ignore the issue and release a record carrying uncleared samples. Further down the line, the record company may invoke the artist’s warranty clause in the recording contract and set about recovering sums direct from the artist, should the label be sued for copyright infringement.
During recording sessions, producers and artists should keep detailed notes of samples used, along with their source, and their timings on the record. This can be used for notification purposes on delivery of your final mix.

It’s also sensible for producers and writers to hire out their services through a limited company, then through an employment agreement with this new company, assign copyright in the songs that they produce. Should they be sued for millions in a copyright infringement claim, they’ll then be protected from personal bankruptcy!

In more general terms, in order to clear samples you can either use a sample–clearing company to assist you, or do the job of gaining permissions yourself. Sample–clearance companies such as Sample Clearance Services Ltd (www.sampleclearance.com) can often negotiate better rates than individual producers or DJs. Such companies can sometimes assist in providing legal advice and expertise in dealing with overseas labels and publishers, and may also be able to clear all future uses of the sample. Where, for example, your club tune crosses over, and you find you have a hit on your hands, you would then be free to license the record for film, TV, Internet or advertising usage, without seeking further licences.

Sample–clearance companies usually charge a flat rate: for example, Sample Clearance Services’ web site states that their “standard fees for sample clearance are £275–£300 per clearance”. Bear in mind that one sample may require two clearances: one for the sound recording and another for the publishing.

Two Steps Forward

Whether you use a clearance company or the DIY route, these steps should be taken:Major music publishers such as EMI are used to dealing with requests for sample clearance and have procedures in place to streamline the process.Major music publishers such as EMI are used to dealing with requests for sample clearance and have procedures in place to streamline the process.
  • The publisher of the original work must be contacted. You’ll need to find out who the original writers of the work are, and which publisher(s), if any, represent their interest or share of copyright in the song. In the UK, the MCPS/PRS can help you with this. They operate a vast database of registered works, and also have a sample–clearance team to assist you. Once you know the publisher and authors, you provide them with a copy of your new record, a copy of the original sampled record, and an isolated copy of the sample in question. Providing extra details, including the release label and size of the release, will help them evaluate your proposed use and speed up the process. The publisher is then in a position to consider price, contact the original composer for permissions concerning moral rights, and start negotiations over copyright ownership and royalty splits on the new record.
  • The record company must be asked for permission to use the original sound recording. Master rights have their own price tag, and sometimes artists or labels will simply refuse to give their permission to use a sample — and they needn’t give reasons. If no permission is given, or the price tag is too high, you needn’t abandon your project altogether: as long as you can license the publishing rights, sample recreation companies should be able to construct an authentic–sounding reproduction of the recording. See the ‘Recreation Grounds’ box for more details.

How Much?!

In the normal course of events, when permission to sample is given there will be a fee for the privilege. The value of a sample, as well as the method of payment, will be determined by a range of factors, including:
  • The notoriety of the original record and prominence of the sampled work in the new record. Puff Daddy’s ode to Biggie Smalls, ‘I’ll Be Missing You’, sampled the worldwide Police smash ‘Every Breath You Take’, thus sacrificing £500,000 in publishing royalties to its author, Sting.
  • The likelihood of your success with your record. The territory, format of distribution, status of the artist and marketing spend all affect how your new version will be perceived, and therefore how much you’ll be charged for the sample.
  • Contrary to popular myth, samples aren’t billed on a per–second basis like some phone calls — nor are they free when under three seconds long. The overall impact of the sample, together with all relevant commercial factors, means that each sample is evaluated on a case–by–case basis.
For the dance producer looking to issue a limited self–release, it’s best to obtain a buy–out of all rights in the sample for a one–off flat fee. This would allow the producer to release the record and not incur further expense were the track to be picked up by a major label or licensed on compilations worldwide.
A major artist will be able to charge top dollar for the right to sample their work. They’ll probably expect an advance payment running into thousands of pounds, as well as future royalties of approximately 1–5 percent on every record sold. These additional costs should be factored into your budget for the release.
Sample Clearance
Similarly, a stubborn or opportunistic publisher may demand 50–100 percent of the publishing income for the privilege of using their words or music. Rock band the Verve learned this lesson the hard way, when following the release of Urban Hymns in 1997 they were obliged to give up 100 percent of the royalties on album opener ‘Bittersweet Symphony’ to Abkco Records. The Verve had sampled The Last Time, a Rolling Stones / Andrew Oldham Orchestra record from 1965. In the court settlement, entire copyright ownership of the the Verve’s song went to Abkco, with full songwriting credit going to Mick Jagger and Keith Richards.

Most publishers are more reasonable when approached with sample clearance requests. But bear in mind that it can be a time–consuming process, especially if rights holders are based overseas, or where the track sampled has itself sampled another work. It won’t be sufficient to gain permission for the second–generation sampled work — you’ll also need to clear all original samples. And, of course, where you sample too extensively, it could end up eroding all profits in your track anyway.

Should you fail to clear a sample, or not even bother trying, you could still release your record and hope it goes unnoticed — although you’d be in breach of copyright. But what happens when an underground release becomes an unexpected hit? At this point the original copyright holder will crawl out of the woodwork and demand that you recall the record from the shops and pay damages, and if you’re very lucky you’ll be able to re–release the record, only with the offending sample removed. Quite apart from the legal nightmare of injunctions, lost profit, and damages claims, the delay alone could cost you sales and your chart position — a fate suffered by Rui Da Silva, who was sued by BMG records and obliged to remove an uncleared sample of Spandau Ballet’s ‘Chant No. 1’, from his dance hit ‘Touch Me’ featuring Cassandra.

Don’t let these cautionary tales put you off sampling, though. Most labels, publishers and artists are only too happy to give their permission to artists looking to re–work their music — for a fee. Moreover, not all unauthorised sampling ends in tears. ‘Tom’s Diner’, an a cappella song written by Suzanne Vega, was known only to fans who bought her 1987 album Solitude Standing. Then, in 1990, DNA sampled Vega’s voice over a sparse beat–laden track. The results were so popular that Vega and her label decided to issue it as an official remix, achieving worldwide acclaim and a top five single.

Case Dismissed

Sample Clearance2 Live Crew making a  statement with their bodies. 
2 Live Crew making a statement with their bodies.

Not all copyright disputes over uncleared samples are resolved in favour of the sample’s copyright holders.
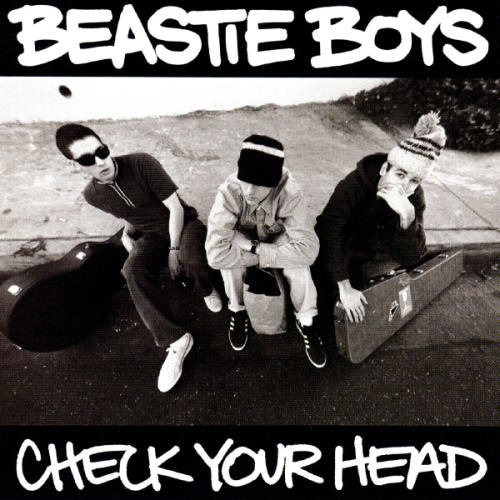
One example is the US case of Newton v Diamond (2003). In this case the Beastie Boys had actually obtained permission from ECM Records to sample a six–second, three–note sequence from James Newton’s flute recording Choir. The Beasties then incorporated the sample as a loop into their song ‘Pass The Mic’, which featured on the album Check Your Head. Unfortunately, the composer of the tune, James Newton, sued, as he hadn’t given his permission for use of the underlying composition.

On appeal, the court confirmed an earlier ruling that no infringement had taken place. The court was of the opinion that the use of the sample was minimal, the two records weren’t substantially similar, and also that the public wouldn’t recognise any appropriation of Newton’s composition. (Though it should be stressed that recognition alone is no legal barometer of whether another work has indeed been copied.)

Other defendants on the receiving end of sample infringement claims in the US have been able to rely on the defence of ‘fair use’. Fair use is a doctrine not recognised in UK, which permits copying for the purposes of criticism, reporting and review. The aim of the US legislators who enshrined this in law in 1976 was to allow authors to build upon, and transform existing works, but without the requirement of buying a licence to do so. The rights accorded to the copyright holder needed to be balanced with the broader cultural benefits of allowing artists to borrow from, re–work, and comment upon existing works of art. If Andy Warhol could re–work the images of Campbell’s soup or Marilyn Monroe, then a fair use defence would argue that today’s gangsta rappers should be free to sample their source of musical inspiration to produce new and original work.

The scope of the fair use defence was explored by the US Supreme Court in Campbell vs Acuff–Rose Music (1994), which concerned 2 Live Crew’s infamous parody of the Roy Orbison classic ‘Oh Pretty Woman’. Rather than dismissing 2 Live Crew’s claim on the basis that they’d used Orbison’s music for commercial gain, the court looked at the factors of acceptable fair use, ruling that parody constituted a fair use, despite the fact 2 Live Crew had benefited financially.

Guidelines that the court considered in evaluating fairness of the use included the purpose of the use and its commercial potential, the nature of the copyrighted work, the size of the sample taken in relation to the copyrighted work as a whole, and the effect of the sampling upon the market value of the original work. In general, cases of sampling will be more deserving of fair use protection where they represent true creative effort on the part of the producer, and don’t threaten the market of the original record. In this case, 2 Live Crew’s buying public were considered to be of a sufficiently distinct demographic to Roy Orbison’s older fanbase.

Recreation Grounds

Sample ClearanceSample–recreation specialists can help in situations where the owner of a  recording can’t be found, or refuses to license it.  
Sample–recreation specialists can help in situations where the owner of a recording can’t be found, or refuses to license it. If the owners of a sound recording flat out refuse to license your sample, or insist on a ridiculously high fee, you could employ the services of a sample–recreation company to work around the problem. Companies like Rinse Productions (www.rinseproductions.co.uk, or as interviewed in SOS September 2003 at www.soundonsound.com/sos/sep03/articles/rinse.htm) and Replay Heaven (www.replayheaven.com) offer to re–record the chosen sample, and can do so to such a high standard that the original version and the new one are practically indistinguishable. These musical skills have helped secure a string of dance hits for labels like Ministry of Sound, who recently benefitted from Replay Heaven’s recreation of sections of Steve Winwood’s ‘Valerie’ on Eric Prydz’s million–selling dance tune ‘Call On Me’.

High–quality re–recordings have the all the hallmarks of the original, but are quicker and easier to clear as there’s only the publisher to consider, and no prospect of stalemate over competing interests with the record label. One such example was the recreation of the Human League’s ‘Don’t You Want Me’, featured in a Fiat Puto ad depicting a lovers’ tiff played out in a Midlands garage forecourt.

Talking of re–recordings, there’s been much rumour of late in the press that Wu–Tang Clan have achieved the impossible, and obtained rights to sample the Beatles’ ‘While My Guitar Gently Weeps’, for inclusion on the WTC release ‘The Heart Gently Weeps’. This story has garnered welcomed publicity for the group, but the reality is somewhat different. WTC’s new track in fact includes re–created or interpolated elements of the Beatles’ original. Wu–Tang weren’t able to secure rights to the original master recording from EMI records or Apple Corps, and in fact their agreement sees them giving up 100 percent of all songwriting royalties, simply to re–record the Beatles composition. All publishing royalties will go to the estates of George Harrison and John Lennon, Northern Song owners Sony/ATV, as well as to Paul McCartney and the publishers of his share.


Published March 2008

Saturday, May 6, 2017

Q. Why don't my synth basses sound good on a hi-fi?

I'm mixing a project which has a number of synth parts that sound great in my studio, but I've just been listening to some rough mixes on my home hi-fi system and things are not good. Firstly, the sounds go very low and are quite bass-heavy, and they distort my normal hi-fi speakers despite coming over great on my studio monitors. Also, some of the instruments just do not sound like they do in the studio. I'd go so far to say that lumps of the sound just aren't there on the hi-fi.
How should I deal with these sounds? My studio speakers (HHB Circle 5s) probably go down to 45Hz, but my hi-fi only goes down to 65Hz and I can't assume a listener will have studio-class monitors or a subwoofer, so I need to tailor the mix so it translates on a range of systems. But I don't want to lose my sounds!

My room has no fewer than six bass traps, and splayed walls and ceilings, so I can't see that it's a room issue. Besides, normal mixes of acoustic/rock music translate fine. In case it's helpful, my music is mostly electronica.

SOS Forum Post

SOS contributor Mike Senior replies: Given that acoustic and rock music already translates pretty well, I think the problem is likely to be to do with the way your monitors are dealing with sub-bass frequencies. Acoustic and electric bass instruments are unlikely to give the kind of powerful fundamental frequency to each note that a synth can, so the capabilities of your monitoring in this area may not have been pushed particularly hard until now.
Stuffing ported monitors (HHB Circle 5s in this case) with socks or fabric will attenuate low frequencies emitting from the cabinets. This will make their output bass-light, but you'll be able to judge the low-mid frequencies better as a result.  
Stuffing ported monitors (HHB Circle 5s in this case) with socks or fabric will attenuate low frequencies emitting from the cabinets. This will make their output bass-light, but you'll be able to judge the low-mid frequencies better as a result. 

For a start, I wouldn't assume that you have no room problems in your control room, despite your acoustic treatment. Your room design and bass trapping will be helping matters, but it's phenomenally difficult to control the frequency range below 50Hz, so you are still likely to have some sub-bass unevenness around the room. For this reason, I'd at least stroll around the room a little when comparing your sub-bass levels against suitable reference material, as this may help give you a more average view of the levels.

Room modes are only one thing that could be causing you problems. Unless you have your speakers on solid stands, sub-bass may be wobbling the stand about and affecting the low-end response. The heavier and more well-rooted your speaker stands are (and the better the speakers are stuck to them) the better your bass accuracy will be. Using speaker-stand spikes to get through carpet, filling hollow speaker stands with sand, and putting non-slip matting under your speakers are all tactics that can help. Also, if you have a boarded (as opposed to concrete) floor, then it could easily be resonating at low frequencies, as could any large furniture surfaces, affecting the perceived sound.

The ported design of your monitors may also be a partial culprit here too. Although porting is often used by manufacturers to increase the bass output of smaller speakers, the side-effects of the port resonance can make mixing bass instruments a real nightmare. For a start, the port's main resonant frequency is probably around 35-40Hz, and anything at this frequency will ring on quite dramatically. The resultant length changes make it very difficult to judge balance. Another side-effect of the port is a very steep roll-off below the port's resonant frequency, and I think this might be encouraging you to use too much sub-bass. I'd guess that the distortion you're getting through your hi-fi is a result of its consumer-grade amplifier struggling to cope with lots of inaudible sub-bass.

The ports on the Circle 5s are also rather slot-shaped, which is likely to produce a fair amount of turbulence (and therefore noise) which will tamper with your perception of sub-bass volumes. Then there are low-frequency compression and distortion effects from the port as well, which could lead you to think that your synth sounds have more low mid-range than they actually do. Given that bass sounds are primarily audible from their low mid-range on smaller speakers, that's probably part of what's making the comparison of your studio and hi-fi monitors confusing. There's also the fact that your hi-fi speakers are almost certainly ported as well, but at a different resonant frequency, which doubles up the problems...

The real question is, how can you work around all this? Well, I've already alluded to walking around the room and referencing against commercial material for coping with room modes, but there are other things you can try too. For a start, try running the sine wave sweep file from SOS January 2008 (www.soundonsound.com/sos/jan08/audio/sinesweep.mp3) through your Circle 5s at a realistic volume, because it can reveal a surprising number of things.

First of all, if you look at the speaker-cone excursions, you'll almost certainly find that they start quite wide, then seem to get narrower as the tone frequencies rise, before widening out again. The excursions narrow the most at the resonant frequency of the port, and this frequency will be where the port-related problems are likely to be most problematic when mixing. If you can begin to get a feeling for how the port resonance sounds, you can go some way towards mentally compensating for it when you're mixing.

The sine tones will also give you an idea as to whether you still have room-mode problems; any level peaks/troughs will be pretty clearly audible. Plus, sine waves are so pure that floor or furniture resonances and port noise will show up much more starkly than when listening to complex music.

Another tactic I'd try is occasionally blocking your monitors' ports with a pair of old socks, or a J-cloth, as is being used in the example above left! This'll probably give you a rather bass-light sound (the speaker's frequency response was designed with the port's bass boost in mind, after all), but I have found that with a lot of ported monitors it also makes the balance of bass and mid-range frequencies much easier to judge reliably.


Published March 2008