Friday, June 30, 2017
Thursday, June 29, 2017
Q. I am deaf in one ear; can I mix with monaural hearing?
I use Logic Express 8 software and an Apogee Duet interface to record guitar and vocals in a small room at home. Unfortunately, I am 100 percent deaf in my right ear and wonder if you can offer advice on mixing tracks in light of this problem. Perhaps I should leave mixing entirely to someone with two ears?

Logic Pro's Multimeter plug‑in has a Goniometer display to assist with stereo balance while mixing, and various third‑party stereo monitoring and manipulation alternatives are also available.
Ed Newman
SOS contributor Martin Walker replies: You can certainly do a lot of mixing with monoaural hearing, Ed. You'll still be able to balance the elements of your mix as well as anyone else, and make decisions about the front-to-back distance of different sounds based on their relative levels and the amount of high frequencies they contain. You may also find that you notice musical nuances that others miss, since constantly listening through one ear can improve its perceptive powers.
With binaural hearing, directional cues rely on two physical processes: the time difference between sounds arriving at our left and right ears, and the intensity differences of sounds arriving at our left and right ears due to the 'shading' effect of the head. With monaural hearing, the pinnae (part of the ear outside the head) can still provide clues to the positions of incoming sounds, but I suspect creating a stereo mix will nevertheless be difficult.
Your best approach is to start by creating mono mixes. After all, mono compatibility is important for commercial releases, since this is how many listeners will hear music on portable radios, on club PAs, many TVs, the Internet, and in areas with poor FM radio reception. Moreover, even when you have good hearing in both ears and the final format is stereo or surround, many experts suggest first creating your mixes in mono, since this can help greatly in establishing a good balance between the various instruments.
Many musicians rely on panning different instruments across the stereo field to give some physical separation in a stereo mix. However, mixing in mono forces you to choose sounds that don't fight each other in the first place, as well as arranging them with the same goal in mind. This will usually result in a better mix when one starts positioning the various sounds in stereo, but is the point at which you will probably have more difficulty.
With guitar and vocals you'll experience few problems, since in a real performance both of these sounds will come from essentially the same point in space (most people would either use a central stereo pan position for both, or place them slightly either side of centre), and be supported either by the stereo acoustics of the room they were recorded in, or by a little stereo reverb whose amount you should also be able to judge well. I see no reason why you shouldn't be able to achieve good mixes of these songs.
Things may get trickier with more complex stereo mixes. Producer Terry Manning's 'Cardinal Points Law' suggests that using centre, hard left and hard right pan positions as a starting point will always give you a clear stereo mix, with less important sounds added to the in‑between positions, so you could use this approach based on the physical positions of the performers in real life to achieve a good starting point for a stereo mix.
However, many musicians find they ideally need to modify the EQ or relative levels slightly once they move from a mono to a stereo mix, so at this point I suspect you'd benefit from collaboration with another musician. That is, assuming you want to create a stereo mix — after all, the 'Back To Mono' movement has a surprising amount of support!
SOS Technical Editor Hugh Robjohns adds: My immediate reaction to this question was that you should simply arrange to monitor in mono on a loudspeaker. The advent of surround has made it far easier to buy a single speaker, so your budget is effectively doubled — you can buy a single speaker that's twice as good as the pair you'd usually be able to afford. You should be able to configure Logic to provide a fixed mono sum output for your monitoring.
Achieving a good balance in mono means that you're 95 percent of the way there for stereo anyway — for all the reasons Martin has said. All that is then left is some panning for a stereo output, and much of that can be done on a purely notional basis. Kick, snare and vocals in the centre, guitars panned one side, keys to the other, and so on.
Something that would help a lot, though, is a decent stereo image display. Something like the DK Technologies 'Goniometer' display (or stereo vector display) that I use would help you to establish that the left‑right balance is consistent and the stereo width is appropriate. Logic Pro's Multimeter plug‑in has a Goniometer, but I think you may not have that in Logic Express. [Consider instead PSP's Stereo Analyser plug-in, from the PSP Stereo Pack at $49 (www.pspaudioware.com) or the freeware Flux plug‑in from www.fluxhome.com/products/Freewares/stereotool.] Using that kind of display, you should be able to visualise the stereo image and form a good impression of how binaurally‑able people would hear it.
Published May 2009
Wednesday, June 28, 2017
Q. Can USB pen drives be used as a cheap way to record audio?
Someone suggested that I could use a USB pen drive to record audio on my laptop. Is this a good idea? How fast are they, and is it really a cheap way to separate my system and audio drives, or are there any problems inherent in this approach?
Mark Hinter
SOS contributor Martin Walker replies: USB pen drives (aka Flash drives and USB sticks) are an extremely convenient way to carry your personal data around, and to transfer data from one PC to another. They have increased in capacity over the last few years, from handy 64MB notepads to seriously capacious drives typically offering between 1GB and 8GB, at prices below $10.

With most modern operating systems, such as Mac OS X and Windows 2000, XP and Vista, they are also 'plug and play', requiring no drivers to be installed, so you can be confident that wherever you go you'll be able to plug in your USB pen drive, wait for it to be automatically detected, and then access your data.
However, recording audio is a rather more serious undertaking, and relies on the one parameter invariably omitted from USB pen drive specifications: sustained transfer rate, or — in layman's terms — speed. Although many are described as 'fast', this is invariably in comparison to older USB 1.1 compatible USB sticks that might take a couple of yawn‑worthy minutes to save a 30MB file.
But let's turn for a moment to the main reason for considering a USB pen drive: to separate your audio files from the single hard drive found on most laptops. Given that you can buy a 250GB internal hard drive for $30, it's scrimping on a Scrooge‑like scale not to install a dedicated audio drive on a desktop audio PC. However, laptops are intended to be portable devices, and carting around an external drive somewhat defeats the object, which is why I suspect folk are interested in trying a USB pen drive instead.
Many musicians expect audio nightmares when recording and/or playing back multiple audio files from a hard drive that already has Windows and all its applications installed on it. However, you shouldn't worry unduly about your operating system being on the same drive, since (as I showed back in PC Musician May 2005) Windows activity on a properly-tweaked audio PC tends to be minimal once you've loaded your sequencer application.
Ultimately, the question you should ask yourself is whether your internal laptop drive is fast enough to record and play back the maximum number of audio tracks you need. I carried out some tests on a variety of hard drives in PC Notes April 2004, including various laptop drives with speeds ranging from 4200rpm to 7200rpm and, despite slowish sustained transfer rates of between 23MB and 36MB/second, all of them were nevertheless perfectly capable of managing dozens of simultaneous audio tracks.

USB Flash Drives may be fast enough to play back a couple of dozen audio tracks, but are considerably slower than most laptop hard drives, unless you buy an expensive dual‑channel model that costs up to 10 times as much.
Let's turn our attention back to USB pen drive speed. It's tempting to assume that pen drives will have a similarly huge bandwidth to system RAM, but this isn't the case. I dug out several in my collection, and even the fastest 1GB Emtec 1GB USB 2.0 Flash drive bought just a couple of weeks ago (for about $7) only registered a modest 14MB/second, quite fast enough to manage up to perhaps 20 24‑bit/96kHz audio tracks, but still about half the speed of a typical 4200rpm laptop drive. The fastest pen drive I discovered on the Internet (an OCZ Rally2 Turbo Dual Channel Flashdrive model costing about $30) managed about 30MB/second, making it slightly slower than a typical 5400rpm laptop hard drive.
So, yes, you could plug in a USB pen drive and use it for audio recording, but simultaneous track counts are likely to be considerably lower than those of even the slowest of today's laptop hard drives, and if you're interested in performance, creating a partition devoted to audio files on the laptop's single internal hard drive will generally offer much better performance.
Published March 2009
Tuesday, June 27, 2017
Monday, June 26, 2017
Q. How do I approach the process of mixing an entire album?
Over the last couple of years I've mixed quite
a lot of songs, but only single tracks here and there. Now I'm about to
mix an album, and I'm wondering what would be the best way to do it. The
recording has been done in a very decent studio, and they have been
adding some programmed elements afterwards. I want to avoid a situation
where I mix all the tracks so that they sound great on their own, only
to realise later that they won't fit together as a whole. How would you
approach this? Would you mix one track, and use it as a reference for
the other mixes? Would you re‑use some of the settings (for example, use
the same plug‑ins for the same tracks, with some tweaks)? Sadly, the
budget doesn't allow for a separate mastering job, so I would have to do
some limiting and final tweaks myself.
SOS Forum post
SOS contributor Mike Senior replies: If you're wanting a collection of tracks to fit together on your record, it makes sense to have some elements common to the different mixes, but at the same time you can't just duplicate your mix settings slavishly, because you also need to allow yourself enough flexibility to respond to each cut's unique mix‑processing needs as well, especially if the instrumentation changes radically from one to the next.

If you're seeking a cohesive feel, the approach required for mixing an entire album of material will usually be somewhat different from that for mixing a single track.
One strategy would be to identify some common arrangement elements that could be used as a kind of 'sonic anchor' for the production as a whole — something that appears in nearly every track, and which, if given a consistent sound signature, might conceptually glue all the tracks together. The lead vocals are an obvious choice in a lot of cases, as they are usually very prominent in the mix, and consistency in this department is often desirable for 'brand recognition' purposes. However, any other important instrument might just as readily fulfil this role too: drums and bass for a rock band, perhaps; acoustic guitar or piano for a singer‑songwriter; or the kick‑drum samples for a house or hip‑hop act.
The point, though, is that it would probably be a waste of effort to try to match everything between the different mixes — it would take you ages and wouldn't make the mixes any better, because you'd be torn between making an instrument sound the same as on the other tracks and making it sound the way it needs to in that specific mix. Duplicate your plug‑in settings for a couple of the most important elements (maybe vocals and bass), and then work from there, trusting yourself to 'fill in the blanks' on each mix as you would normally do, and tweaking the duplicated plug‑in settings as necessary to make each mix work in its own right. Remember that, if nothing else, your own personal mixing style will also contribute to a consistent overall sound.
Another thing which might help is to decide on a basic core line‑up of send effects (especially reverbs and delays), supplementing them with other effects specific to each mix as required. Even though you'll need to adjust the levels and reverb/delay times of these core effects to match the different mixes, their basic sound will otherwise remain fairly consistent, giving all the cuts on the record something of a common environment, whether real or unreal sounding. And again, don't be afraid to tweak the duplicated effects if that works better in each specific mix; just having started with them as they were will have helped put you in the same mindset as you were in on the previous mixes.
I would certainly reference the full mixes against each other as you work, but I'd leave this comparison until you've got a pretty good draft mix up and running in each case, otherwise it's easy to start chasing your tail with individual instrument levels. Once you have a good first draft of a mix, import it into a new sequencer project so that you can compare it not only with the other mixes you've done, but also with a selection of representative commercial mixes. The main things to look for here, in my experience, are the levels of certain key instruments such as drums, bass and vocals (as these can be very genre‑dependent) and the overall tonality of each mix. Be careful of getting too obsessed with other, more minor, details, as this is usually a good way to spend lots of time for very little reward! This referencing project will also help with getting suitable loudness levels if you're going to be taking on the responsibility for loudness processing in the absence of a mastering engineer.
Published March 2009
Saturday, June 24, 2017
Friday, June 23, 2017
Q. Which entry-level Sequencer should I choose?
I'm looking for advice about a software sequencer,
mainly to record guitar, electric bass, basic keyboards and banjo, plus
some small use of MIDI sampling to provide backing tracks and maybe drum
tracks.
I do have Cubase SE but this seems quite complicated for use by a beginner, and I was attracted to a free version of Samplitude 9 SE because it looked more 'user friendly'. What would you recommend?
Malcolm Furneaux
 and Sequoia Samplitude 9SE are 'entry-level' versions of flagship software applications. They offer a useful set of features, but can take a little while to get used to.")
Both Cubase SE3 (pictured) and Sequoia Samplitude 9SE are 'entry-level' versions of flagship software applications. They offer a useful set of features, but can take a little while to get used to.
PC Music Specialist Martin Walker replies: Both Cubase SE3 and Samplitude 9SE have been used successfully by many beginners, but choosing a sequencer package tends to be a very personal thing, and what some consider 'easy to use', others may find initially impenetrable. Cubase SE (Special Edition) is described by Steinberg as 'your entry-level ticket to the world of computer-assisted music productionâ€, yet it still contains a surprising number of features, supporting up to 48 audio tracks plus unlimited MIDI tracks, as well as providing 16 'slots' for VST Instruments, eight effect send channels, automation, drum editing, MIDI step recording, and more.
Similarly, Samplitude 9 SE is described by Magix as 'the ideal starting point for sound professionals, producers, and ambitious musiciansâ€, and also manages to incorporate a huge number of features for its modest 50 Euro download price (it has also been featured on various magazine cover-mounted CD-ROMs).
The intention with both of these, and various others from competing developers, is to give you a foothold on a particular product range, so you can learn the basics and then upgrade to a more professional version with yet more features as and when required. (Magix, for instance, provide special discounts for any Samplitude 9 SE users who want to upgrade to Samplitude Master, Classic or Professional.) This makes these packages an absolute bargain for those who anticipate spending lots of time creating music, and especially those who intend to collaborate with other musicians using another package from the range, or who eventually intend to visit a recording studio that runs the flagship version, so they will already be familiar with all the basics.
However, if you simply want an easy-to-use MIDI + Audio sequencer for your own music-making, you have the luxury of being able to choose whichever sequencer initially seems the most 'user-friendly' to you. You don't mention which type of computer you're running, but since the Magix range is only available for Windows users I'll assume you're running a PC. Why not have a look at MU Lab Free (for Mac and PC) from Mutools (www.mutools.com), which is described as an 'ultra-light music application, designed to compose and perform music of different styles and flavoursâ€. When I reviewed it in SOS September 2007 (www.soundonsound.com/sos/sep07/articles/pcmusician...) I found 'it still provides a rather more straightforward interface than those of many mainstream packages, that is also considerably easier to get to grips withâ€.
Another to consider is Reaper from Cockos Incorporated (www.cockos.com), which is considered by many musicians to be significantly easier to use than many other, similarly capable packages, despite its wealth of features.
You may, however, find it worth persevering with Cubase SE or Samplitude SE. It always takes at least a few hours of use before you enter the mind-set of a particular developer, and then things might suddenly click into place and become a lot clearer. You may even find that using a simpler application such as MU Lab Free will help you appreciate the advantages of all their extra features in the long run. Good luck with whichever sequencer you choose!
Published September 2008
Thursday, June 22, 2017
Wednesday, June 21, 2017
Tuesday, June 20, 2017
Q. Do I really need 24-bit recording?
Is 24-bit recording any better than 16-bit
recording in a home studio, given that the only qualitative difference
is (apparently) the noise floor? In 99.9 percent of home studios, this
difference will be masked by the ambient noise of the studio, and by
preamp or mic self-noise. From what I've learnt from Hugh's articles on
digital audio, I'm sceptical. Is it really worth me switching from
16-bit to 24-bit recording?
SOS Forum Post
Recording at 24-bit increases the available headroom in the system, although this may not offer any practical benefits for signals recorded with microphones in an average home studio.
Technical Editor Hugh Robjohns replies: The characteristic defined by the word length is the available dynamic range, or where the noise floor sits in relation to the peak level. A properly dithered 16-bit system provides a dynamic range of around 93dB, while a mid-budget 24-bit system should be able to deliver something around
115dB or so. The implication, then, is that you could work with about 20dB more headroom in a 24-bit system without any increase in the apparent system noise over the 16-bit mode. For most people, the additional computer overhead of operating with 24-bit word lengths instead of 16 has a negligible effect on processing power, and the additional file-storage requirements are inconsequential, given the size of modern hard disks, so the lower system noise and greater headroom margins are a welcome benefit for a negligible cost.
Having said all that, you are right in that for most people recording at home, the recording noise floor is almost always defined by the ambient room noise rather than the digital system noise. Therefore, you can usually work with reasonable headroom margins at 16-bit word lengths while maintaining the ambient noise floor comfortably above the system noise floor. In other words, the dynamic range of the source recordings is typically far less than the capability of a 16-bit recording system. Where that changes is if you record electrical instruments such as guitars and keyboards via DIs. In these cases, the noise floor is often far lower than that possible when recording with microphones in a home studio, so the dynamic range of a 16-bit system may start to become a limitation.
The bottom line is, if you are happy with the results you get with 16-bit, there may be no benefit in changing to 24. However, most people do find that 24-bit working enables greater headroom margins without noise penalties, and that in turn makes recording less stressful and mixing rather easier. Personally, I can see no negative side to recording at 24-bit, and only positive benefits.
Published June 2008
Monday, June 19, 2017
Saturday, June 17, 2017
Q. Where should I put my violas?
I'm going to be recording a string section. I'll be
recording the section using both close-miking and a Decca tree in order
to have maximum recording flexibility. We'll be doubling a lot of
sections and, further down the line, adding a 10-piece brass section and
some samples to make the recording sound fuller. Can you please advise
me as to how I can place my 14 string players in order to get the most
out of them? I have five first violins, three second violins, two
violas, two cellos and two double basses. As I only have two violas, I'm
worried that placing my players in their normal orchestral positions
will leave a big gap in the middle of the formation, where the violas
would be placed. I'm trying to emulate a large orchestra and have been
mulling over whether a wider spread of players will help or not. The
danger is that the players will not blend, and instead sound like
individual players, which must be avoided. What's your advice here?
Via email
Via email
SOS contributor Mike Senior replies:

With only two violas in the section, there could be problems with regards to the mix balance. If you have time, you could try overdubbing extra violas to make up for the shortfall.
If this orchestral arrangement is designed to complement some kind of pop or rock track, then leaving a bit of a hole in the middle and over-emphasising the width of the section might be just what you need. This will keep the strings out of the way of other more important parts of the track, such as lead vocals. Plus, with everything else going on, you probably won't notice a few blend problems in the grand scheme of things.
However, it sounds to me more like you're trying to mock up an orchestral score for a film or something similar, in which case the situation's a bit different. You might find that you have mix-balance problems with only a couple of violas. A lot depends on the specific players, instruments, and arrangement, but the numbers are a little against you. If it's just the stereo image you're worried about (and you're not happy for this hole to be filled by the winds and brass), then move the violas a little closer to the cellos, and bring the whole string formation tighter together. If balance is still the problem, then you're right that pushing the close mic nearer to the violas, to compensate for their minority, could easily affect the blend. If you have time, you could try overdubbing the violas as a separate part to give you a fall-back option. (If the lack of other parts would make it impossible for the violas to coordinate their part solo, then put in a token player on whichever other sections are required to make it possible.) The important thing to remember when doing this is to record the Decca tree alongside the viola close mics: this will give you more viola ambience to help gain the illusion of more viola players. That said, if you're going to be including samples anyway, you might find that you can deal with any imbalance at that stage. A pair of violas, especially if doubled, should be enough to disguise quite a lot of extra sampled viola parts. If there is an exposed viola line that you're worried about somewhere, but you still want to prop things up with more samples, then adjust the arrangement a little in that spot to double the violas with some of the violins or cellos. If all else fails, and you have to turn up the viola close mics in a way that affects the blend, then you might be able to compensate with a little added reverb on those mics.
However, If you're aiming to capture a very natural sound, more akin to a classical-style ensemble, then you have to ask yourself how much real stereo positioning you'd actually hear from a couple of dozen rows back in a concert hall. I'd question the idea of widening things too much if that's your target sound.
Published June 2008
Friday, June 16, 2017
Thursday, June 15, 2017
Q. When should I add delays and reverbs to my mix?
All of my mixdowns start with a list of all the
tracks involved, then each one is introduced and blended into the mix
depending on its order of importance within the mix. I would usually
build and build until all parts have been blended correctly in terms of
volume and EQ. When everything is sitting correctly in the mix, and each
part is clearly audible, I would then go back through the mix, and
begin to add effects.
 has lit sends showing multiple tracks routed to the same bus. The bus channel provides the effects for all the individual tracks sent to it. This is often expressed as using 'common' or 'global' effects, and it can produce a more cohesive-sounding mix.")
There are few hard and fast rules for using effects in a mix. This Logic mix (above) has lit sends showing multiple tracks routed to the same bus. The bus channel provides the effects for all the individual tracks sent to it. This is often expressed as using 'common' or 'global' effects, and it can produce a more cohesive-sounding mix.
The thing is, though, that adding delay and reverb will surely have some effect on the lovely clear mix I have just achieved, so is it generally accepted that it would be more beneficial to add effects to each new part when it's brought into the mix, and only then EQ things to sit comfortably? Surely this way I will end up with a clearer mix? However, by following this approach I figure I'd have to use more effects units, as each track would have its designated effect EQ'd.
SOS Forum Post
SOS contributor Mike Senior replies: There are no hard and fast rules here, and every engineer answers these questions differently. Also, specific projects will favour one technique over another.
Many professionals who work a lot with live acoustic music and rock bands take the approach of getting as far as possible without effects, so that they don't need to use as much artificial processing to bring about the final result, and thereby often achieve a more natural-sounding end product. Given the quality of many older reverb and delay devices, it's easy to see why this approach has a long and honourable history, and it still remains well suited to straightforward acoustic or rock tracks, which need refining rather than reinventing at the mix stage. For example, I used roughly this strategy for my remixes of Jesper Buhl's jazz trio and Two Spot Gobi's live recording (SOS April & June 2008 respectively), both of which were simply about enhancing what had gone on in the recording room.
On other occasions, though, the effects are as important as the instruments, and in these cases you simply have to get them involved at an earlier stage if you're going to be able to judge the level balance and any processing settings in a representative context. When I remixed Imprint's 'Let Me Go' (back in SOS January 2008), for instance, I knew that EQ and balance judgements would be very difficult without the dramatic reverbs and delays in place, so I introduced those at a much earlier stage.
 are used for each individual track. Using effects in this way can give you greater control over the way in which each track interacts with its effects.")
In this mix window shown above, separate effects (shown as inserts) are used for each individual track. Using effects in this way can give you greater control over the way in which each track interacts with its effects.
However, the most important thing to say is that neither approach is foolproof, and neither is going to make mixing the linear process you seem to hope it will be. Mixing is highly iterative in my experience, in that no individual level, pan, processor or effects setting can actually be set in stone until the mix is completely finished. Once all the tracks are in the mix, there is inevitably an extended period where you find yourself dotting around between different channels and plug-in windows to respond to a multitude of interactions that are too complex to predict. You might brighten your vocal once the electric guitars are in the mix, but then find that the singer's sibilance hits the vocal reverb too hard. De-essing the reverb channel deals with this problem, but then changes the reverb sound for the piano and tambourine tracks, which also happen to be feeding that reverb. So you maybe change your EQ settings on those tracks, and the process just goes round and round while the overall mix sound slowly shifts into focus.
Whether to use 'shared global send effects' or 'separate effects for each instrument' is a question of mixing style, even amongst the professionals. The advantage of common delay and reverb effects is that they help bind overdubbed recordings into a cohesive-sounding whole, creating a kind of imaginary space within which all the separate tracks exist. High-profile producers such as Chuck Ainlay, Mike Clink, John Leckie and Elliot Scheiner have all talked about this very approach in interview, for example. On the other hand, as you say, using separate effects for individual tracks gives you greater control over the way in which each track interacts with its effect, and there are other equally famous engineers who have described using this kind of setup to their advantage as well — Eddie Kramer, Jon Gass and Tony Visconti, to name just a few. In short, there's no simple response to this question either. What's now great is that modern sequencers and plug-ins give you ample opportunity to experiment with both ways of working, because the number of effects units available at once is much less limited in the software world than it used to be in the hardware environment.
Published July 2008
Wednesday, June 14, 2017
Q. How should I optimise my Gain structure?
The crack team of Paul White and Hugh Robjohns have
travelled the world solving readers' problems. Here, they down the Hob
Nobs and answer some of your recording queries in our Q&A
mini-series, Sound Advice.
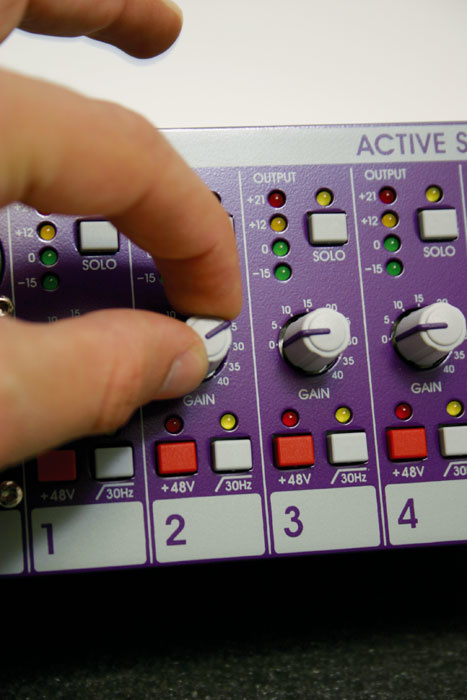
Paul: Gain structure is a term often bandied about, but what does it mean? Well, it's all to do with exploiting the dynamic range of audio equipment to its best advantage, to minimise noise and unwanted distortion. Audible sound covers a huge dynamic range, from the rustling of a sheet of paper to a rocket engine, so to reproduce this dynamic range in the analogue domain would leave us with signals several volts in amplitude for the jet engine but perhaps only a few millionths of a volt for the paper. The problem is that all audio equipment adds some noise to the signal, due to the random movement of electrons within the components. This noise is usually very low in amplitude, but when amplifying progressively smaller electrical signals, the noise will at some point overwhelm the sound we are trying to capture. The obvious solution is to make the wanted signal as large as possible relative to the noise floor, but then louder signals risk exceeding the upper range of the equipment, causing clipping distortion.
Hugh: We need to ensure that the gain in each stage of electronic processing within a signal path is optimised to keep the signal level well above the noise floor, but comfortably below the circuitry's clipping point. In a typical analogue microphonemixerrecorder chain, the first gain stage to adjust is the microphone preamp: adjust the gain so that the signal is brought up to a reasonable line level, with the biggest occasional transient peaks falling safely below the mixer's clipping point. Usually, you would achieve this by selecting the pre-fade level function on the channel and adjusting its input gain while looking at the signal level on the mixer's PFL meter. The meter display should hover around or a little below 0dB most of the time, with occasional higher peaks, but still comfortably below clipping level.
Paul: Keeping the signal level passing through each item of equipment as high as possible, while still leaving a little safety margin before clipping, is fairly easy to do with old-school analogue gear. The level meters usually have a safety margin of 10dB or more above the 0VU mark that can accommodate signal peaks, so if you aim to get your nominal signal level reading 0VU on the meters, you'll get good performance from the device. With digital circuits, there's no safety margin or area of progressive distortion above 0VU, as there is with analogue circuitry. As soon as you exceed 0VU you get clipping, so it's prudent to leave a safety margin of 12dB or so when setting levels. At the other end of the scale, a very small audio signal is represented by fewer bits, which translates into higher distortion levels, and this quantising distortion can sound very much like noise. Analogue noise is also added by all A-D converters, to some extent. However, if you're working with 24-bit audio, you can leave a 12dB safety margin without having to worry about noise.
Hugh: In many ways, the fact that the metering in digital systems shows the entire top half of the dynamic range is useful you can see exactly how high the transient peaks are reaching, and provided you keep them below 0dBFS, all will be well. On the other hand, the fact that a digital meter shows the entire headroom margin means that perfectly correct average levels will always look scarily low, hovering around the -30 to -20dBFS marks most of the time. This takes some getting used to, but it is worth it. Analogue systems provide 18-20dB of headroom above the nominal level for solid reasons, and 24-bit digital systems should emulate that.
Paul: Optimising gain structure where several bits of gear are connected together is even more demanding, as we need to ensure that every circuit is running at its optimum signal level, while still leaving the appropriate safety margin.
Hugh: Yes, and there are various places in the signal path where level can be changed, so we need to be aware of their effect on the overall signal level. For instance, if you apply a lot of EQ boost, the overall signal level will be increased. So although the microphone input stage has been adjusted to ensure the signal won't clip that part of the circuitry, the additional EQ gain could push the signal into clipping later in the signal path. Applying a lot of EQ boost is rarely a good idea, but if you need to it is worth reducing the mic preamp's gain to compensate. These basic principles apply for every other stage in the signal path where the level can be changed — faders, output levels, recorder input levels and so on. At every stage, think about where the signal level is in relation to clipping point and noise floor, and make adjustments to ensure that the noise level is acceptably low, while removing any risk of overload or clipping.
Paul: While a well-designed analogue mixer will have a sensible internal gain structure, you can run into problems when patching external hardware into insert points. You need to set the correct input levels to the connected device and also ensure that its output is at the correct level for the receiving device, in this case the console's insert return. Sometimes this can be as simple as setting the operating level of the external device to be the same as that of the console's insert points (usually -10dBV or +4dBu), but where the device itself has input and output level controls, you need to set these sensibly too, using any metering the device itself has to help you set the best level. If you find you're working with gain controls close to their maximum or minimum settings, you may have a problem. Also check that your peak signal level is roughly the same whether the external piece of gear is bypassed or not. The same applies when using aux sends to feed external effects; if you have your console send controls turned right down and compensate by turning the input gain of your external device right up, you're adding unnecessary noise.
Hugh: So, in practice, having the input and output gain controls somewhere in the middle of their travel is usually a good sign. The ideal when dealing with line-level signals is a unity gain situation where the signal stays at nominally the same level as it flows from device to device, rather than being constantly attenuated and then amplified, or vice versa.
Published October 2008
Tuesday, June 13, 2017
Monday, June 12, 2017
Q. How do I archive my recordings?
The crack team of Paul White and Hugh Robjohns have
travelled the world solving readers' problems. Here they down the Hob
Nobs and answer some of your recording queries in our Q&A
mini-series, Sound Advice
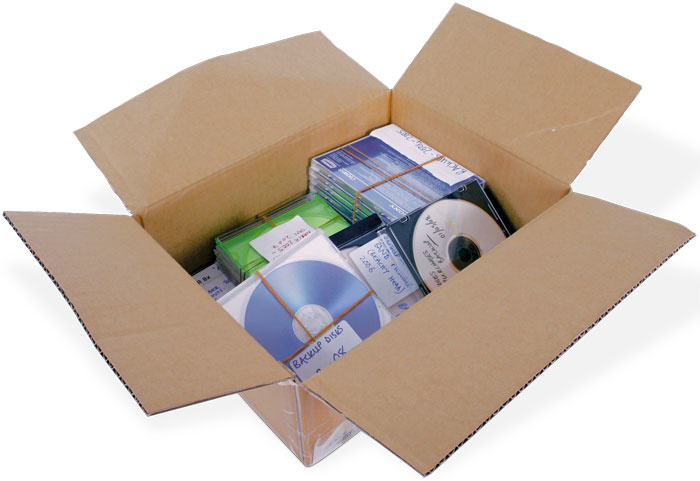
Hugh: The key aspects of an archiving system are that it is stable, and that it uses a format that can be accessed easily. Historically, we know that shellac and vinyl records are pretty stable for at least 100 and 50 years, respectively, and the technology needed to replay them is straightforward. Optical sound tracks on film have survived extremely well, while analogue tape hasn't proved quite so robust in some specific cases (notably involving particular kinds of tape binder used in the '70s and '80s).
Paul: But with most music these days recorded digitally, we have to think about digital backups. The good news is that since our technology is derived from the computer industry, there are plenty of off-the-shelf options for data archiving. The fundamental audio data formats — WAV, and AIFF (and their 64-bit variants) — are very simple and there should be no problem accessing the raw audio in decades or even centuries.
Hugh: The bad news is that the project data formats used by the numerous different sequencers and DAWs to log the production processes (mix data, plug-in settings, MIDI-control data and so forth) are bespoke, complex, and tend to change with new software editions. With this in mind, it is wise to save the source audio files both with and without plug-in effects so that you have the option of recreating the mix as it was or starting afresh with new effects. Ideally these audio files should be saved at the highest possible resolution as data files, not as 16-bit audio CDs, which have relatively poor error correction.
Paul: But what to do with the data? There is a popular maxim that computer data doesn't really exist unless it is stored in at least three different places at the same time — preferably with at least one being off site in case fire, flood or some other disaster causes the loss of the primary storage. We probably all know someone who has suffered a catastrophic loss of data through a drive failure, even if we have been fortunate enough not to have suffered ourselves. So multiple backups are essential.
Hugh: The risk of data loss can be lessened further by using RAID arrays — multiple hard drives configured so that the data is shared across them in such a way that, should a drive fail, it can be replaced and the data reconstructed (automatically) without loss. Terabyte RAID arrays can be bought now for about the same as a half-decent guitar or set of active monitors.
Paul: However, hard drives aren't immune to failure, and the worst thing you can do to a disk drive — whether it's part of a RAID array or not — is store it on a shelf somewhere. Drives need to spin to keep them alive, and if left idle and static for long periods the platter and motor bearings have been known to fail. Data recovery experts can often retrieve the data by disassembling the drive and repairing it, but it's not something you should rely on! Far better to keep using the discs regularly, and to copy the data routinely to new discs (or other storage formats) every couple of years.
Hugh: There are other storage options beside hard disk, of course — although most are slower and require some level of manual intervention. Recordable discs like CD-R and DVD±R are cheap and easy to use, but their long term stability is unproven. Re-recordable formats like CD-RW and DVD±RW are better long-term bets from a chemistry point of view, but even so it would be a wise precaution to burn multiple copies on different media brands.
Paul: Keep CD- and DVD-based media in the dark in a moderate environment with no extremes of temperature and humidity. A shoe box on the top shelf of your wardrobe is probably as good a place as any in the home studio. You should also make sure all the necessary documentation is included and that the discs themselves are properly labelled. With hard drive backups, a text information file is the simplest way of keeping track of what you have.
Hugh: Solid-state storage is quickly gaining in data capacity and robustness, but there are too many scare stories of random data loss around to consider this a reliable long-term archive medium at the moment. So bearing all that in mind, I would favour storage to multiple hard disks, ideally with at least one being a RAID array. Copy the data between hard drives periodically, and make sure some copies are stored on a separate site.
Paul: And most important of all, once you have made an archive copy, check that it really can be retrieved successfully. There's nothing more upsetting than dismissing the shock of a dead hard drive with the confidence that everything is safely backed up elsewhere, only to then find that the archives can't be accessed after all!
Published September 2008
Saturday, June 10, 2017
Friday, June 9, 2017
Q. Which comes first: Audio Interface or Mixer?
This is a basic gear connection question. Should I connect instruments and mics to mixer inputs and connect mixer outputs to audio interface inputs, or alternatively connect instruments and mics to audio interface inputs, connect audio interface outputs to mixer inputs, and connect mixer outputs back to audio interface inputs? I think both work, but is one 'better' than the other, and if it is, why?
SOS Forum post

The best way to connect up your mixer and audio interface may depend on factors such as relative quality of mic preamps. If your interface is mid-priced and upwards, such as this Presonus Firestudio, you'll probably find its mic preamps are better than those on the average mixer, so you'll be better off plugging your mics directly into the interface preamps rather than the mixer preamps.
SOS contributor Martin Walker replies: Both approaches do work, but which one you choose largely depends on the quality and features of both your audio interface and mixer and what other gear you have, as well as on how you prefer to work.
For recording mic signals, audio interfaces in the medium to higher price brackets (and by this I mean several hundred pounds upwards) often feature mic and instrument preamps that sound better than the ones you find on typical small mixing desks. So plugging your microphones directly into the interface mic inputs may well result in a higher-quality recording. Another attractive alternative for many musicians is to buy a few high-quality rackmount mic preamps for the particular sound they offer, and plug these direct into audio interface line-level inputs rather than patching them through a mixing desk.
Electric instruments with passive circuitry are best plugged into a high-impedance input to avoid high-frequency loss. You can either use one on a guitar amp and mic up the amp, use a suitable DI (Direct Injection) box to raise the input impedance and then plug its output into a mixer or interface mic input, or use a specialist guitar preamp, such as a Line 6 Pod or Behringer V-Amp, that you plug into any line-level input on a mixing desk or interface. While mixing desks very rarely have suitable high-impedance instrument inputs, many audio interfaces do provide dedicated 'instrument' inputs with a high impedance, often making them the cheapest and most convenient option for guitars.
Another big divide occurs in the effects department. Some musicians find it easier to get the best recordings by sending their signals through a mixing desk EQ and then adding analogue effects such as compression and reverb, which can be easily patched into the desk using its dedicated insert and send sockets. Alternatively, if your signals are sent direct to the audio interface, computer-based plug-in effects can be used, but these will normally only be heard after a slight delay (latency) of at least several milliseconds, which can sometimes be disconcerting (particularly for vocalists monitoring their performance). Many audio interfaces do provide 'zero latency' features to help monitor your sounds in real time during the recording phase, and a few audio interfaces (notably from Emu, Focusrite and TC Electronic) also feature built-in DSP effects that can help you during the recording process, even though the signal is still often recorded 'dry' into the computer so you can apply different effects afterwards.
Ultimately, your input choice depends on whether you like the 'sound' of your mixing desk and prefer the immediacy of having all its controls laid out in front of you for immediate tweaking during a recording. If you do, then that's the routing to adopt.
When it comes to output routing, there are, again, considerations to weigh up. Patching the outputs of your audio interface through the mixer lets you mix its sounds with other sources, and also gives you instant hands-on control over their relative levels, EQ and effects while mixing. Analogue mixers may also add that certain something to 'glue' the overall sound together, and you can then patch the output back into the audio interface inputs to record the final stereo mix. However, it's generally acknowledged that you need a high-quality (read expensive) analogue mixing desk to add 'fairy dust': cheaper models rarely cut the mustard in this department, so don't automatically expect an audible improvement simply from passing your recordings through an analogue mixer.
The opposite argument is that connecting the output of the audio interface directly to your monitoring system, with no recourse to an analogue mixing desk, results in a simpler signal path that can sound cleaner and more transparent, although you may lose some control over it, especially if the interface doesn't offer an analogue output level control to let you easily adjust the volume of the speakers (this is why so many musicians who abandon their analogue mixing desks require a monitor controller).
Your routing choices tend to determined by what gear you have available, which approach worked best for you in the past, and the audio quality of your gear. You could always try recording and mixing the same song using several approaches and see which proves most manageable, which you enjoy most, and which achieves the best overall sound quality.
Published October 2008
Thursday, June 8, 2017
Wednesday, June 7, 2017
Tuesday, June 6, 2017
Choosing An Audio Interface
The
vast majority of computer-based musicians will need an audio interface,
but with so many on the market, it can feel like an impossible task to
decide which to buy. You can narrow down the choices significantly with
the help of our essential guide.

At its simplest, an audio interface lets you record external sounds such as vocals and instruments into your computer, converting them from analogue to the required digital format en route, and performs the opposite function on the return journey from computer to amp/loudspeakers. Whether you're a newbie or a seasoned pro, there's now a bewildering choice of audio interfaces available, at prices ranging from pocket money to arranged loan.
We're regularly asked on the SOS Forums 'which is the best audio interface?', but even if we know the available budget that question is impossible to answer without knowing what the person asking it wants to achieve. After all, the best audio interface for a musician creating electronica may be totally different from one used to record a live band, while if you only require stereo inputs and outputs, within a given budget you'll generally get better audio quality than spending the same amount of money on an interface with eight or more channels. To successfully choose the perfect audio interface for your own particular requirements isn't difficult if you follow some basic steps to narrow down the options. Follow this SOS step-by-step guide to make a more informed buying decision.
What Do You Want To Record?
This is the most important question of all, since it determines how many simultaneous inputs, and of which types, you'll need. The simplest inputs are 'line-level', and are suitable for connecting other electronic equipment such as mixing desks, CD/DVD players, synthesizers and preamplifiers.Microphones output a much lower-level signal, and therefore require an additional preamp to bring their signal up to line level, before it gets converted to digital form to enter your computer; capacitor mics require a preamp that can supply 'phantom power', and these days, nearly all do so. If you want to record with one or more mics and are starting from scratch, the most cost-effective option is to choose an interface with suitable mic preamps built-in. Those who already have an analogue mixing desk with input channels offering mic preamps and direct outs can patch these into the line-level inputs of an audio interface, while those with larger budgets can investigate more sophisticated stand-alone preamps that offer particularly clean or desirably 'coloured' audio.

If you don't want to be faffing about buying extra preamps, look for audio interfaces that feature 'versatile' inputs that cater for microphone, instrument and line-level sources, such as Focusrite's Saffire, shown here.
The third main type of audio interface input is for an 'instrument', most often the electric or bass guitar, but also the piezo pickups used on acoustic guitars and other acoustic instruments. The output from such pickups often falls between mic and line levels, and will overload mic inputs unless you're able to turn their gain down by a considerable amount. Compared with mics, magnetic pickups also require a higher input impedance to avoid high-frequency loss; guitars with passive pickups like to 'see' at least 100kΩ to avoid high-frequency loss, and preferably 1MΩ. However, if you're a guitarist, don't agonise over an otherwise perfect audio interface if it simply lacks an instrument input: you can buy a DI (Direct Injection) box that will let you plug a guitar into a mic input, or use one of the various 'Pod'-type preamps with line-level output for more control over your tone and effects (we'll be talking more about such options in the 'Useful Extras' section).
So what inputs will you need? Well, if you're working with pre-recorded samples, loops and software synths, you may not personally record any signals at all, in which case the most basic stereo line-level input will almost be more than you need (although those two inputs are still likely to come in very handy at times, even if only to transfer other analogue-based music into your computer). There are plenty of classic budget interfaces with two basic analogue inputs and outputs, including the Echo AudioFire2, Emu 0404, ESI Pro Juli@, and M-Audio Audiophile 192.
If you're recording your own live performances, you're unlikely to need more than one mic input for vocals and one instrument/line-level input for guitar/bass/keyboard, or two if you want to record your sources in stereo. Many interfaces offer two 'versatile' inputs that can accept mic, instrument and line signals, and these are also suitable for more ambitious multitrack work, as long as you're happy to overdub one track at a time. Recommended examples include the Edirol UA25 EX, Emu 0404 USB, Tascam US-144/122L, Presonus Firepod and Focusrite's Saffire and Saffire LE.
If you're recording other musicians your requirements may vary considerably. Interfaces featuring four inputs are comparatively rare (Digidesign's M Box 2 Pro and TC's Konnekt 24D are two), but would cope with a duo or small ensemble. Far more common is the 8-input interface, which is probably the minimum number of channels that you could get away with for recording a live rock band. For instance, you could use four mics on a drum kit (kick, snare, and two overheads), plus guitar, bass, vocals and mono keyboard.

The Digidesign M Box 2 Pro is one of the few interfaces that offer four inputs, a useful halfway house between simple stereo interfaces and the many 8-input devices on the market.
There are plenty of interfaces in the 8-in/8-out line-level analogue format, from Terratec's Phase 88 series at the budget end of the market, through popular mainstays such as RME's Fireface 400 (with two mic preamps), to highly sophisticated models such as Apogee's Ensemble and the Prism Orpheus at the other (both of which also feature four mic preamps).
If you prefer to have eight mic preamps built in to the interface, recommended models include Focusrite's Saffire Pro 26 I/O, the Presonus Firepod, M-Audio's ProFire 2626 (reviewed in this issue), and MOTU's 8pre and 896HD. Other combinations are also available, as on MOTU's Ultralite, which offers two mic/line/instrument inputs, six more line-level ones and 10 analogue outputs.
To cater for live backing vocals, stereo keyboards, and so on, further increasing the number of analogue inputs can be done in two main ways. For many musicians the easiest approach is to buy an 8-channel combined preamp/converter box such as as Behringer's ADA8000 or one of the Focusrite OctoPre series, and plug its output into the ADAT input port found on many audio interfaces (see the 'Digital Extras' box). Each ADAT port supports up to eight extra channels at standard sample rates.
If, on the other hand, you need more of everything, combining the features of two identical 8-in/8-out interfaces into one 'super interface', to achieve 16 inputs, is probably wiser. For this to work on a PC, the interface manufacturer must offer 'multi-device drivers' (most support up to four devices, giving you the potential of 32-in/32-out), plus a way to lock the digital clocks of all the devices together so that the combined inputs and outputs remain in perfect sync. One very popular candidate in this category is RME's Fireface 800, which also features two pairs of ADAT ports for further expansion. However, even if you only currently need one 8-input interface, buying one with multi-device drivers may make it much easier and cheaper to upgrade to a larger setup later on.
A few manufacturers also offer more I/O in a single package — for instance, MOTU's 24I/O has 24 analogue line-level inputs and outputs in its compact, 1U rackmount case, while a combination of Lynx's Aurora 16 and AES16 card will give you 16 ins and outs.
Digital Extras
Digital I/O is important to many musicians, since it enables them to connect up compatible studio gear without having to pass their audio through additional analogue-to-digital conversion stages and cause possible degradation. S/PDIF (Sony Philips Digital InterFace) is a two-channel consumer format that uses either coaxial phono or Toslink optical connectors, and is useful for connecting DAT or MiniDisc recorders, CD players and rack effects with digital interfacing, as well as a few keyboards or synths that offer digital output options.
Although some interfaces provide both coaxial and optical connectors, don't worry if your otherwise perfect interface has the wrong kind to plug in your other gear; format converters such as M-Audio's CO2 Coaxial/Optical Bi-Directional Converter are comparatively cheap.
ADAT (Alesis Digital Audio Tape) uses an identical Toslink optical connector to the S/PDIF format, but supports up to eight simultaneous digital audio channels, which is a great way to cater for future expansion without breaking the bank. ADAT normally only supports sample rates up to 48kHz, although some interfaces license S/MUX (Sample Multiplexing) technology that can optionally combine two ADAT channels to carry a single 24-bit/96kHz signal, enabling them to offer 96kHz support with half the number of channels.
One obvious partner is an ADAT or similar multitrack recorder (sometimes a safer way to record live gigs that you can then transfer to your computer for mixing later on), but nowadays ADAT inputs are just as often found connected to combined preamp/A-D converter boxes to add analogue inputs (see main text), and ADAT outputs connected to 8-channel D-A converter boxes to provide more analogue outputs, both in multiples of eight channels.

There are plenty of examples of interfaces with ADAT expansion possibilities, including Emu's 1820/1616 series, the M-Audio Firewire 1814 and the MOTU 2408. Remember, though, that models incorporating numbers in their name generally refer to the total number of inputs and outputs including all the digital ones, and once ADAT I/O is involved this makes a significant difference to the analogue complement. For instance, Emu's 1820M has 18 inputs and 20 outputs in total, but only six analogue inputs and eight analogue outputs, while the MOTU 2408 features 24-in/24-out ADAT plus 8-in/8-out analogue, and the newer MOTU 828 Mk3 has 16-in/16-out ADAT plus 10 analogue ins and outs. There are even some interface models (such as the M-Audio ProFire Lightbridge, RME HDSPe RayDAT and Presonus FireStudio Lightpipe) that provide little or no analogue I/O, instead offering rows of ADAT ports so that you can add your own choice of analogue converters as required.
Other digital I/O to be found on more upmarket interfaces includes AES-EBU (Audio Engineering Society/European Broadcasting Union), another stereo format complementing more professional gear such as A-D and D-A converters and various multitrack digital recorders, and word clock, for those with lots of digital gear that could benefit from being clocked from one central source. If you're a beginner with a small studio you probably won't need either of these, and if you're an established professional you'll probably already know what specialist digital connectivity you require.
What Are All The Outputs For?
Deciding on the most useful number of outputs for your perfect audio interface is a partly academic exercise, since products mostly offer an equal number of inputs and outputs (notable exceptions include M-Audio's 4-in/10-out Firewire 410 and Echo's 2-in/8-virtual out Mia). This may seem bizarre to all those musicians who want to record a band and listen back in stereo and are therefore looking for an 8-in/2-out interface, so let's see what you can do with all the other outputs on the far more common 8-in/8-out models.
If you want a lot of simultaneous recording and playback channels in a small package, manufacturers such as MOTU are keen to help with interfaces like their 2408 and particularly their 24I/O, which manages to squeeze 24 analogue inputs and outputs into a single 1U rackmount package.
One obvious use for additional outputs is in a 5.1 surround setup, which requires six outputs (left, right, centre, left surround, right surround and Low Frequency Effects channel). Some interfaces include handy integral surround management features that handle the filtering and distribution of your surround mix to the various loudspeakers. Although surround hasn't taken off in a major way with professional musicians, such features are now fairly common on mainstream audio interfaces (such as Creative's Audigy series and Terratec's DMX 6Fire) intended for games use, and do also appear on various interfaces designed for musicians, such as M-Audio's Firewire 410 and Delta 1010LT, as well as high-end products such as the Prism Sound Orpheus.
Echo's Mia provides four stereo pairs of virtual outputs available to software, which are mixed internally to emerge as a single physical stereo output. This approach means that you can run four separate software applications (perhaps a sequencer, stand-alone software sampler and a couple of stand-alone soft synths) and combine their outputs into one interface, which a lot of musicians have found really handy.

Interfaces with lots more outputs than inputs, such as M-Audio's Firewire 410 shown here, are useful for surround playback, distributing multiple headphone monitor mixes to performers, or for analogue 'out of the box' mixing.
Pairs of inputs and outputs can also be pressed into service to patch in outboard effects such as analogue EQ, compression or tape/tube enhancement. You'll need to allocate one interface output per mono send and one input per mono return, and then, by routing your computer audio tracks to the appropriate output using your sequencer, and retrieving them from the effect box, you can add outboard effects to computer-based mixes. Some sequencer applications, including the Cubase/Nuendo family, even provide functions that can automatically compensate for any 'round trip' delays, so that the effected sounds remain in perfect sync with your other tracks, but if yours doesn't you can manually drag these tracks into line.
Possibly the most fashionable use for spare inputs and outputs at the moment is to patch in an analogue summing box or analogue mixer, so you can mix computer-based compositions 'outside the box', by allocating each audio track (or 'stem' submixes such as drums, vocals and so on) to a different hardware output connected to the summer/mixer, and allocate two inputs to route the resulting stereo mix back into your computer. Given analogue gear of sufficient quality, you can add a certain something to the mix that 'glues' it together compared to a totally 'in the box' mix.
MIDI
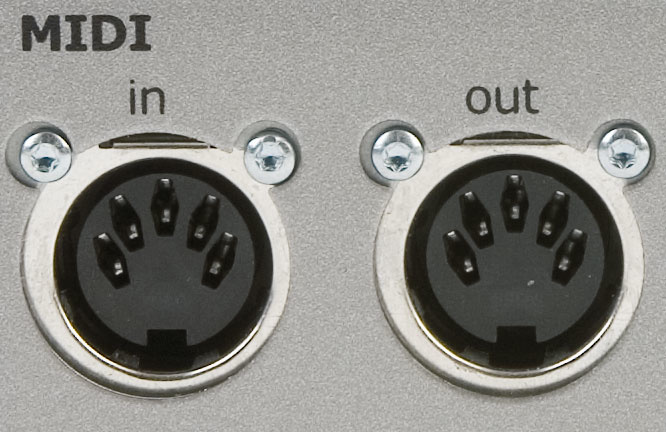
Most musicians concentrate on audio features when drawing up their shortlist of suitable interfaces, but it's worth bearing their MIDI features in mind as well. Many modern keyboard controllers and MIDI controllers provide a direct USB connection to computers, so you may need no MIDI ports at all, and if you have more than a couple of MIDI devices to connect, investigating a dedicated MIDI interface may be more appropriate.
If you only have a couple of rack or keyboard synths with standard MIDI outputs, many audio interfaces offer one or more MIDI inputs and outputs alongside all the audio I/O, which may save you having to buy a separate MIDI interface, and also avoids any possible conflicts between the two when streaming data.
Headphone Options
Dedicated headphone-level outputs mounted on the interface front panel are also important to many musicians, as they enable you to monitor while recording, as well as play back audio when you don't have suitable loudspeakers available (on location, perhaps, or in a room with poor acoustics that make it difficult to take sensible mixing decisions). With a laptop computer, plus an interface that's bus-powered (ie. drawing power from the computer it's plugged into) and has a headphone socket, you might even be able to run everything from battery power.
Having DSP effects built into an interface can be a great help, particularly during the recording stages when you want performers to hear themselves with effects, but without any off-putting computer-based delays. TC Electronic's Konnekt 24D features a channel strip with EQ, compressor, de-esser and limiter, plus a high-quality reverb.
Some interfaces feature two or more dedicated headphone outputs, which can be very handy during live band recordings (although you may not be able to send separate different monitor mixes to each one). If you do a lot of live recording, extra line-level outputs can also be pressed into service to provide different headphone monitor mixes for the performers, although you may need a separate multi-channel headphone amp to bring the line-level outputs up to a sufficient level.
Headphone outputs invariably have analogue level controls, but relatively few interfaces provide analogue level controls for their main stereo line-level outputs. This is a shame, since it's far safer to have hardware control of loudspeaker levels, so you can turn them down quickly in the event of a fault or computer crash, to protect your loudspeakers and ears. Now that more and more musicians are using active monitors without easy-to-grab level controls of their own, a few interface manufacturers, such as Focusrite and TC Electronic, are finally adding analogue output controls to their interfaces.
Useful Extras
Most audio interfaces incorporate hardware DSP (Digital Signal Processing) to provide their on-board mixing functions, so you can mix together various input and output signals and send them to specific outputs for monitoring purposes. However, recently there's been an explosion of interfaces offering special DSP functions such as effects, physical modelling, and bass management for surround systems.
The lines between audio interface and other studio gear are becoming increasingly blurred, as with the Line 6 Toneport KB37, which is a combined interface and MIDI keyboard that's bundled with amp modelling software.
Running extra effects inside an interface is very useful in two situations: when you're short of CPU power in your computer and want to offload some processing elsewhere, and when you want to bypass the latency associated with computer-based buffers. Early DSP-assisted interfaces either offered a generic set of workmanlike effects, such as those in Creative Labs Audigy and Emu's DAS (Digital Audio Systems) ranges, or one particularly desirable high-quality effect, such as the PCM90 reverb found in Lexicon's Core 32. However, a trend on more recent interfaces has been to offer a small range of high-quality effects particularly suited to the recording stage.
Most vocalists (amongst other performers) find headphone monitoring of their live performance far easier if they can't hear any latency (delay) between what they're singing and what they hear in the cans, and may also need effects while they're performing. Even with the lowest buffer sizes offered by modern interfaces there's nearly always a few milliseconds of delay before you can hear signals that are being treated by plug-in effects inside your sequencer, but such delays are bypassed if you instead rely on effects running on the interface itself.
You can also bypass such delays using the so-called 'zero latency monitoring' features found on many interfaces, which send the output of the interface A-D converters direct to its D-A converters, so you can monitor without the added latency of the computer buffers. This reduces latency to a couple of milliseconds or less, which (for many people) is close enough to the 'true' zero latency of analogue connections. If you're confused about the causes of latency, and the various solutions that are possible, take a look at our June 2007 feature on the subject (www.soundonsound.com/sos/ jun07/articles/latency_0607.htm)

The Alesis MultiMix 16 USB is a good example of the recent trend for analogue mixers to incorporate USB or Firewire interfacing, allowing them to do two jobs in the studio at the same time.
The most useful effects for vocalists and other acoustic performers are compression (to even up levels), reverb (to place them in an acoustic space), and EQ (to alter the timbre), so these three effects are the most popular. For instance, TC Electronic's Konnekt 24D essentially offers a 4-in/4-out analogue format, but with the benefits of a Fabrik C channel strip (EQ, compressor, de-esser and limiter) and Fabrik R reverb, while Focusrite's Saffire and Saffire Pro 26 offer two analogue inputs and eight outputs, along with DSP effects including EQ, compression, reverb and basic amp modelling.
The last is, of course, for guitarists, so they can plug in their instruments direct, yet hear them as if they had already travelled through a guitar amp/speaker combination. For those who need more sophisticated control over their guitar tone when recording it direct into a computer, there's now a comprehensive selection of physically modelled preamps with analogue line-level and/or digital outputs that you can connect to an existing audio interface, including various models from the Line 6 Pod and Behringer V-Amp ranges.
It's also possible to buy audio interfaces which have their own physical-modelling features built-in. For example, Edirol have several interfaces in their range that offer COSM (Composite Object Sound Modelling), such as the UA4FX, with 14 effects including multi-band dynamics and tube preamp modelling. Those who have lusted after Line 6's Pod guitar processors may be interested in their Toneport range, which combines the same modelling quality as the Line 6 Pod XT range (this time in software form) with a USB computer interface. The Toneport KB37 model even incorporates a 3-octave keyboard, further blurring the boundaries between interface and MIDI controller. Meanwhile, products like Digidesign's Digi 003, M-Audio's Project Mix I/O and Tascam's FW1884 combine multi-channel audio and MIDI interfaces with moving-fader control surfaces. There's something to be said for not putting all your eggs in one basket, but there's also no denying the convenience of having all these functions in a single product.
Audio Quality
Debates on which audio interface 'sounds the best' abound on forums, but it's fair to say that you mostly get what you pay for, so more expensive models will have the edge on budget ones. However, even today's budget models sound extremely good for the price, while audible differences between more expensive models are often not as huge as some people expect. Nevertheless, they do all sound slightly different and different manufacturers are perceived to have their own strengths — so, for instance, Focusrite are widely praised for their mic preamps, TC Electronic for their low jitter and DSP reverbs, M-Audio for their versatility and value for money, RME and MOTU for their rugged reliability, and Lynx for their PCI soundcard quality.One aspect of audio interface design that often confuses the novice is the potential benefit of balanced I/O. Budget interfaces tend to offer unbalanced inputs and outputs, while more expensive ones offer balanced I/O. Connections between unbalanced outputs and inputs are made with 'single-core plus screen' cables that can pick up interference en route (especially with longer cable lengths). Moreover, where such cables connect two or more devices that are already earthed via their mains power supplies, the unbalanced cable between them creates a 'ground loop' that can result in background hums plus digital nasties including buzzes, whines and whistles that vary with mouse, hard drive, and graphic activity.
Cable-induced interference problems disappear when you connect a balanced output via 'two-core plus screen' balanced cables to balanced inputs, because any interference picked up by the cable is picked up equally by both cores and is cancelled out at the far end, while potential ground-loop problems also disappear because the screen connection is this time not part of the signal path.
You can find more about this in our FAQ on Audio Cables & Wiring in SOS January 2002 (www.soundonsound.com/sos/jan02/articles/faq0102.asp), and advice about ground-loop issues in SOS July 2005 (www.soundonsound.com/sos/jul05/articles/qa0705_1.htm). The moral of the story is that buying an interface with balanced I/O can save you an awful lot of potential audio quality problems when connecting multiple pieces of electronic gear.
Nowadays it's rare to run into problems with background noise levels or distortion, even on budget interfaces, as long as you choose 24-bit rather than 16-bit for your projects and take care to record at sensible levels that peak at perhaps -12dBFS (Full Scale) on the typical peak-reading digital meters found in most audio interface Control Panel utilities.
Sample rate is a thornier issue, especially since so many modern interfaces stress their 192kHz capability, and in some cases expect you to pay more for this feature. In practice, many musicians are still perfectly happy running their projects at 44.1kHz (especially if the final format is Red Book CD Audio), although quite a few are now running at 96kHz (particularly for orchestral, jazz, folk and other acoustic ensembles), and it's rare to meet many musicians who actually work at 192kHz!
Digital audio quality is a complex subject, so if you're still confused, make a beeline for our 'Digital Problems, Practical Solutions' feature in SOS February 2008 (www.soundonsound.com/sos/feb08/articles/digitalaudio.htm). This article covers the theory of digital sampling, jitter and clocking, quantisation, dither and digital headroom, and is linked to downloadable audio files that are designed to demonstrate what typical digital problems can sound like.
The Best Of Both Worlds?
Other boundaries are being blurred by products that combine the functions of analogue mixing desk (including analogue EQ and true zero-latency monitoring) and audio interface into a single product: the USB/Firewire mixer. This approach can be particularly appealing to those who are already familiar with the hands-on approach of analogue mixing, but want the added convenience of being able to record multiple audio channels direct into the computer via a single cable.Cheaper models such as Yamaha's MW10 and Behringer's Xenyx 1204 tend to combine the various mixer channels into a final stereo send to the computer, whereas more expensive ones such as the Alesis MultiMix, M-Audio NRV10, Phonic Helix Board, and Mackie's Onyx series provide a separate feed from each channel to your computer, so you can continue to work on your mix after it's recorded.
The Computer Connection
The choice of hardware format for your audio interface is far less of an issue nowadays than once it was, and in most cases you'll either rule out certain formats before making your shortlist because your computer doesn't support them, or ignore format decisions until you've narrowed down your shortlist. However, if you find yourself debating several interfaces with different computer connections, here are some of their pros and cons.
While USB and Firewire interfaces now seem to dominate the market, PCI soundcards such as the Lynx Two are capable of superb audio quality with very low latency at a competitive price.
There are still advantages to the PCI and (still comparatively rare) PCIe soundcard for PC desktop users, such as generally tighter timing on MIDI ports, and potentially lower audio latency than either Firewire 400/800 or USB2 formats, while those two-part interfaces comprising a soundcard plus a remote 'breakout box' connected by an umbilical cable offer almost as much convenience as self-contained Firewire/USB interfaces, but don't generally require external power supplies. Audio quality is rarely compromised by a soundcard being bathed in the RF inside a computer case, as proved by the exemplary performance of soundcards such as the Lynx Studio Technology range, and other internal computer conflicts are also extremely rare nowadays. On the down side, PCI slots have been phased out on many modern Mac desktops in favour of the PCIe variety (as they will be in future PCs), and of course users do face the added inconvenience of having to open up their computer to install them.
If you want a compact yet portable interface to partner a laptop, there are a few audio interfaces based around the Cardbus slots found in many laptops, such as Echo's Indigo range, Emu's 1616 and1616M, and RME's Cardbus adaptor. Inexpensive adaptors from companies such as Duel (www.duel-systems.com/products/adapters.aspx) also let you plug these into modern laptops that feature the newer Express Card slots.
USB and Firewire are the two very popular and more portable alternatives, offering the convenience of stand-alone boxes that you can quickly swap between any desktop and laptop machine. USB has traditionally been considered the poor relation, largely because earlier interfaces designed for USB 1.1 ports struggled for bandwidth when attempting stereo in/out at a 96kHz sample rate.
 XLR mic, line and instrument inputs and (centre top) analogue outputs; Firewire (bottom centre), with ADAT multi-channel optical digital I/O, S/PDIF stereo digital I/O, and word clock I/O next to it; and MIDI In and Out sockets (top right). Different combinations of these facilities are found across the range of audio interfaces on the market, so to choose the right interface, you need to first consider which facilities you really need.")
Digidesign's Digi 003 is at the better-specified end of the audio interface spectrum, so it's blessed with the majority of I/O connections you could need, including (on the left) XLR mic, line and instrument inputs and (centre top) analogue outputs; Firewire (bottom centre), with ADAT multi-channel optical digital I/O, S/PDIF stereo digital I/O, and word clock I/O next to it; and MIDI In and Out sockets (top right). Different combinations of these facilities are found across the range of audio interfaces on the market, so to choose the right interface, you need to first consider which facilities you really need.
However, nowadays Hi-Speed USB interfaces can manage more simultaneous inputs and outputs than Firewire 400 devices, and although there's still a little snobbery around, in practice Hi-Speed USB (2.0) audio peripherals can work just as well as Firewire 400 ones. If your computer has Firewire 800 ports, you have double the bandwidth compared with Firewire 400, but few musicians will actually need the extra unless they require more than about 56 simultaneous channels of 24-bit/192kHz audio (although it's worth noting that your Firewire channel count will drop if you also want to chain other Firewire devices to the same port, such as external hard drives for recording and playback or a TC PowerCore Firewire DSP FX unit, for instance).
Negative points for both USB and Firewire audio interfaces include intermittent connection problems with a few models (there's nothing more frustrating than your sequencer telling you there's no interface connected when it obviously is). Some Firewire models also include small extra buffers to help smooth playback performance, which increases overall latency slightly.
In the case of Firewire interfaces you may also have to be careful about the make and model of controller chip found behind the Firewire ports on your computer, since some are not compatible with certain audio interfaces. Texas Instruments (TI) is the make most widely recommended by audio interface manufacturers, but you should consult the interface manufacturer's web site for specific chip-set recommendations to avoid problems. This isn't a PC-only problem: the Agere chip set used in new Macbook Pros and iMacs has been causing problems with various interfaces from Presonus and RME, among others.
Another special format of interfaces is that of those compatible with Digidesign's famous Pro Tools platform. The flagship Pro Tools HD systems perform much of their processing on dedicated DSP cards, and have an associated range of professional I/O audio interfaces (HD1, HD2 and HD3). Those with more limited budgets who would like to be able to create projects with Pro Tools software (widely used by music professionals, and considered by many to be the 'industry standard' DAW) can buy an audio interface from Digidesign's own M Box and Digi 003 ranges. These come bundled with the consumer-level Pro Tools LE software. M-Audio now also have a selection of audio interfaces that are designated 'Pro Tools M-Powered' and designed to run with a special version of the Pro Tools LE software (Digidesign and M Audio are both divisions of parent company Avid Technology). All Pro Tools interfaces also have Core Audio and ASIO drivers, so they can be used with other sequencer packages, while Logic and Digital Performer go further and support the DSP features in HD rigs, allowing you to use TDM plug-ins within their own mixers.
Further Information
You can get full details of the interfaces mentioned in this guide from their manufacturers' web sites:- Alesis www.alesis.com
- Apogee www.apogeedigital.com
- Behringer www.behringer.com
- Creative Labs www.creative.com
- Digidesign www.digidesign.com
- Echo www.echoaudio.com
- Edirol www.edirol.com
- Emu www.emu.com
- ESI Pro www.esi-pro.com
- Focusrite www.focusrite.com
- Line 6 www.line6.com
- Lynx www.lynxstudio.com
- M Audio www.m-audio.com
- MOTU www.motu.com
- RME www.rme-audio.de
- Phonic www.phonic.com
- Presonus www.presonus.com
- Prism Sound www.prismsound.com
- Tascam www.tascam.com
- TC Electronic www.tcelectronic.com
- Terratec www.terratec.net
- Yamaha www.yamaha.com
Subscribe to:
Posts (Atom)