Thursday, June 30, 2022
Wednesday, June 29, 2022
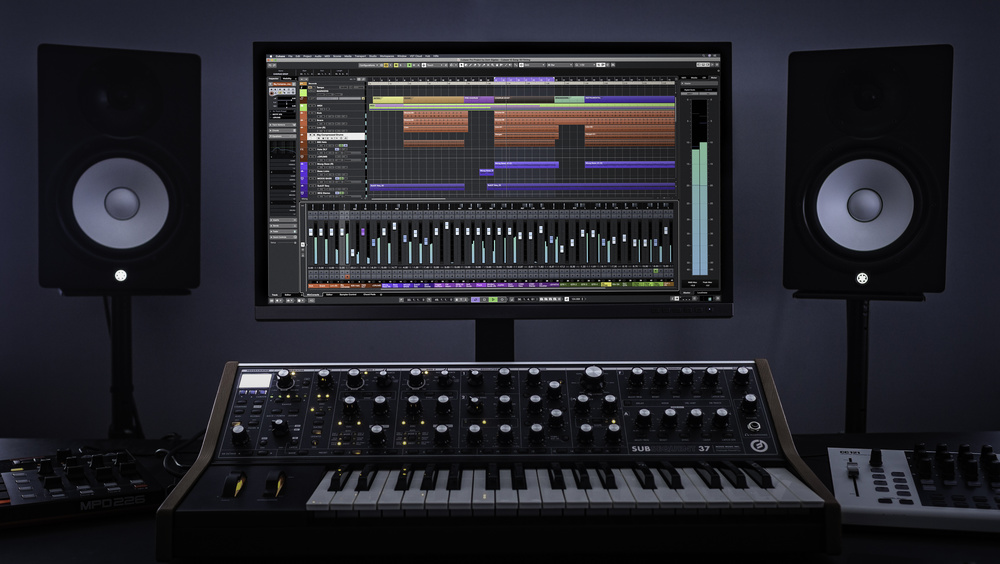
Cubase: Macro Logical
When building Macros gets tough, the tough get going with Cubase’s Project Logical Editor.
In last month’s Cubase workshop, John Walden explained how Macros can be used to automate repetitive tasks — and I was reminded me of a surprisingly challenging recent Macro‑making experience of my own. So this month, I’ll dive a little deeper into Macros, exploring some limitations and workarounds. Hopefully, by taking you through how I overcame the challenges posed by one particular Macro, I’ll be able to help you design and troubleshoot some sophisticated Macros of your own.
Missing The Bus
 When the Macro has been run, it’s easy to copy and paste the channel settings from the Stereo Out to your new Premix bus.The task I wanted to automate should have been simple: inserting a new ‘premix’ bus — a fancy name for a stereo Group track that sits between Cubase’s master Stereo Output track and the rest of your mix — into an existing project. The idea of a premix bus is that you can put all of your master‑bus processing on this bus, while leaving Cubase’s main Stereo Out track free of processing. This setup allows you to either send or directly route selected sources ‘around’ any bus processing you’ve set up.
For example, I often like to mix into some gentle mix‑bus compression — just 1‑2 dB of gain reduction to ‘glue’ the mix together. But often, what feels like the right setting for the mix as a whole can be a bit too much for the vocals or cymbals. There are various strategies to overcome this, but one is the premix bus. By placing the compressor on the premix bus, I can set the level of the vocals running into the compression using the vocal channel fader as normal, but can later choose to nudge the vocals up a little without impacting on the action of the bus compressor, by sending a little of the vocal directly to the clean master bus. Similarly, if I feel that the drum overheads are a little undesirably coloured by an analogue tape emulation on the bus, but I want to keep that effect on the rest of the mix, I can back off the overheads’ channel fader and use a send to route more overheads to the clean Stereo Out.
 Here’s the test project before running the Macro...Another scenario is where you’re using reference tracks and either don’t wish to use the Control Room or don’t have it (it’s only available with the full Pro version of Cubase): simply route the references to the Stereo Out and use the reference tracks’ channel mute and solo controls to audition your references.
Ideally, you’d create your premix bus before you start work on your project, but there will be occasions when you wish to add one to existing projects. If the project is a busy one with lots of Group tracks, this can be rather fiddly. It requires careful manual selection of tracks and a lot of mouse clicks and key presses — it’s easy to overlook something, and distracts you from the actual job of mixing.
Manual Or Automatic?
A few built‑in commands can help speed things up. For example, in the MixConsole, you can select a track and use the ‘Show Channels that are Connected to the First Selected Channel’ command to reveal all tracks that are routed directly to the selected one. And you can re‑route all the currently selected channels by clicking on one of the channels’ routing, then Shift+Option (Alt+Shift on Windows) clicking the desired destination.
Sadly, Cubase is a little inconsistent in terms of which commands are available to you and how those commands behave, with the choice and result depending on whether you’re viewing the MixConsole or the Project page. The command I’ve just described, for instance, is only available when in the MixConsole. Yet selecting ‘all’ tracks in the MixConsole selects both the visible tracks and any you’ve hidden, whereas in the Project page the same command selects only the visible tracks, not the hidden ones. Accessing the Project Logical Editor, which can be used to make track selections, requires you to be in the Project page.
When it comes to automating things with Macros, the same rules apply; you must be in a certain window to execute certain commands. You’ll also find that lots of obvious commands are toggle types, which invert the current state of something (eg. open a window if it is closed, and vice versa) but can’t actually specify the state (eg. there’s no built‑in command to ‘Open the MixConsole’). Thus, automating the creation of a premix bus, complete with routing, requires some prep work and a little lateral thinking...
Prep School
 As Cubase only has toggle commands to show/hide the MixConsole, it’s necessary to create a Workspace to provide the Macro with a known starting point.The MixConsole command that hides all tracks that aren’t routed to the Stereo Out requires the Stereo Out to be selected. Automating that selection requires the creation of a Project Logical Editor (PLE) preset, which means you must have the MixConsole closed! The default F3 command to toggle the MixConsole open/closed won’t work in our Macro, as it has no way of knowing whether that window is currently open or closed. So we must create a known starting point using Cubase’s Workspaces: close all open windows except the Project page, go to ‘Workspaces / Add Workspace’ and create a global (so it applies to all projects) Workspace preset called ‘Project Page’. Macros address Workspaces by number, not name, so make a note of the Workspace number and use that in place of Workspace 1 in your Macro.
Next, create that PLE preset — in fact, you’ll need to create a few. The first will select the Stereo Out. Go to ‘Edit / Project Logical Editor’ and set the PLE with the following parameters: Filter Target = ‘Name’; Condition = ‘Equal’; Parameter 1 = ‘Stereo Out’. Leave everything else at the default settings (the Action pane blank, the Function as ‘Select’ and the Macro as ‘Not Set’). Save this as a preset called ‘Select Stereo Out’.
Create a second preset called ‘Select All Except Stereo Out’: use the same settings, but change the Condition parameter to ‘Contains Not’. With both presets saved, go to the ‘File / Key Commands’ and open the Project Logical Editor folder. You should see your new PLE presets listed here, which means they’re now available to add to Macros and/or assign to keyboard shortcuts.
You must also ensure that the Stereo Out track is actually selectable in the Project Page — the Input/Output Channels folder must be expanded. Again, the default commands for specific folders toggle the open/close state of the currently selected folder. And while there’s a command to expand or collapse all folders in your project, that could hide things you don’t want hidden! But you can create the command you need with another PLE preset.
This time in the PLE window’s upper pane, you need to add two conditions. The first row should read: Filter Target = ‘Container Type Is’; Condition = ‘Equal’; Parameter 1 = ‘Folder’. Click on the plus sign to add another row, in which the parameters need to be set as follows: Filter Target = ‘Name’; Condition = ‘Contains’; Parameter 1 = ‘Input/Output’. That selects the folder and the lower pane’s settings, so instruct Cubase to expand it: Action Target = ‘Track Operation’; Operation = ‘Folder’; Parameter 1 = ‘Open’. Finally, set the Function parameter at the bottom of the window to ‘Transform’. (You can check the selection works without performing the action by leaving this set to ‘Select’). Save this as a PLE preset called ‘Open Project IO Folder’.
 Another preparatory step is to sync the Project and MixConsole visibility and track selections.Our final piece of prep ensures that the visibility of tracks in the MixConsole and the Project Page is synchronised. I couldn’t find a way around doing this manually, but you should only need to do it manually once as it will become the default setting. Go to ‘Cubase / Preferences’ and in the ‘Editing / Project & MixConsole’ section, ensure ‘Sync Visibility of Project & MixConsole: On/Off’ is ticked. You can assign this a shortcut if you wish (I used Shift+Alt+S), and can check and change the status by clicking on the ‘=’ icon in the visibility tab to the left of the MixConsole or Project page. If doing this really bugs you (because you want, for other reasons, to be able to un‑sync the two windows), note that Cubase actually has three separate MixConsoles, and each can be set independently to sync with the Project page or not. So you could easily adapt this Macro to use MixConsole 2 or 3 without affecting the sync setting of your main MixConsole — the commands to toggle open/closed these auxiliary MixConsoles are available in the ‘Key Commands’ window.
Building The Macro
Having created your Workspace and channel‑selection commands, you can start work on the Macro itself. Add the commands in the sequence I’ve used, since you can’t drag to reorder commands in a Macro — by default a new command is added below the currently selected one. Get this wrong and you have to delete the command and try again.
 These two Project Logical Editor presets enable the Macro to select the Stereo Out track, and all tracks except the Stereo Out.Go to ‘File/Key Commands’ and click on the Show Macros button at the bottom. Click the New Macro button and call the new Macro ‘Insert Premix Group’. I find it quickest to find commands by typing in the search field at the top — type the text you want and hit enter to find the first result. Use the magnifying glass to find additional results (don’t hit enter twice or you’ll close the Key Commands window). In this search box type ‘Workspace’ and hit enter. From the list select Workspace 1 (the one we created with only the Project Page open). Then, in the Macro sub‑pane click the Add Command button.
Now to select the Stereo Out: type ‘Project IO’ to find your ‘Open Project IO Folder’ PLE preset and add this to your Macro. In the same way, find and add your Select Stereo Out preset.
The next step will need the MixConsole open. Since the Macro’s first command defined the state of the MixConsole as closed, we can add the MixConsole toggle command — it’s in the ‘Devices (Studio)’ folder and is called ‘MixConsole’. Then add the wordy command ‘Channel & Track Visibility — Agents: Show Channels that are Connected to the First Selected Channel’.
 Another Project Logical Editor preset locates the default Input/Output Folder and sets its view to expanded.As discussed earlier, while the MixConsole now displays only those channels we want selected, you can’t actually select them here — you must first return to the Project page. So add either the Workspace 1 or MixConsole toggle command (it doesn’t matter which). Then add your ‘Select All Except Stereo Out’ PLE command, followed by another MixConsole toggle command to return us once again to the MixConsole. Finally, add the ‘Mixer — Add Track to Selected: Group Channel’ to the Macro.
 In the upper pane, you can see the command that allows us to select all tracks currently routed to the main Stereo Out. The lower pane lists the different steps that form the finished Macro.And that’s almost it. You can run your Macro either via the ‘Edit/Macros’ menu, or by assigning a keyboard shortcut to your Macro in the Key Commands window. It will create a new Group track routed to your Stereo Out bus, re‑route any tracks currently routed to the Stereo Out to the new Group, and prompt you to name the Group. Call it ‘Premix’ or something similarly descriptive (to make it easy to select via PLE presets, should you ever wish to do so).
The Hidden
I said ‘almost’, because there are two remaining issues. First, you need to make visible in the MixConsole those tracks that were hidden by the Macro. Second, we need to move any processing on the Stereo Out to the new Premix track.
There’s a command (accessible only in the MixConsole view, and called ‘Agents: Undo Visibility Changes’) that should do what we want: it reverses the last visibility changes you made. But this didn’t work reliably for me when used in the Macro. You could use ‘Channel & Track Visibility — Agents: Show All Channels/Tracks’. This will unhide all tracks that were previously hidden, and if you don’t tend to hide many tracks in your projects this is probably the best way to go. Personally, I preferred to do this step manually, using the Visibility pane on the left of the MixConsole, where it’s the work of seconds. But if it really bugs you and you want to aim for Macro perfection, you could design this whole Macro to operate on MixConsole 2 or MixConsole 3 behind the scenes, leaving your main MixConsole’s visibility settings intact. As before, to do that you simply replace the MixConsole commands in your Macro with MixConsole 2 (or 3).
Processing Chain
I’m afraid I met with stauncher opposition when trying to automate the transfer of the processing chain from the Stereo Out track to the new Premix bus. The commands exist to make automation possible, but on my system (at the time of writing, I’m using Cubase Pro 9.5.30 on MacOS), these seemed somewhat buggy, resulting in Cubase crashing. So I ended up doing this step manually. Still, as I know other Cubase users who didn’t experience any problems with this, it’s worth me setting out the steps necessary to automate this side of things.
 ...and here it is after. All I had to do was hit one key and enter a track name, and the re‑routing of tracks was taken care of automatically.There are a number of ways to save and recall settings: saving and loading track presets, for example, and saving and loading effects chains. But to my mind, the simplest approach is to select the Stereo Out and simply use the Cmd+C (Ctrl+C on Windows), go to the destination track and use Cmd+V (Ctrl+V). If you want to automate that, then you’d create another PLE preset to select your Premix bus, as we did before for the Stereo Out. Then you’d be able to get your Macro to select the Stereo Out, then ‘Copy First Selected Channel’s Settings’, then select the Premix bus and ‘Paste First Selected Channel’s Settings’. (I suggest doing this task as a separate Macro.)
Perhaps this Premix‑bus Macro will be useful to you and perhaps not. But I hope at least it has given you some idea of how you might solve any more complex task‑automation problems; there’s usually a way, even if it isn’t all that obvious at first!
Debugging
When creating Macros like this from scratch, you’ll probably find that you need to spend a chunk of time double‑checking your logic, and it’s thus a good plan to do your Macro building in a ‘dummy’ test project, as I did here. That way, you can be sure you won’t wreck any important work!
As you can see from the screens I’ve included here, my test project consisted of four Audio tracks, two of which I routed to a Group track (which was routed to the Stereo Out) and two directly to the Stereo Out. I also ensured I had the Routing section open in the MixConsole — that way I could see at a glance whether the Macro had delivered the intended results.
If you find that your Macro hasn’t worked as planned, I’m afraid a simple ‘undo’ command won’t necessarily unpick everything the Macro did — in particular it won’t reverse all the routing changes, since deleting a track such as the Premix bus described in the main article will change the routing of all the tracks that were routed to it so that they feed ‘no output’. You’ll thus need to re‑route these to the main stereo output every time.
Published September 2018
Tuesday, June 28, 2022
Monday, June 27, 2022
Cubase: Robo Pop!
 VariAudio can perform extreme pitch correction, rewrite the melody, and extract MIDI from an audio vocal melody.
Create robotic vocal effects using Cubase’s in-built tools.
While some might think heavily processed, robotic-style vocals a cliché, in pop and EDM tracks they’re here to stay. There are countless ways of turning your pristine vocal recordings into something obviously synthetic and ‘processed’, but two tactics in particular — overcooking pitch correction, and vocoder-style processing — are great places to start, and Cubase has some wonderful tools for the job.
Pitch Perfect
For the ‘Cher meets T-Pain’ sound, the pitch processing must be obviously overcooked, and in Cubase Pro, VariAudio can achieve this: engage VariAudio in the Sample Editor window, select the pitch ‘blobs’ you want to process, and set the Quantize and Straighten controls to 100 percent. The pitch transitions become instantaneous and the pitch-drift of each note will be ironed flat. The results vary with the source material, and with a really well sung phrase, you might find the effect isn’t as ‘obvious’ as you might wish. If so, try splitting any extended blobs into several pieces, then move the shorter blobs to different notes in the same key.
All editions of Cubase include the Pitch Correct plug-in, and this can achieve similar results. Inserted on an audio track, this corrects the pitch in real time. Set the Correction Speed and Tolerance to 100 for the most obvious effect, but you can do more, such as specifying the key/scale for notes to be corrected to. You can also define a Custom Scale — in other words, you can specify your own combination of ‘allowed’ notes, which can result in bigger, more obvious pitch jumps.
You can also try the External MIDI Note setting: a MIDI input will be created for the plug-in, and any MIDI track can be routed to Pitch Correct, allowing you to specify the target note using your keyboard or a MIDI clip. Correction is only performed when a MIDI note is received — in the absence of a MIDI input, the original audio is heard, with no pitch correction applied. You can fashion some truly weird and wonderful pitch correction in this way, doing anything from simply ‘correcting’ the occasional note to completely rewriting the melody.
 Pitch Correct’s target notes for pitch correction can be set by an external MIDI source.
This plug-in has more settings you can abuse, too —for example, adjusting the Formant Shift tweaks the size (and, to some extent, the perceived gender) of the voice. This can easily be pushed into unhuman territory for special effects, and the parameter can be automated.
In Stock
Moving away from the pitch-correction side of things, Cubase’s stock plug-ins provide plenty of dehumanising potential, and Metalizer, Chopper, Phaser, Bitcrusher and Cloner are all well worth exploring. How far to go is down to personal taste, but one tactic is to add a good selection of them, all with fairly subtle settings, and then automate the plug-ins’ bypass in different combinations as the song plays back. This can add useful variety to the vocal ear-candy.
Artist and Pro users can also try inserting the LoopMash FX plug-in. For some real-time glitching, the Stutter, Staccato and Cycle options are well worth experimenting with. And LoopMash FX can, in the same way as Pitch Correct, be controlled via a separate MIDI track.
 Don’t overlook Cubase’s stock plug-ins — they offer plenty of scope for vocal mangling.
Slice Of Life
Both Chopper and LoopMash FX provide options for slice-like glitching, but if you add Groove Agent SE4’s (GA SE4) loop-slicing into the mix you can take your vocal mangling much further — it allows you to ‘play’ your vocal via MIDI in very interesting ways. The first step is to slice your vocal phrase. You can do this manually, but selecting the Split tool and Alt-clicking on the clip will split it as per the current Quantize setting; if in doubt, try eighth-note divisions. To get these slices into GA SE4, open an empty instance of GA SE4, select all the vocal-clip slices, and drag them to an empty GA SE4 Instrument pad (for example, C1). The slices will be mapped sequentially across the MIDI pads (in my eight-bar example, from C1 to D6).
These pads can be triggered by playing the relevant note on your MIDI keyboard. But switch to the instrument’s Pattern panel and you’ll see that the drag/drop of the slices automatically puts a pattern on one pad. This triggers each slice in turn, thus playing the whole original vocal phrase. For now, use the MIDI Export button (to the right of the Pattern page) to drag and drop the pattern onto the GA SE4 Instrument track as a MIDI clip.
Let’s go the whole hog here — insert Pitch Correct plus any of the other effects plug-ins you want to use on the GA SE4 track. Then create a further MIDI track and route it to the MIDI input of the Pitch Correct plug-in. (If you have VariAudio, you can also extract the MIDI from the original vocal melody and copy that MIDI clip to this new MIDI track, to serve as an initial control over Pitch Correct.)
 and dragged it into GA SE4, you can replay the slices via MIDI (middle tack) and, via the Pitch Correct plug-in, control the pitches of each slice (bottom track).") Having sliced your vocal (top track) and dragged it into GA SE4, you can replay the slices via MIDI (middle tack) and, via the Pitch Correct plug-in, control the pitches of each slice (bottom track).There are now two lots of MIDI we can edit (or play in real time) to give us creative control over our vocal phrase. The MIDI clip on the GA SE4 track can be edited to glitch the phrasing of the syllables/words (based on the slices on GA SE4’s pads), while the Pitch Correct MIDI track can be used to control the pitch of each slice. There’s a huge amount of fun to be had here, in ‘re-phrasing’ the sung words, changing the pad/slice order, shortening the MIDI Notes used to trigger each pad (for a cool stutter effect), re-pitching the original melody, reversing slices on particular GA SE4 pads — or all of the above! And, of course, any other insert effects can be applied too.
Having sliced your vocal (top track) and dragged it into GA SE4, you can replay the slices via MIDI (middle tack) and, via the Pitch Correct plug-in, control the pitches of each slice (bottom track).There are now two lots of MIDI we can edit (or play in real time) to give us creative control over our vocal phrase. The MIDI clip on the GA SE4 track can be edited to glitch the phrasing of the syllables/words (based on the slices on GA SE4’s pads), while the Pitch Correct MIDI track can be used to control the pitch of each slice. There’s a huge amount of fun to be had here, in ‘re-phrasing’ the sung words, changing the pad/slice order, shortening the MIDI Notes used to trigger each pad (for a cool stutter effect), re-pitching the original melody, reversing slices on particular GA SE4 pads — or all of the above! And, of course, any other insert effects can be applied too.
For a more obvious ‘glitchy’ effect, adjust GA SE4’s Amp settings for each pad to create a fade in. You can do this kind of edit for each pad individually, but this can take quite a while, so why not try selecting a range of pads? Holding the Shift key, click on one pad and then on another. All pads between these two are selected, and any edits will be applied to all selected pads. The different Amp envelope modes are also worth playing with, as each gives a different result. You might also experiment with GA SE4’s filters.
Robot Wars
If you’re prepared to get stuck in with detailed audio editing, Cubase offers plenty more options for generating heavily processed, robotic vocals. But using MIDI to control the ‘performance’ of your processed vocal phrase is so intuitive and so versatile — the approaches described here can take you a long way.
I’ve created a number of audio examples to accompany this article, all contained in a single ZIP file.
Published October 2018
Saturday, June 25, 2022
Friday, June 24, 2022
Cubase: MIDI Mod Cons
If you’re not blessed with flawless piano keyboard skills, don’t worry, Cubase can help.
In my SOS November 2013 Cubase workshop, I explained how those of us with less-than-stellar piano-playing skills can play a harmonically correct MIDI chord performance using Cubase’s Chord Track. But what if you just need some melody or bass line assistance? Well, there are some unsung heroes amongst Cubase’s bundled MIDI plug-ins...
MIDI Modifier
 Don’t overlook the humble MIDI plug-ins that are bundled with Cubase — MIDI Modifier in particular can be a powerful tool.Each MIDI/Instrument track’s Track Inspector has a MIDI Modifier section, which allows you to modify your MIDI data in various ways, whether the data is real-time (as you play) or played back from a MIDI clip. There are some useful options, including transpose up/down in semitones, velocity adjustment and random (but constrained) manipulation of note parameters such as pitch, position, velocity and length. Cubase Artist and Pro also include a separate MIDI Modifier plug-in, and while this offers very similar functionality to the Track Inspector, there are some differences. One feature, Transpose To Scale, is required for our ‘keyboard assistant’. It’s super-easy to use: just select the root note of the key and then one of the scale types from the list.
With your key/scale selection made, any MIDI note data will automatically be checked against the chosen key/scale combination and, if required, corrected to ‘fit’. You can now close your eyes and bash away at your MIDI keyboard — whatever notes you press, Cubase ensures everything remains harmonically correct. It won’t guarantee you a melody to die for, but there will be fewer duff notes!
More Mods?
 The Transpose To Scale option comes with a huge selection of preset scale types — although no user-defined scale option is included.Another trick that might appeal is re-mapping the notes of your chosen key/scale to the white keys of your MIDI keyboard, for ease of playing. Having made your key/scale selection, simply adjust the MIDI Modifier’s Transpose setting up/down (either by trial and error or by working out the number of steps required) to settings that get the majority of the notes mapped onto white keys. As a simple example, if a song is in Bb major, the scale contains Bb, C, D, Eb, F, G and A. If we set a Transpose value of -2, Bb notes will actually be played on the C key and Eb on the F key. All the other notes are also transposed by two semitones, but they remain on white keys. This can be made to work for many common scales, including major, harmonic minor and pentatonic, although some (eg. the melodic minor) will have one or two ‘correct’ notes mapped to a black key. With Transpose To Scale active, though, the plug-in will pitch-correct for you if your fingers miss the occasional black key.
If music theory isn’t your strong suit, trial and error with the Transpose function is easy enough. But it would be brilliant if Steinberg were to add some sort of keyboard graphic to the MIDI Modifier plug-in to give a visual cue of the notes in the chosen key/scale you’ve mapped across the keyboard — and then see how they shifted as you adjusted the Transpose value. (If you agree, why not add a request for this on the Steinberg forum?)
Another neat feature is the MIDI Modifier’s Record Output To Track button (red when enabled). With this active, the MIDI notes Cubase records are the modified notes produced by the plug-in, which is useful because if you need to do any editing, the note pitches you see in the piano-roll are the ‘corrected’ ones. If you leave this inactive, the ‘raw’ notes are recorded, but the MIDI Modifier will still correct them on playback. If you choose to have this option active while recording, make sure you bypass the MIDI Modifier on playback, or its settings will be applied for a second time — which is obviously not what you want!
One-note Chords?
There are some other things that the non-specialist piano keyboard hacker might like to do but which aren’t currently possible via the MIDI Modifier plug-in. These include the creation of custom scales and control over the direction of the pitch-correction for out-of-key notes. However, if these are things you would like to be able to do, Cubase Artist and Pro have another MIDI plug-in that can help, called Chorder.
 The Chorder plug-in doesn’t have to be used for chords — you can also use it to re-map notes for complex scales, or create custom scales.
I looked at the primary function of this useful little plug-in (building custom chord voicings that can be triggered via a single MIDI note) way back in SOS April 2010, so feel free to read that if you need a quick refresher. It takes a little more effort to configure than the MIDI Modifier options I’ve described above with this plug-in, but it can also be put to good use as a piano keyboard assistant for melody/bass line creation.
The screenshot shows a simple example where I wanted to play white notes (easy for my poorly trained fingers) but to get the seven scale notes of D major (D, E, F#, G, A, B and C#). Note that I’ve selected the One Octave and Single Mode settings. This means that I only have to define my required key mapping for a single octave (it’s then applied across all other octaves) and that I’m not prompted for multiple mappings for different velocity layers (useful when defining full chord voicings but not for our single-note melody application).
The task is then simple — as you select a note on the lower mini-keyboard graphic, click the Learn button, and then select the note from the upper, stripped, area that you want to ‘map’ to your selected note below (to map a chord, you’d select multiple notes in the upper zone). Once a note on the mini-keyboard zone has a mapping applied, a pale blue highlight appears above it. Repeat the process as many times as required for all the notes in your desired scale, and if it contains seven or fewer notes, you can map everything to the white keys for ease of playing. Once the mapping is complete, play away, and the Chorder plug-in will remap your white-key noodling to the programmed scale.
The above process does require you to know what notes are in your target key/scale combination, but if that’s a problem, then you can always consult Google. Two further things are also worth noting. First, when you start playing, if you happen to hit a MIDI key that you’ve not mapped, then no MIDI note will be generated (so no duff notes). Second, if you think it’s an advantage, you can choose to map these ‘empty’ keys as duplicate notes within the required scale. This is what the MIDI Modifier plug-in does, but with Chorder you get to control the mapping and whether ‘wrong’ notes are pitch-corrected up or down. The other option, which I quite like, is to map these empty notes to the root (and perhaps the fourth interval) of the scale. With this configuration, if you did hit a ‘wrong’ key, then your melody gets a root (or fourth) added — as ‘wrong’ notes go, this makes for some pretty solid melodic choices!
Transformed
 If all this note re-mapping gets a little confusing, the MIDI Monitor plug-in can be a useful troubleshooting tool.This last idea is corrective, but can also be considered ‘creative’ — you can use such mappings to place emphasis on certain scale notes, no matter how random your actual keyboard playing might be. There are other tools in the Cubase MIDI plug-in suite, in particular the Density and Transformer plug-ins (the latter is a real-time version of the Logical Editor and provides an alternative means to access the Transpose To Scale feature), that can apply a creative touch to your melody/bass line construction. Indeed, these might make a good subject for a future column...
Let’s finish with a mention of the MIDI Monitor plug-in. This provides you with a simple window to monitor all MIDI data generated by a MIDI track. This includes note values, so if your attempts to map from one scale to another are leaving you scratching your head then a pair of MIDI Monitors (one instance before MIDI Modifier and one after) can be a useful troubleshooting tool.
Most of us would love to be better at playing the piano keyboard, and it’s still worth working to improve such performance skills. But in the meantime, whatever your current skill level, the suggestions above will at least allow your melodies and bass lines to stay in tune — and leave you free to focus on the creative side of things.
Published November 2018
Thursday, June 23, 2022
Wednesday, June 22, 2022
Steinberg release Cubase 10
Steinberg’s Cubase has long been a favourite among certain composers and music production professional and with Cubase 10, there are a lot of features that are a result of user feedback, solving real-world music production problems.
Auto Aligment is one such notable feature, exclusive to the flagship Cubase 10 Pro version, which is a tool that speeds up the process of tightening up stacked recordings — super helpful when you’re tracking lush BVs. Also exclusive to Pro is VariAudio 3, Cubase’s built-in pitch correction tool which enhances micro pitch editing as well as allowing control over formant shifts. For the mix engineer, MixConsole Snapshots allow the saving and recalling of a current mix within the mixer, so you can compare alternate mixes of a project as well — great for those times when you didn't know when to stop mixing your track...
REVerence, the convolution reverb in Cubase Pro, also now includes 20 new impulse responses, covering a range of vintage reverbs. On top of that, AAF import/ export has been added, along with improved workflows for editing to picture, plus the Steinberg Virtual Reality production suite that offers tools for producing VR content.
Added to Pro and Artist editions of Cubase 10 is Distroyer, a remarkable addition to the list of effects processors that infuses asymmetric distortion. Side-chaining has also been simplified, making setting up a sidechaining as simple as a few clicks. Since both editions feature the unique Note Expression capability, this has been expanded to support MIDI Polyphonic Expression (MPE) for multidimensional controllers.
Upgrades across all versions (Pro, Artist and Elements) include new metering elements in each module of the mixer, big improvements to Groove Agents SE 5 across both its interface and acoustic and electronic drum content. The audio engine has also been refined, now supporting 32-bit integer and 64-bit floating-point audio for recording, importing/exporting, and converting. Plug-ins have been redesigned and can now be dragged from the Media Rack and dropped directly into the project, creating an instrument track automatically, while the user interface supports HiDPI for high-resolution displays. A Latency Monitor lets you quickly and easily know exactly where — and how much — latency is occurring.
The additional content in Cubase 10 rounds out the extensive feature list: 5 GB of sounds and loops cover various genres, produced by renowned artists the likes of Florian Meindl, Rawtekk, Beat Butcha and many more.
All versions are out now. Pro will cost €579 boxed (€559 as a download), Artist will be €329/€309 meanwhile both boxed and download versions of Elements will come in at €99.99.
https://new.steinberg.net/cubase/
Published 15/11/18
Tuesday, June 21, 2022
Monday, June 20, 2022
Cubase Piano Roll: Chord Tools
Not all piano-roll editors are created equal — Cubase’s boasts some very handy chord-programming tools.
As explained in previous columns (in SOS November 2013, May 2015 and November 2018), Cubase offers a range of tools that enable anyone who lacks keyboard skills to create convincing MIDI chord or melody parts. The Chord Pad system is superb, but for a step-based approach to chord/melody creation, you should turn your attention to Cubase’s Key Editor — while most DAWs have such a piano-roll editor, this one is particularly well specified, and it boasts a couple of features that make creating chord sequences a breeze, namely Step Input and the Chord Editing panel.
Step To It
I The MIDI Key Editor offers lots of useful options for creating chord sequences.f you’re able to finger the chords you want, but not good enough to play a complex sequence in real time, Step Input can be a real time-saver. It can be enabled from the Key Editor’s Toolbar, where a blue cursor appears to tell you this mode is on. (Visit the Toolbar’s Settings panel if the buttons aren’t displayed by default.) Any notes played on your MIDI keyboard appear at the cursor position, and when you release the notes the cursor moves one ‘step’ along the timeline. The step length is determined by the Quantize setting, and the note lengths by the Quantize Length setting. (If you set the latter to ‘Quantize Link’, it’s controlled by the former.)
The automatic advance of the blue cursor makes note or chord entry very efficient. You can take as much time as you wish sorting out your fingers before triggering each chord; all the notes will snap precisely to the current grid position. To leave a step empty, simply advance the blue cursor one step using the cursor/arrow keys.
 Step Input places the notes played on your keyboard according to the current quantise settings.A couple of other things are worth noting. First, if you don’t want every step or chord to be the same length, change the Quantize setting — better still, assign keyboard shortcuts to frequently used Quantize values. Second, while Step Input detects note velocity data, having every chord hitting the grid exactly can still leave the performance feeling mechanical; a quick trip to the Key Editor’s Quantize panel might allow you to apply a more human groove.
Chord Recorder
The second approach uses the Chord Editing panel in the Key Editor’s Inspector, which has several useful features. For example, select a number of MIDI Notes and the Chord Type field will do it’s best to identify the chord. Not all random note collections will form a neat, simple chord, but it’s still a useful option if you’re struggling to make sense of what you’ve just played!
For actual chord entry, focus on the Triads and 4-Note Chord sections. Click on the arrowhead icon of any of the chord types in the Key Editor itself, then click at a certain pitch/time location to create instantly a chord of that type with the selected root note. As mentioned, the note lengths will default to the selected Quantize Length, but click-dragging to the right as you add a chord allows you to create notes of any length.
Usefully, if you click and drag up/down when placing a new chord, you can adjust the pitch. Alt-dragging up/down retains the root note pitch you first clicked on, but scrolls through the various three- and four-note chord types. It’s a good idea to enable the Key Editor’s Audition button (the speaker icon in the Toolbar) so you can ‘hear’ what you’re doing. It’s difficult to overestimate the time it takes to generate a four- or eight-bar chord sequence ‘sketch’ in this way! As MIDI tools go, it really is a bit of a gem.
Also note that if you want something denser than a three/four-note chord, you can click again on the same time location (an octave higher or lower, for instance) to generate a six- or eight-note version. And if you’re a regular Chord Track user (for an introduction to the Chord Track see SOS June 2013’s Cubase column), select the notes and then click the Add To Chord Track button, which does just what you’d imagine, and will create a new Chord Track if one is required.
Find Your Voice
Chord sequences created via the Chord Editing panel may need some velocity and quantise tweaks to ‘humanise’ them, but the Chord Editing panel offers other options for spicing up your ‘performance’. For example, select one or more chords in your sequence and you can drag them up/down to change their root note/pitch. You can also click on any of the Chord Editing panel’s three- and four-note chord types to change the harmonic structure of the chord.
 Once chords are entered, the Key Editor lets you explore different chord voicings, using the Inversions and Drop Notes buttons.And while three- and four-note chords created via the Chord Editing panel are, by default, voiced close together (as if played by the fingers of one hand), you can experiment with different voicings using the Inversions and Drop Notes buttons, which can spread the notes out in interesting ways. This is particularly useful for string-section patches, since it allows you to voice the chord over two or more octaves, producing a result that’s more likely to reflect how real string-section parts might be scored. Note that you can select any notes in a chord or selection of chords and, via the Key Editor’s Info Line, assign them to a different MIDI channel; if you’re using a multi-timbral VST (such as Halion Sonic SE) you can then, say, play back the lowest notes on a bass/cello patch while sending the others to a violin/viola. All these MIDI changes are applied in real-time, so with playback in cycle mode you can audition your changes as you make them. It’s really very neat!
Arping On
There’s just one feature I’d love to see added to the Chord Editing panel/Key Editor combo — the ability to draw in notes from a chord as an arpeggio. Essentially, this would amount to the Key Editor ‘snapping’ note input to a pre-selected chord type/root note. While that’s not currently possible, there are some simple workarounds, and the first should be obvious — once you’ve created your chord progression, slap an Arpache 5 or Arpache SX MIDI plug-in on your track and let it handle the load. But if you prefer more control over your arpeggios, some creative use of the Key Editor’s line drawing tool and the Chord Editing panel, and some simple manual edits, can quickly create a custom arp-style note pattern.
 The three stages of the arp workaround: in bar 1, the Line tool has been used to add 16th notes; in bar 2, those notes have been selected and ‘snapped’ to a C major 7th chord; and in bar 3, simple manual editing has moved ‘doubled’ notes to alternative pitches in the chord, to create a flowing arpeggio pattern.Select the Key Editor’s Line tool (use the straight-line option), and you can draw some 16th notes spanning a couple of bars/octaves. Select all these notes and apply a chord type from the Chord Editing panel, and all the notes will be forced to ‘fit’ the selected chord type, using the first note as the chord’s root. Depending on how you drew the initial line of notes, this step will probably create some ‘duplicate’ notes, with two or three notes in a row sharing the same pitch. So, as a final step, move some of these duplicates up/down to the next higher/lower note in the chord, so no consecutive notes are the same. Identifying the target pitches is trivial, since the Chord Editing panel has already snapped notes to all the obvious targets, so it’s really easy to create a sweeping arp-style pattern.
For any given four- or eight-bar loop, this process has probably taken longer to explain than it actually does to execute, but you can go as far with the manual editing stage as your creativity wants to take you.
Published December 2018