Tuesday, April 30, 2019
Monday, April 29, 2019
Q. Should I be time-aligning my drum tracks?
After recording my drum tracks, I spend some time aligning all
the waveforms. As a matter of course, I align the overheads to the close
top snare mic, then I align all the mics to the overheads. I finally
flip the phase buttons so I get positive attacks on all the tracks
(meaning I usually have to flip everything apart from the in/out kick
mics and bottom snare mic).

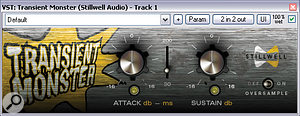
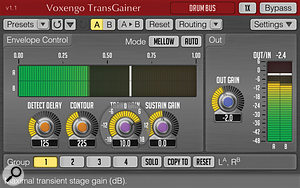
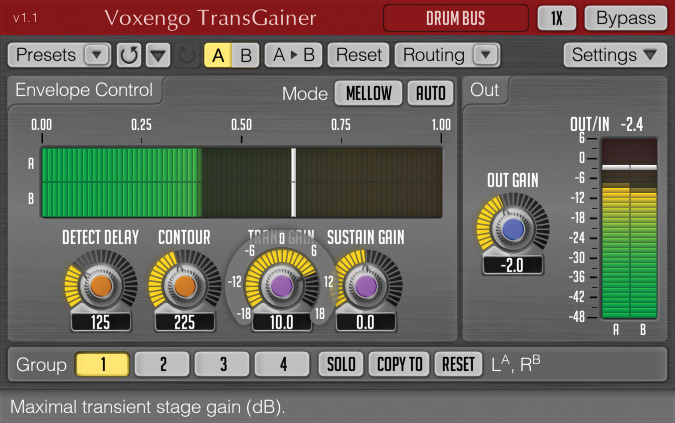
If you prefer not to time‑align the tracks in a multi‑mic drum recording, achieving adequate transient attack can sometimes be a problem. Fortunately, there are now numerous dedicated transient processors on the market that can help. Here you can see a small selection: Voxengo TransGainer, Stillwell Audio Transient Monster and SPL Transient Designer.
However, I was recently working with a very experienced recording artist who recoiled in horror at what I was doing, declaring that he knew no engineer but me who did this. With due deference, I returned the track timings to their original positions and reset the phase settings (though I left the snare phase flips), but to my ears it now sounds awful; the phase cancellations are killing the mix. So am I really alone in doing this kind of time alignment?
Via SOS web site
SOS contributor Mike Senior replies: In a word, no. By the same token, however, every engineer seems to have their own preferences in this regard, and I can understand that an artist might never have encountered such practices if he happened to have worked with engineers who didn't bother with time‑alignment, or else dealt with it only surreptitiously under cover of an unattended mixdown!
The reason for the lack of common practice is that a time‑aligned kit sound has different characteristics to one that has not been time‑aligned, so both tend to serve different goals. If you time-align, what you get is a more phase‑coherent attack to your most important drum sounds, and this can make it easier for them to cut through other elements of the mix. However, the danger is that the weight and body of your drum hits may then appear lacking by comparison, and you can find that this leaves more dynamics‑processing work to do at the mix.
The other problem is that time‑aligning the close‑miked drums can cause the overheads and room mics to pull those drums backwards into the mix. If you fade the room and overhead mics down to reduce this effect, the drum sound, as a whole, can then begin to sound rather anaemic and disconnected because of its reliance on the, typically, less natural‑sounding close mics. Once again, extra compression and/or reverb might then be needed to draw out a satisfying sound.
By contrast, if you leave time‑alignment out of your drum mixing process, you won't usually get the same transient smack that time‑alignment can provide, but the close mics may sound clearer and more up-front as a result of the time gap between their transients and the corresponding peaks in the overheads and room mics. In fact, producer Steve Albini has said that he occasionally delays his room mics artificially to increase this temporal separation.
The 'smearing' of the drum transients, which can result from a lack of time‑alignment, may also help make the drums feel more solid for a given subjective mix level, simply because each drum's combined drum‑mix peak is broader in the time domain and is also not as far above the level of that drum hit's sustain tail (compared with a time‑aligned drum mix). The down side is that you may struggle to achieve enough attack for some aggressive styles, unless you get busy with specialist transient processors on the close‑mic tracks. (There are lots of these to choose from, though, if you need them: SPL's Transient Designer, Waves' TransX Wide, Voxengo's Transgainer, Stillwell Audio's Transient Monster, Flux's Bittersweet... the list goes on and on.)
So, whether you time‑align or not, the result will always be something of a compromise; there are pros and cons of both approaches. What really matters, of course, is the sound in the context of the final mix, so the choice of methodology depends on which set of advantages you value most highly, and which set of disadvantages you can remedy most successfully.
One further thing to add, though: even without time‑alignment, phase issues still needn't make mincemeat of a drum sound. However, you can't expect to use some preset configuration of your channel polarity buttons, because the phase relationships between the mics are more complex than that. Much better to introduce each mic or mic pair into the mix sequentially (I typically start with the overheads and room mics), flipping the relevant polarity switch for the most solid‑sounding combination. Just make sure that you keep an ear on the entire line‑up of drum kit instruments while doing this, as adding a tom‑tom close mic, for instance, can easily affect the tonality of the snare or kick drum.
If the polarity buttons alone fail to satisfy your ear, try getting a phase rotator involved, to provide you with finer phase adjustments for the most critical close mics. There's the freeware Betabugs Phasebug, and there's also the better‑specified IBP Workstation from Little Labs, which has just been released for the Universal Audio UAD2 processing cards.

If you prefer not to time‑align the tracks in a multi‑mic drum recording, achieving adequate transient attack can sometimes be a problem. Fortunately, there are now numerous dedicated transient processors on the market that can help. Here you can see a small selection: Voxengo TransGainer, Stillwell Audio Transient Monster and SPL Transient Designer.

However, I was recently working with a very experienced recording artist who recoiled in horror at what I was doing, declaring that he knew no engineer but me who did this. With due deference, I returned the track timings to their original positions and reset the phase settings (though I left the snare phase flips), but to my ears it now sounds awful; the phase cancellations are killing the mix. So am I really alone in doing this kind of time alignment?
Via SOS web site
SOS contributor Mike Senior replies: In a word, no. By the same token, however, every engineer seems to have their own preferences in this regard, and I can understand that an artist might never have encountered such practices if he happened to have worked with engineers who didn't bother with time‑alignment, or else dealt with it only surreptitiously under cover of an unattended mixdown!
The reason for the lack of common practice is that a time‑aligned kit sound has different characteristics to one that has not been time‑aligned, so both tend to serve different goals. If you time-align, what you get is a more phase‑coherent attack to your most important drum sounds, and this can make it easier for them to cut through other elements of the mix. However, the danger is that the weight and body of your drum hits may then appear lacking by comparison, and you can find that this leaves more dynamics‑processing work to do at the mix.
The other problem is that time‑aligning the close‑miked drums can cause the overheads and room mics to pull those drums backwards into the mix. If you fade the room and overhead mics down to reduce this effect, the drum sound, as a whole, can then begin to sound rather anaemic and disconnected because of its reliance on the, typically, less natural‑sounding close mics. Once again, extra compression and/or reverb might then be needed to draw out a satisfying sound.
By contrast, if you leave time‑alignment out of your drum mixing process, you won't usually get the same transient smack that time‑alignment can provide, but the close mics may sound clearer and more up-front as a result of the time gap between their transients and the corresponding peaks in the overheads and room mics. In fact, producer Steve Albini has said that he occasionally delays his room mics artificially to increase this temporal separation.
The 'smearing' of the drum transients, which can result from a lack of time‑alignment, may also help make the drums feel more solid for a given subjective mix level, simply because each drum's combined drum‑mix peak is broader in the time domain and is also not as far above the level of that drum hit's sustain tail (compared with a time‑aligned drum mix). The down side is that you may struggle to achieve enough attack for some aggressive styles, unless you get busy with specialist transient processors on the close‑mic tracks. (There are lots of these to choose from, though, if you need them: SPL's Transient Designer, Waves' TransX Wide, Voxengo's Transgainer, Stillwell Audio's Transient Monster, Flux's Bittersweet... the list goes on and on.)
So, whether you time‑align or not, the result will always be something of a compromise; there are pros and cons of both approaches. What really matters, of course, is the sound in the context of the final mix, so the choice of methodology depends on which set of advantages you value most highly, and which set of disadvantages you can remedy most successfully.
One further thing to add, though: even without time‑alignment, phase issues still needn't make mincemeat of a drum sound. However, you can't expect to use some preset configuration of your channel polarity buttons, because the phase relationships between the mics are more complex than that. Much better to introduce each mic or mic pair into the mix sequentially (I typically start with the overheads and room mics), flipping the relevant polarity switch for the most solid‑sounding combination. Just make sure that you keep an ear on the entire line‑up of drum kit instruments while doing this, as adding a tom‑tom close mic, for instance, can easily affect the tonality of the snare or kick drum.
If the polarity buttons alone fail to satisfy your ear, try getting a phase rotator involved, to provide you with finer phase adjustments for the most critical close mics. There's the freeware Betabugs Phasebug, and there's also the better‑specified IBP Workstation from Little Labs, which has just been released for the Universal Audio UAD2 processing cards.
Published July 2010
Saturday, April 27, 2019
Friday, April 26, 2019
Q. Is working with digital recordings harder than working with analogue ones?
In the past few years, it seems that I have to work much harder to
get things to sit properly in a mix — to get the vocal or horns to just
blend with the rest of the track, rather than feeling 'stuck on top',
for example. What has crossed my mind is that I rarely (if ever) seemed
to find this an issue when I was working purely in the analogue realm.
Was I being helped by the losses in the analogue system to blend the
sounds? Is it harder to blend multitrack recordings in the digital
world? I'm a musician, really, but I think I've improved as an engineer
over time, so I should say that I'm not a total klutz at this. I do
usually manage to get things to blend, but it does take effort. Do you
have any tips for improving the situation?
Via SOS web site
SOS contributor Mike Senior replies: There are a lot of good reasons why recordings made entirely in the analogue domain often seem easier to glue together at mixdown. The compression side-effects of the tape recording medium often help to tame over‑spiky transients (especially on drums), which can be difficult to tuck into the mix otherwise. The progressive high‑frequency loss that tape‑recorded signals suffer after multiple playbacks helps push sounds further away from the listener too; the brighter a sound, the more it tends to pop out of the mix.
Background noise is an inevitable side‑effect of working in the analogue domain — not just on account of the tape itself, but also because of contributions from all the other processing equipment — and this combined noise floor usually makes it easier to blend a mix. To quote producer Steve Churchyard (in Howard Massey's book Behind The Glass), "Tape hiss doesn't bother me at all, never did. It's like the glue that holds the record together”. A little added distortion is also unavoidable in analogue setups, and this can be turned to advantage by experienced recording engineers to make sounds fuller and more present. Such sounds don't need to be faded up as high in the mix and are, thus, easier to balance.
One other factor a lot of people forget regarding analogue productions is that compression is more often done while recording, to make the best use of the tape's dynamic range and the available gear resources, and then many of those parts may be further compressed at the final mix. This kind of serial compression is typically better at levelling out performance levels than a single, more heavy‑handed, processing stage, so that can also affect blend and the overall sense of naturalness.
There are other factors that contribute to the analogue sound, but that's enough to be going on with at the moment! Let's start looking at how you can try to get similar effects in the digital domain. The bottom line is that you can't expect to use all the same techniques you used for your analogue mixes when working on an all‑digital production. So, for example, I normally find that I do a lot more work with tape emulation, saturation, clipping and specialist transient processors when mixing digital recordings, in order to bring the typically less‑rounded transients under control. Tape emulations are, of course, an option here also.
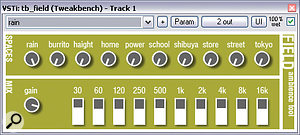
Adding background noise artificially can also help achieve more analogue‑style blend, and if you don't fancy sourcing your own noise recordings, there are a lot of places you can find suitable samples. Most media sound effects libraries have a selection of what are usually called 'room tone' or 'room ambience' files, which are the sound of nothing happening in various common environments; not the most interesting sounds, but they really help to make tracks feel as if they're all occurring in the same place. Vinyl noise is another good option, and I've found good examples in many sample libraries. Spectrasonics' Retrofunk (www.spectrasonics.com) and Tekniks' The Mixtape Toolkit (www.tekniks.co.uk) spring to mind immediately, but there are lots of others. The Swedish developers Retro Sampling (www.retrosampling.se) have made background noise something of a speciality, and you can get whole CDs full of different vinyl noises from them, plus they also do freeware Audio Impurities and Vinyl Dreams VST plug‑ins, which give a small taster of what their product range has to offer. There are other plug‑ins worth a look too, such as Izotope's Vinyl (www.izotope.com) and Cubase's built‑in Grungelizer, but be aware that some of these don't output everything in stereo, and mono noise won't help the blend nearly as much in this application. One other freeware plug‑in that you might try is Tweakbench's Field (www.tweakbench.com), which provides a selection of mixable room tones.

Retro Sampling's Audio Impurities Vintage Edition and Tweakbench's Field are two freeware plug‑ins that can feed subtle background noise to your mix bus, thereby subtly improving your apparent blend.
Via SOS web site
SOS contributor Mike Senior replies: There are a lot of good reasons why recordings made entirely in the analogue domain often seem easier to glue together at mixdown. The compression side-effects of the tape recording medium often help to tame over‑spiky transients (especially on drums), which can be difficult to tuck into the mix otherwise. The progressive high‑frequency loss that tape‑recorded signals suffer after multiple playbacks helps push sounds further away from the listener too; the brighter a sound, the more it tends to pop out of the mix.
Background noise is an inevitable side‑effect of working in the analogue domain — not just on account of the tape itself, but also because of contributions from all the other processing equipment — and this combined noise floor usually makes it easier to blend a mix. To quote producer Steve Churchyard (in Howard Massey's book Behind The Glass), "Tape hiss doesn't bother me at all, never did. It's like the glue that holds the record together”. A little added distortion is also unavoidable in analogue setups, and this can be turned to advantage by experienced recording engineers to make sounds fuller and more present. Such sounds don't need to be faded up as high in the mix and are, thus, easier to balance.
One other factor a lot of people forget regarding analogue productions is that compression is more often done while recording, to make the best use of the tape's dynamic range and the available gear resources, and then many of those parts may be further compressed at the final mix. This kind of serial compression is typically better at levelling out performance levels than a single, more heavy‑handed, processing stage, so that can also affect blend and the overall sense of naturalness.
There are other factors that contribute to the analogue sound, but that's enough to be going on with at the moment! Let's start looking at how you can try to get similar effects in the digital domain. The bottom line is that you can't expect to use all the same techniques you used for your analogue mixes when working on an all‑digital production. So, for example, I normally find that I do a lot more work with tape emulation, saturation, clipping and specialist transient processors when mixing digital recordings, in order to bring the typically less‑rounded transients under control. Tape emulations are, of course, an option here also.
Adding background noise artificially can also help achieve more analogue‑style blend, and if you don't fancy sourcing your own noise recordings, there are a lot of places you can find suitable samples. Most media sound effects libraries have a selection of what are usually called 'room tone' or 'room ambience' files, which are the sound of nothing happening in various common environments; not the most interesting sounds, but they really help to make tracks feel as if they're all occurring in the same place. Vinyl noise is another good option, and I've found good examples in many sample libraries. Spectrasonics' Retrofunk (www.spectrasonics.com) and Tekniks' The Mixtape Toolkit (www.tekniks.co.uk) spring to mind immediately, but there are lots of others. The Swedish developers Retro Sampling (www.retrosampling.se) have made background noise something of a speciality, and you can get whole CDs full of different vinyl noises from them, plus they also do freeware Audio Impurities and Vinyl Dreams VST plug‑ins, which give a small taster of what their product range has to offer. There are other plug‑ins worth a look too, such as Izotope's Vinyl (www.izotope.com) and Cubase's built‑in Grungelizer, but be aware that some of these don't output everything in stereo, and mono noise won't help the blend nearly as much in this application. One other freeware plug‑in that you might try is Tweakbench's Field (www.tweakbench.com), which provides a selection of mixable room tones.

Retro Sampling's Audio Impurities Vintage Edition and Tweakbench's Field are two freeware plug‑ins that can feed subtle background noise to your mix bus, thereby subtly improving your apparent blend.
Published August 2010
Thursday, April 25, 2019
Wednesday, April 24, 2019
Q. How can I salvage my ‘spiky’ guitar track?
I recently recorded a steel‑strung, finger‑picked acoustic guitar track. The problem is that it sounds very 'spiky' and I'm having to use a lot of compression. The track is for an acoustic song with a single guitar and a single vocal. Do you have any tips on how I can bring it 'under control' without making it sound too compressed?

Specialised processors might be needed to deal with an over‑spiky acoustic guitar recording. Suitable examples include multiband transient processors such as Waves' Trans-X Multi and dynamic equalisers such as the Platinum Ears IQ4.

Via SOS web site
SOS contributor Mike Senior replies: If it's sounding too spiky, that'll probably be because you put the mic too close to the instrument, in general, and too close to the sound hole, in particular. This tends to capture the instrument's picking transients more prominently than its overall tone, so, on the recording side, I'd try to back the mic off a bit. The mechanical noises, in particular, won't travel as well as the more resonant components of the sound and you should get something a bit smoother. A more distanced positioning will probably give you a sound that is more appropriate for the genre, too, as it'll catch the instrument in a more natural perspective.
Regarding dealing with this problem after the fact, you're right to say that straightforward compression probably isn't what you're looking for here. If the spikiness you're hearing is mostly down to pick noise, this is likely to be concentrated mostly in the high‑frequency region of the audio spectrum, in which case some kind of frequency‑selective dynamics processing will make a better job of things, because it'll be able to target only the troublesome frequency region, thereby reducing the processing artifacts. The top band of a fully‑featured multi‑band compressor would do the trick here, if you set the high crossover to maybe 2‑3kHz. My first instinct would be to go for a fairly high ratio (perhaps 8:1) with fast attack and release times (around the 1ms and 10ms marks respectively) and then try to set the band's threshold so that it just reins in the spiky peaks. A dynamic EQ (such as the freeware Platinum Ears IQ4 VST plug‑in) could be set up to very similar effect, too and, in some cases, a vocal de‑esser may be able to achieve similar results. Some dedicated de‑essers are based around a similar kind of high‑frequency dynamic EQ.
If the spikiness is more than just pick noise, you could also try using a dedicated threshold‑independent transient processor (such as SPL's Transient Designer). Some such designs may be better at dealing with the problem than others, as each has its own attack and release characteristics. So, if you have more than one such processor available to you, do try them all to find which one works best. Waves even do a multi‑band model, Trans-X Multi, which is a phenomenally powerful salvage tool if set up with care.
If none of those suggestions work well enough, a final suggestion would be to try some kind of mastering limiter. Mastering limiters specialise in the transparent reduction of level peaks, and often operate on them in much more complex ways than traditional dynamics processors do. Again, though, if you have more than one limiter available to you, try them all, as they all seem to have their own individual character, in my experience.
Published April 2010
Tuesday, April 23, 2019
Monday, April 22, 2019
High-capacity Drives
High‑capacity drives now not only make it
possible to carry entire multitrack audio projects in your back pocket,
they also allow installation of some audio applications, theoretically
offering a totally portable studio solution.

Your studio can now be attached to your keyring with Kingston's new DataTraveler 310 flash drive, which has a massive 256GB capacity.
USB memory sticks are no longer restricted to scratchpad duty: Kingston's new DataTraveler 310 offers a massive 256GB capacity, along with read/write speeds that make it feasible to carry entire multitrack audio projects around on your keyring. More and more musicians are finding such drives indispensable as a convenient backup medium or for carting around songs, sounds, or even video files from studio to studio. It's also possible to install some audio applications on them, for a totally portable music solution.
Nearly all USB sticks of 2GB or smaller are pre‑formatted as FAT16 (File Allocation Table, often simply abbreviated to FAT), which generally offers very slightly faster read and write speeds than FAT32. However, maximum volume size and file size is 2GB, so larger USB sticks generally arrive in FAT32 format, which supports a maximum volume size of 32GB and a maximum file size of 4GB. Both format types are optimised for quick removal and can, therefore, be unplugged without using the Windows 'Safely Remove Hardware' tool.
USB sticks of greater than 32GB are best formatted as NTFS (New Technology File System), as used by most modern hard drives, which also offers greater security. NTFS also seems to offer considerably faster write speeds, because Windows write‑caching declares each write complete once it's written to your system RAM, but before it's actually finished sending it to your USB stick. This is great if you tend to do lots of separate writes while your stick is inserted, but it's absolutely vital to use the 'Safely Remove Hardware' tool before unplugging, to avoid corruption of all your stick's data.
Many musicians are left wondering whether or not they will benefit from reformatting smaller USB sticks from FAT to NTFS, and if so, how. Well, the main reason is to allow single file sizes of larger than 4GB, but you are unlikely to see any performance improvements. Initially, Windows will only offer FAT or FAT32 options, so if you decide to switch to NTFS, you need to find your USB stick in Device Manager, double‑click on its icon to open the Properties page and select the Policies tab. Finally, you need to click on 'Optimise for performance' instead of 'Optimise for quick removal', to enable write‑caching. Once this has been done, a new NTFS option will appear in your Format options for this USB stick.
SHEPPi Spatial Enhancer

SHEPPi is a seriously good spatial enhancement plug‑in that works well on both stereo and mono sources, and just happens to be free!
The SHEPPi (Stereo Haas Effect Ping‑Pong Inverter) Spatial Enhancer is based on principles discussed in a 1983 AES white paper. If you want to enhance the localisation and ambience of your sounds to make them bigger and more spacious, this is a free PC‑only VST plug‑in that's most definitely worth a download from the Open Ambience Project (http://dallashodgson.info/articles/OpenAmbienceProject).
The well‑known Haas effect states that if two sounds arrive at your ears within 25 to 35 milliseconds they are perceived as a single sound. So SHEPPi performs its magic using a fixed 30mS ping‑pong delay with optional feedback, courtesy of its Deep button, and an inverter switched in and out of one of its crossfeed delay lines, using its Wide button. This means that the extra early reflections bounce around out of phase to increase the stereo width. Completing the package is a balance control for the Mid/Side components of your sound, along with a three‑band EQ and level control for fine‑tuning the extra reflections.
This sort of spatial trickery isn't new, and I have several similar plug‑ins in my collection, but SHEPPi is not only seriously good for enhancing stereo recordings with minimal coloration, but also for turning mono sources into pseudo‑stereo ones. Of course, you can take it to nasty extremes, particularly if you raise the effect amount too much, but the presets demonstrate just how natural it can sound. Highly recommended!
PC Snippets
Dodgy USB sticks: Counterfeiters are reprogramming USB sticks so that they appear to have much larger capacity. If you've been tempted by any bargain sticks on eBay, always use the freeware H2testw utility (www.portablefreeware.com/download.php?dd=1519) to test them while empty, before you start saving your valuable data on them. It's not unknown for a 64GB stick to actually only be able to store just 4GB!Dongles aren't so bad: Some musicians are already voting with their feet when it comes to products protected by USB dongles, but one game company is so incensed by rampant piracy that they've come up with a new and rather draconian scheme that we will have to hope doesn't get taken up by any music developers. While playing Ubisoft's Assassin's Creed 2 you require a permanent Internet connection to Ubisoft's servers. If you lose your connection, the game will freeze, but will carry on trying to reconnect for an unlimited time. However, the biggest obstacle to hackers is that your current game progress is stored on Ubisoft's servers as well, along with the associated code. In other words, the developer hosts your personal data on their computers, so it will take a lot longer to crack; probably as long as the game's shelf life!
Published May 2010
Saturday, April 20, 2019
Friday, April 19, 2019
Q. Should I be using dedicated word-clock connectors?
When clocking an audio interface using an external device, such
as a stand‑alone mic preamp with A‑D conversion, is it better to use the
dedicated word-clock (normally BNC) connectors, or will the clock
signal be just as good coming down the S/PDIF, AES3 or ADAT cable that
is carrying the audio signal?

If a clock signal is a perfect square wave, as shown here, clock timing will be jitter free. However, passing an AES3 signal down a capacitive cable distorts the waveshape and introduces a timing ambiguity called 'interface jitter'.
Photo: Prism Sound
Sam Wood, via email
ASOS Technical Editor Hugh Robjohns replies: Theoretically, recovering the clock from a dedicated clock source via word clock should be easier and better — with less intrinsic interface jitter — than trying to extract an embedded clock from AES3, S/PDIF or ADAT interfaces.
The reason is that word clock is a really simple square-wave signal running at the sample rate. Cable losses will slow the transitions, so what falls out the end of the cable will probably be a little more rounded than what went in. But the important point is that the periods between each transition from high to low (and vice versa) will remain absolutely consistent. It's those transitions that define the sample points.
By contrast, AES3, S/PDIF and ADAT all embed the clock pulses within the audio stream by using a type of modulation process. The result is that the transitions depend on both the audio data and the clock data, so the transition rate varies. The inherent capacitance within the cable reacts with those transitions and the result is small, but varying, time shifts of the transition point. This process is called 'interface jitter', and it is an intrinsic part of that kind of digital audio interface. The diagram above, courtesy of Prism Sound, illustrates the effect.
Fortunately, interface jitter can be removed fairly easily using phase‑locked loops (PLLs) or other, often proprietary, techniques these days. Moreover, it doesn't actually matter in the case of transferring digital audio from one digital machine to another, anyway, provided all that is required is to identify each data‑bit value reliably.
Where interface jitter becomes important is in the D‑A conversion stage, or when clocking an A‑D converter from an external master clock. In both of these situations, the signal is being converted between the analogue and digital domains, and precise, jitter‑free sample-clock timing is, therefore, absolutely essential.
That's why it's best to run an A‑D from its internal crystal clock, rather than an external master clock, if possible, and why good D‑As go to so much trouble to isolate and remove interface jitter.
Published April 2010
Thursday, April 18, 2019
Wednesday, April 17, 2019
Solid-state Drives
The silent studio is a real possibility now
that solid‑state drives are offering unrivalled transfer rates, free
from mechanical noise. So why aren't we all switching over?

Solid-state drives, such as the popular Kingston model shown here, are an ideal way to minimise boot‑up and application launch times.
Most modern mechanical hard drives spinning at 7200rpm manage between 100MB/second and 150MB/second sustained transfer rates, and slightly less than 10ms access times as their read/write heads whizz about getting to the appropriate location on the magnetic discs. However, SSDs (solid-state drives) offer sustained transfer rates of over 200MB/second and amazing random access times of a fraction of a millisecond, which means that using an SSD to install Windows and its applications will give you significantly faster boot‑up and application launch times.
Solid-State Drives & The Musician
Rather like a USB flash drive (but without the bottleneck of its USB 2 connection), the SSD relies on Flash memory for its storage and, therefore, has no moving parts, making it more rugged. This aspect of its performance makes it attractive to musicians both on stage and in the studio; its lack of moving parts results in lower power drain and renders it completely silent.So why aren't we all swapping over? One reason is cost. For a similar outlay to a 2TB mechanical hard drive (that's 2000 Gigabytes) you're only likely to get a 64GB solid-state drive, which is about the minimum capacity you'd need to install Windows and a few applications.
This means you'll probably need two mechanical hard drives as well — one for audio streaming and the other for sample libraries — and, given that most audio applications rarely access the Windows drive or partition after their initial launch, this means the SSD is only offering you the advantage of a faster start‑up time, and no real‑time performance enhancements.
Another down side is that the memory cells of solid-state drives eventually wear out. Admittedly, though, they tend to be rated for tens of thousands of read/write cycles and, therefore, have a lifespan of many years.
Flash memory is also typically accessed in 512KB blocks, so if you only need to store a single kilobyte, this happens very quickly with an empty SSD. However, once the drive is partly filled, that same kilobyte of data might require a 512KB block with at least a kilobyte of empty space to be read into a cache, have the new data slotted in, and then the resulting 512KB block written back again. More overheads!
Installing a solid-state drive in your audio PC is currently considered a luxury but, as with all computer storage options, prices will drop and overall performance will improve. I'm sure it won't be long before we wonder how we managed without them, as the silent studio gets ever closer!
IndyGo FXTractor

Robin Schmidt's freeware Signal Analyzer is a great tool if you want to learn more about waveforms and harmonics.
Back in PC Notes June 2007, I discussed the new VST3 preset format first used in Steinberg's Cubase 4 (and now in its successor, Cubase 5). Along with Steinberg's MediaBay database functions, the VST3 format allows VST plug‑ins and instruments to be tagged with styles and characteristics, such as Acoustic/Percussive or Clean/Dirty.
Of course, all Steinberg's new bundled instruments and plug‑ins have sets of carefully tagged presets, and Cubase 4 or 5 will happily import presets in Steinberg's older VST2 FXP/FXB formats, so various helpful users, spearheaded by Jan Lanter of Lanter Audio, have subsequently carried out the donkeywork, converting a swathe of third‑party preset banks into the new VST preset format (http://projects.lanteraudio.nl/downloads/cubase).
However, Cubase 4 and 5 will only save presets in the new VST preset format, which has proved to be a real annoyance for many Cubase owners who want to share their presets with users of virtually every other VST‑compatible sequencer that only loads FXP/FXB. There's even a poll on the Cubase forums pleading for FXP/FXB save functions to be added to Cubase 5.
Fortunately, help is at hand from third‑party developer IndyGo, whose small FXTractor utility (www.indygo.de/fxtractor) allows you to drop VST preset files or complete folders onto its window and have them converted to FXP and FXB formats. It's still at an experimental stage, with no guarantees, but has been tested on Windows 2000, XP, Vista and 7. So if you've got VST presets that you need to share with other sequencer users, why not give it a try?
Shareware Spotlight
Robin Schmidt has some intriguing PC‑only shareware products on his web site (www.rs‑met.com), such as the Straightliner subtractive synth and the very flexible Echo Lab effect. He also offers a range of very useful freeware 'Music Engineering Tools', including a particularly useful MIDI Monitor that lets you filter out various MIDI data options. Anyone who has needed to examine the output of their MIDI keyboard or controller in the past, during a fault‑finding session, and got frustrated by an endless scrolling stream of FE Active Sensing messages emerging from it, can finally make them disappear for good!However, for me the most useful tool in Robin's collection is his new freeware Signal Analyzer. It does take a lot more CPU power in its spectrum analyser mode than others in my collection, but I think this is outweighed by the convenience of being able to switch instantly between frequency and time domains (i.e. spectrum analyser to oscilloscope). You can learn a huge amount by studying waveforms and which harmonics they generate!
Published April 2010
Tuesday, April 16, 2019
Monday, April 15, 2019
Q. How can I fix timing issues?
I'm not new to technology or recording but, having started recording other people in my home setup, I have come across what I guess must be a common problem. However, it's not one I've experienced before. The problem is with some people not being able to play guitar to a click‑track properly or sing in time. I use Cubase 5 as the main host and I know how to correct pitch, but not timing! I have tried — unsuccessfully — to fix these timing problems with Cubase's Variaudio and I can't work out how to fix timing properly with Melodyne. I just want to move complete notes to their rightful spots. I'd like to know if there's a particular program I should be using and how I should actually go about fixing timing issues.

One of the trickiest places to edit is in the middle of a sustained pitched note, but you can often get surprisingly good results as long as you make sure to line up the waveforms as closely as possible through the crossfade region.
Via SOS web site
SOS contributor Mike Senior replies: If this is the first time you've encountered timing problems, you can count yourself lucky. Dodgy timing is certainly one of the most common shortcomings of Mix Rescue submissions, and even many commercial‑level productions will have had extensive work done on them in this department. Both Variaudio and Melodyne can provide an answer to the problem, but because they do this by time‑stretching — which can cause audible chorus‑like artifacts, especially on polyphonic or distorted parts — I actually still do the vast majority of my timing work using just my sequencer's ordinary audio editing tools. I know from first‑hand experience of Cubase, Logic and Reaper that they're more than up to this task, but I'm also confident that any major sequencing platform would also do fine here. On a basic level, all you have to do is slice out the offending notes, slide them into time and then create crossfades to smooth the joins. Beyond this, the art of getting a good result is in learning how to judge whether a note is in or out of time and in managing the edits as inaudibly as possible.
My main advice for timing evaluation is to make sure you don't just audition the immediate area of suspect timing, because timing is subjectively judged, relative to what's happened before. Listen to a good two bars before the edit you're working on and it'll be much more apparent when the edit is right. For similar reasons, it's possible for a note that's perfectly in time actually to sound late or early if the preceding section, as a whole, is consistently slightly ahead of, or behind, the beat. So be careful of trusting your eyes over your ears while editing.
When it comes to making the edits sound smooth, there are lots of tricks. The first is to put your crossfades just before percussive attack onsets, because they'll actually be concealed, to some extent, by such transients; this is one of the more bizarre psychological audio effects, commonly known as backwards temporal masking, or pre-masking. In such instances, short crossfades (around 5ms) tend to work best. My second suggestion is, if possible, to put edits either into silent periods in the audio signal or noisy parts, such as breaths, sibilants and other consonants. These edit points often don't require any crossfading at all.
For any other edits the main trick is to try to match the waveform shapes on either side of the edit as exactly as possible. If you can do this well, you can usually just crossfade over a couple of waveform cycles to get an edit that is somewhere in the range from passable to invisible. If all else fails, you can hide even quite clunky edits behind big transients occurring on other tracks, perhaps kick or snare drums. In some cases, it can be useful to time‑stretch individual slices a little where there's a bit of a gap to fill, but in practice I don't find I actually need to do this a tremendous amount; it's vocals and sustained melodic instruments that are most likely to require it, because their exposed nature can sometimes reveal normal mid‑note edits ruthlessly.
All that said, for a lot of parts that are buried in the texture of a track, you don't actually have to be particularly discerning with your edits. For example, you can get away with a lot of lumps and bumps in the audio when you're working with double‑tracked acoustic guitar strumming or the individual tracks in a group of layered backing vocals. No‑one is ever going to be able to hear sounds like these well enough to make out the artifacts once the mix is finished.
SOS Reviews Editor Matt Houghton adds: One tip to add to this is that when you're time‑stretching you shouldn't forget that you only want to stretch the offending note and not necessarily the whole phrase, as doing so can put elements such as consonants and note changes out of time. Also, there's a quick 'cheat', which is to mask a slightly short note by automating a reverb or delay send effect, but that won't work in every instance.
Finally, no discussion of vocal timing correction would be complete without a mention of Synchro Arts' excellent VocAlign software for Pro Tools (also now available as an Audio Unit for Logic and Digital Performer). As the name suggests, this is intended to automatically align vocal parts, which makes it great for applications as diverse as overdubbing backing vocals and film‑dialogue replacement.

In
the March issue of Sound On Sound, Sam Inglis demonstrated how to use
markers as hitpoints in Cubase, offering a good way of correcting timing
across multiple drum tracks.
Reader Yonatan Barak has responded to Sam Inglis' piece on using markers as hitpoints to correct timing for multitrack drum recordings in Cubase (subscribers can see the article at /sos/mar10/articles/cubasetechnique_0310.htm).
"I was happy to see Sam Inglis tackle this very common problem for Cubase users. However, as my projects usually contain high numbers of markers (mainly for project orientation), I find that using them as hitpoints can be problematic and transferring the drum tracks to another project can be quite clumsy and time consuming.
"My way of doing it is by locating the next event instead of the next marker. After setting the hitpoints, I use the 'Divide audio at hitpoints'command for the duplicated Kick and Snare tracks and a macro containing the following commands: 'Locate next event' and 'Split at cursor'. So the duplicated tracks are highlighted and the rest of the drum events are selected. it's pretty much the same thing, but without the huge amount of markers!”
Published May 2010
Saturday, April 13, 2019
Friday, April 12, 2019
Q. How do normal DAWs differ from mastering workstations?
Why are there specific systems like SADiE, CEDAR, Sonic Solutions to
master with, as opposed to, say, Logic, Cubase and Pro Tools? To me,
they both seem to just be multitrack DAWs!

The capabilities of DAWs and mastering workstations have converged over the years. An example of this is in Pro Tools 8, which started off as an audio editing system, but now has very sophisticated MIDI facilities and plug‑in support.
Via SOS web site
SOS Technical Editor Hugh Robjohns replies: I think it's inevitable that DAWs of all kinds will converge in functionality over time. The evidence of that convergence is already plain to see in many cases. However, in the early days of digital audio editing and workstations, the complexity of these new technologies meant that manufacturers tended to specialise in specific areas of functionality.
The original MIDI‑based sequencers — such as Notator (now Logic), Cubase and their ilk — have all gradually added audio recording and editing tools, while the originally pure audio-editing systems — such as Sound Designer, SADiE, Sonic Solutions and Pro Tools — have gradually added MIDI facilities and plug‑in support. So the difference between systems is far less clear now than it once was.
However, the inertia of change has meant that some systems still retain strong specialisms and are favoured on that basis. For example, CEDAR started as a largely off‑line post‑processing platform for audio restoration, but its current incarnation includes sophisticated audio recording and editing facilities to improve the convenience of using it as an 'on‑line' tool.
SADiE started out, fundamentally, as a radio programme production platform. Its audio editing tools and workflows are geared up for very slick and versatile audio manipulation, which is precisely why it has been seized upon as the almost de facto music mastering system, essentially replacing the original king in that role, Sonic Solutions. However, there are other popular alternatives, such as Sequoia and Pyramix (in the professional sector) and very capable lower‑cost options, such as Wavelab and Adobe Audition.
In the mastering role, the most important features are very accurate and flexible editing facilities combined with all the behind‑the‑scenes tools for PQ creation, ISRC (International Standard Recording code) and so on, as well as the ability to generate the industry-standard DDPi mastering files. So generally these systems tend to have less well‑endowed MIDI facilities and internal or plug‑in processing, simply because they aren't required.
However, when it comes to the music production platforms, MIDI is obviously fundamental, so, while systems like Cubase, Logic and Digital Performer, for example, tend to have slightly more clunky audio editing tools, they do incorporate sophisticated MIDI features, very comprehensive internal signal processing, and support for plug‑in effects.
Pro Tools started out as an audio editing system, but has gradually acquired more and more sophisticated MIDI facilities and plug‑in support. This platform, perhaps, represents most clearly the idea of total convergence.
Published June 2010
Thursday, April 11, 2019
Tuesday, April 9, 2019
Monday, April 8, 2019
Overheating; De-clutter
If your PC is overheating, the solution could be as simple as getting rid of the filth — and we don't mean pornography...

If you want your PC to have a long and happy life, don't let it get into this state!
Specialist music PC builders tell me that the most common reason for new machines to arrive back for repair after about six months is overheating, due to cooling fans and heatsinks becoming so blocked with accumulated dust, cigarette ash and other gunk that they can no longer function. If you have a strong stomach, take a look at 'Dirty, Dirty PCs: The X‑Rated Picture Guide' (www.theregister.co.uk/2009/11/13/ventblockers).
So once every few months you should unplug your PC from the mains and use a soft brush and a vacuum-cleaner brush attachment to remove as much muck as you can find from all the obvious places. These include the CPU fan and heatsink, and any case fans or air filters (often placed before the intake fans at the front of a PC). Don't forget to clean any other heatsinks you find on the motherboard or any expansion cards (modern graphics cards require large heatsinks, as do some soundcards). For inaccessible fans, such as those inside PC power supplies, moisten a cotton bud and use it to wipe the fan blades, or blow an airduster into the PSU from the back of the PC to loosen the internal dust, which should then get blown out by the fan. This latter approach may also help laptop owners. Help your PC to live long and prosper!
USB Hub Deception
Loads of musicians use USB hubs to house multiple dongles, RAM sticks and the like, so here's a warning tale. Being stuck out in the sticks, I've been using various arcane means to improve my pitiful Internet connection speed of around 512kbps. I wanted to buy a powered USB 2 hub so that my USB‑powered modem could remain on all the time and not risk dropping from this new-found speed.However, while ordering a 'USB 2 hub' on‑line, I very nearly fell for this cunningly worded product description. After further research, it turned out to be merely 'compatible' with USB 2, but actually only capable of 12Mbps transfer rates, rather than the 480Mbps of USB 2. I still find it hard to remember which is which when it comes to USB Full Speed (12Mbps) and USB Hi‑Speed (480Mbps), and have long suspected that manufacturers deliberately blur such issues so they can continue to sell less‑capable products.
Whether or not you actually need the increased transfer rate of Hi‑Speed USB is sometimes debatable but, at the very least, it ought to be clear what you're about to buy.
SATA Confusion
Another confusing area is the serial‑connected SATA hard drive, whose first generation could communicate at a maximum transfer rate of 1.5Gb/s and is, therefore, now known as SATA 1.5Gb/s. As with USB, the designers of SATA aimed for backward and forward compatibility with further revisions of the SATA standard, but when the SATA Revision 2 appeared, incorporating a new SATA 3Gb/s maximum transfer rate, most people assumed that SATA 2 was synonymous with SATA 3Gb/s performance. In fact, SATA 2 has absolutely nothing to do with data rates; it's the name of the standards organisation itself (which has since, confusingly, changed its name to Serial ATA International Organisation or SATA‑IO). So a 'SATA 2 hard drive' may either offer 1.5Gb/s or 3.0Gb/s transfer rates; both are compatible with the SATA 2 standard. Confused yet?Now we have the SATA Revision 3 standard, offering a new maximum rate of 6Gb/s. But, as you might expect, given its name, many people now mistakenly think a SATA 3 hard drive offers SATA 3Gb/s performance, when it simply means it's compatible with the SATA 3 standard, and could, therefore, offer SATA 1.5Gb/s, SATA 3Gb/s or SATA 6Gb/s performance. To further muddy the waters, backwards compatibility means that you can plug in a SATA 6Gb/s capable drive into a SATA 1 port, but you'll only get SATA 1.5Gb/s performance levels. Check the SATA section of your motherboard manual to see if the full performance of a new and faster hard drive will be achieved.
Ultimately, many musicians are probably using a combination of USB ports, hubs and peripherals, and SATA ports and peripherals that don't achieve anywhere near their maximum capable performance, but they simply don't notice the difference. Isn't technology wonderful?

The
latest accessory for the modern musician on the move is OCZ's Enyo USB
3.0 External Drive, capable of shifting 1GB of data every three seconds.
OCZ Enyo USB 3 external drives: OCZ Technology have released the Enyo range of external Solid State Drives in capacities ranging from 64GB to 256GB. Capable of transferring 1GB of data every three seconds — and featuring sexy slimline casings — these should prove popular with musicians on the move. See www.ocztechnology.com for more details.
EasyTune audio culprit exposed: The DPC Latency Checker utility (www.thesycon.de/deu/latency_check.shtml) has proved a godsend to musicians trying to track down the cause of audio clicks, pops and shudders, and it has also enabled various culprits to be publicised. Wi‑Fi continues to be a prime contender for public enemy number one, but the EasyTune6 utility provided by Gigabyte for easier overclocking of their popular P55 motherboards is also proving to be a bit of a pig, resulting in regular latency spikes and audio drop-outs. Simply disabling EasyTune could solve your audio problems.
DDR3 RAM on the up: The popularity of Intel's Core i7/i5/i3 processor ranges and their support for DDR3 RAM has boosted popularity for this faster memory, resulting in keener prices compared with DDR2 RAM. Sales for both types are now neck and neck, with DDR3 likely to edge into the lead later on in 2010. When manufacturers have shifted the bulk of their production over to DDR3, we may get further price cuts. Fingers crossed!
Published July 2010
Saturday, April 6, 2019
Friday, April 5, 2019
Why Upgrade To Windows 7?
Not everyone has yet made the leap to Windows 7, so if you're a musician, what are the benefits of upgrading?
Currently, the SOS forums seem awash with posts from musicians enquiring about the benefits (or not) of upgrading to Windows 7. Most users who have taken the plunge are agreed that Windows 7 is more pleasant to use, runs significantly more smoothly than Vista, and has various useful new non‑audio bells and whistles. So, yes, Windows 7 is proving very good for music production and, if all your hardware now has compatible drivers, it certainly makes sense to go for it on a new PC.
Seventh Heaven?
However, upgrading an existing PC for the sake of it is another matter, and it's important to stress that, in raw performance terms, Windows 7 is unlikely to offer any audio benefits over Windows XP. One user quite rightly pointed out that if you have a streamlined audio‑only system that just runs your sequencer, you may as well stick with XP.As I've stated before, there is one major exception to this scenario, which is if you're already using loads of samples in your music and are running into voice polyphony restrictions due to the Windows XP 32‑bit usable limit of around 3GB of system RAM. In this case it really is worth upgrading to Windows 7 64‑bit and installing more system RAM (6GB will probably do the trick) for increased maximum polyphony.
Startup Delayer

Delaying non‑essential tasks with Startup Delayer can result in your PC being ready for duty sooner than expected.
It can be frustrating waiting for your PC to finish booting up before you can do anything, which is why Microsoft have put so much development time into speeding startup in their latest Windows 7 operating system.
Unfortunately, whatever the operating system, PC startup times tend to increase over time because so many applications add startup tasks to the list. One of the tricks used by Windows 7 is to defer the loading of various tasks that aren't immediately needed, so that your PC feels responsive more quickly.
If, like a lot of musicians, you're still running Windows XP, 2000, NT4 or 98, Startup Delayer (found at www.jockersoft.com) is a handy freeware utility that provides deferred startup of any utilities or applications that are normally run as soon as Windows arrives at the desktop. It displays a 'time chart', where you can drag and drop applications and subject them to startup delays ranging from a few seconds to several hours. This avoids the normal log-jam that generally results in a lot of CPU, RAM and hard drive activity and a non‑responsive machine.
Startup Delayer can be run automatically each time you boot, in which case Internet‑enabled PCs should have their Firewall and similar utilities started as soon as possible. It can also be run on demand, which could be an ideal approach for musicians who want a stripped‑down system for music creation, but then want the option of running a whole string of things in the correct sequence (Firewall and anti-virus software, for example) before they visit the web. You can add your choice of programs to the list at any time, decide whether they appear normally, minimised or maximised, and re‑order/re‑time them at will.
I haven't noticed any further reduction in the startup time on my own machine, because it's already pretty streamlined, but I have, nevertheless, found Startup Delayer invaluable for ensuring that startup tasks happen in a specific order on every boot, so that their icons now always appear in the same sequence in the Startup tray.
Published June 2010
Thursday, April 4, 2019
Wednesday, April 3, 2019
Q. How do normal DAWs differ from mastering workstations?
Why are there specific systems like SADiE, CEDAR, Sonic Solutions to
master with, as opposed to, say, Logic, Cubase and Pro Tools? To me,
they both seem to just be multitrack DAWs!
The capabilities of DAWs and mastering workstations have converged over the years. An example of this is in Pro Tools 8, which started off as an audio editing system, but now has very sophisticated MIDI facilities and plug‑in support.
Via SOS web site
SOS Technical Editor Hugh Robjohns replies: I think it's inevitable that DAWs of all kinds will converge in functionality over time. The evidence of that convergence is already plain to see in many cases. However, in the early days of digital audio editing and workstations, the complexity of these new technologies meant that manufacturers tended to specialise in specific areas of functionality.
The original MIDI‑based sequencers — such as Notator (now Logic), Cubase and their ilk — have all gradually added audio recording and editing tools, while the originally pure audio-editing systems — such as Sound Designer, SADiE, Sonic Solutions and Pro Tools — have gradually added MIDI facilities and plug‑in support. So the difference between systems is far less clear now than it once was.
However, the inertia of change has meant that some systems still retain strong specialisms and are favoured on that basis. For example, CEDAR started as a largely off‑line post‑processing platform for audio restoration, but its current incarnation includes sophisticated audio recording and editing facilities to improve the convenience of using it as an 'on‑line' tool.
SADiE started out, fundamentally, as a radio programme production platform. Its audio editing tools and workflows are geared up for very slick and versatile audio manipulation, which is precisely why it has been seized upon as the almost de facto music mastering system, essentially replacing the original king in that role, Sonic Solutions. However, there are other popular alternatives, such as Sequoia and Pyramix (in the professional sector) and very capable lower‑cost options, such as Wavelab and Adobe Audition.
In the mastering role, the most important features are very accurate and flexible editing facilities combined with all the behind‑the‑scenes tools for PQ creation, ISRC (International Standard Recording code) and so on, as well as the ability to generate the industry-standard DDPi mastering files. So generally these systems tend to have less well‑endowed MIDI facilities and internal or plug‑in processing, simply because they aren't required.
However, when it comes to the music production platforms, MIDI is obviously fundamental, so, while systems like Cubase, Logic and Digital Performer, for example, tend to have slightly more clunky audio editing tools, they do incorporate sophisticated MIDI features, very comprehensive internal signal processing, and support for plug‑in effects.
Pro Tools started out as an audio editing system, but has gradually acquired more and more sophisticated MIDI facilities and plug‑in support. This platform, perhaps, represents most clearly the idea of total convergence.
Published June 2010
Tuesday, April 2, 2019
Monday, April 1, 2019
Q. How can I get ‘harsh’ vocals to sit properly in the mix?
I'm mixing a female pop/rock band and I'm struggling with getting the
vocals to sit in the mix. They were recorded with a Rode NT1A straight
into a Digidesign Digi 002 with the HPF switch in. The vocals are very
dynamic and I've tried a variety of things to tame them. My plug‑in
options are all the Pro Tools LE 8 crew, plus the Waves Musicians II
bundle (Renaissance Vox, Compressor, EQ and a few others). I've
experimented with serious volume automation, some EQ notching and
different compression settings, but to no avail. It's the big, held
notes that are the problem. I'm happy riding out the fast peaks, but the
long notes always come across as harsh. Is it a matter of some
well‑applied multi‑band compression or a side‑chained compressor
stamping down on the harsh frequencies?

Platinumears' freeware IQ4 dynamic EQ plug‑in can seem rather complicated to set up, but it's powerful enough to deal with some of the most intractable mix processing problems, such as harsh intermittent vocal resonances.
Via SOS web site
SOS contributor Mike Senior replies: This isn't that uncommon a problem and sounds to me like one of the textbook applications for real‑time EQ changes. The problem is that some singers can create very powerful momentary resonances in their throat and mouth while singing and these, effectively, cause the levels of very narrow bands of harmonics to shoot through the roof. With shouty rock singers such resonances are often in the 6-14kHz region and can be exacerbated by insufficiently damped capsule resonances in cheaper mics. On the other hand, I've worked with an opera singer who produced a similar problem with projection resonances in the 1-2kHz region, so you just have to use your ears (and perhaps a high‑resolution spectrum analyser too) to home in on the offending frequency regions.
You've already found that fader automation and compression won't get you out of this scrape, and that's because neither deals with the underlying frequency balance issues. The nasty‑sounding frequency peaks will still be there no matter what level the overall signal is squished to. Likewise, ordinary EQ isn't much help either, because you often need quite dramatic notch-EQ cuts to smooth out the harsh notes, and these make the rest of the performance sound like the vocalist is singing through their scarf.
Possibly the simplest solution is to 'mult' the harshest notes to a separate track with its own, separate EQ setting. However, while this is comparatively quick, it's rarely precise enough to deliver really good results. A better‑sounding solution is to identify the problematic resonant frequencies (there are usually two or three) and then automate very narrow peaking‑filter cuts to ride their levels independently of the vocal signal as a whole. Tedious? Enough to make you consider Harakiri with your USB dongle.
If you don't fancy this messy demise, you'll be glad to know that there's another solution, although it does require the use of a forbiddingly complex type of audio processing called dynamic equalisation. This is where the gain controls of an EQ act like the gain elements of a dynamics processor, producing a kind of cross between equalisation and compression/expansion. By using dynamic EQ, you could set up a handful of EQ notches to target the harshest vocal frequencies, but then set up each band's dynamics threshold such that the gain cuts only kick in when those frequencies become loud enough to be irritating. If that sounds a bit tricky to set up, you're not wrong, but the upside is that it can work really well if you spend a little time configuring all the band parameters so that they precisely target the exact frequencies you're most annoyed by.
On a practical level, you don't actually appear to have a dynamic EQ plug‑in to hand, so you'd need to acquire something specifically for the purpose. On the face of it, multi‑band compression might appear to be suitable for the task, as it also combines elements of EQ and compression into a single algorithm. However, in reality, you usually need to control much narrower bands of frequencies than multi‑band compressors can typically isolate. Probably the most cost‑effective option, therefore, would be to use the (admittedly, brain‑meltingly configurable) freeware Platinumears IQ4 VST plug‑in within FXPansion's £55 VST To RTAS Adapter, as this would also make other freeware VST effects available to you in future. (Go to www.platinumears.com and www.fxpansion.com for more information.)
Published June 2010
Subscribe to:
Posts (Atom)