By Mark Wherry
Although there are many third-party equaliser plug-ins available, the EQ built into Cubase SX and SL is both functional and convenient, and has the unique advantage of being closely integrated with the Mixer, Inspector and Channel Settings windows.
Every audio-based channel in Cubase (Audio tracks, Rewire, Group, VST Instrument, Input and Output channels) has a set of four parametric EQ controls that allows you shape the tone of the audio being output from that channel. While you can set the EQ from several different places in Cubase, the best place to start is with a channel's Channel Settings window, which you can open by clicking the 'e-in-the-circle' Edit Channel Settings button for the channel you want to investigate. This button can be found in one of three places: on the actual track in the Track List, next to the track's name at the top of the Inspector, or on the corresponding channel on the Mixer, just below the channel's 'W' Write Automation button.
If you want to EQ a VST Instrument, for example, make sure you click the 'e' on the track or channel that represents the audio output of the VST Instrument, rather than the MIDI track/channel that contains the data being fed into said VST Instrument — you can't EQ a MIDI track!
The EQ section in the Channel Settings window is always to right of the inserts column — I'd say in the centre between the inserts and sends columns, but some channels in Cubase, such as Input and Output channels, don't have the ability to send audio to another buss. You'll notice that the top half of the EQ section in the Channel Settings window contains a graph, with a bright green line to visually indicate the overall EQ curve created by the four separate bands. The horizontal and vertical axes indicate frequency and level (in decibels) respectively, so you can always see at a casual glance how much a particular frequency range is being cut or boosted. You'll notice the EQ is completely flat by default.
Below the graph, you'll notice four columns of duplicate controls for fine-tuning the EQ settings, with each set containing a power-plug-styled button to enable or disable that EQ, and three rotary controls for adjusting the frequency, gain, and Q of each band of EQ. The frequency control (the outer dial in the top row of rotary controls) sets the frequency you want to manipulate, while the gain control (the inner dial) adjusts how much the selected frequency is cut or boosted. Finally, the Q dial (the rotary control at the bottom of each column) sets the range for how many frequencies around the selected frequency should be affected, where a high number indicates a narrow Q and, conversely, a low number indicates a wide Q. The Editing Controls page in the Preferences window allows you to set one of three behaviours for how knobs (or, to be more polite, rotary controls), such as those used for the EQ settings, can be adjusted by the user.
The lowest and highest Q values on the middle two EQ bands, Lo-Mid and Hi-Mid, are 0.0 and 12.0 respectively, whereas setting the Q controls on the Lo and Hi bands to their extreme high and low positions causes those bands to function as high or low shelving/pass filters instead of parametric EQs. See the 'Filters 101' box if you're unsure about these types of filters.
As you would expect, you can double-click the text fields reporting the value of a control to enter a value numerically if you like, but most people will probably find it more intuitive to actually drag the EQ's rotary controls to make adjustments. When dragging the rotary controls, though, it's worth remembering you can Shift-drag them for greater accuracy, and if you have a mouse with a scroll wheel, as with most Cubase parameters, you can hover the mouse pointer over a rotary EQ control and use the scroll wheel to adjust the value — and, again, you can hold down Shift while adjusting the scroll wheel for greater accuracy.
An interesting aside here is that if you're not entirely comfortable with the way Cubase responds when you drag a rotary controller, it is actually possible to configure how Cubase's rotary controllers respond to dragging in the Editing Controls page of the Preferences window.
The Knob Mode pop-up menu offers three options and is set to Circular by default, which allows you to drag the rotary control in a circular motion as you would a physical knob — clicking around the edge of the rotary controller automatically sets it to that location. Circular Relative is like Circular, except the rotary controller doesn't jump to the current position of the mouse when you begin to drag, and instead, as you might expect, adjusts the control relative to the position of the mouse. However, I think the easiest way to control on-screen knobs by dragging is with the simple Linear option, enabling you to adjust rotary controllers as you would faders by dragging either horizontally or vertically from the position of the knob.
With some instruments, there are basic rules you can follow when setting up EQ to shape the sound. Take drums, for example: add a little gain around 60Hz to the kick drum and some 2k for the snare, boost everything above this for the hi-hats and cymbals and Robert's your mother's live-in lover. All right, so perhaps it's not that easy — unless you want to offend a really good engineer — but what do you do if you're not sure what frequency you need to change in order to make the appropriate tonal adjustment? You can hear a harsh sound in the strings that you'd rather not be there, but you're not sure where it is, for example. One solution is to use your ears and drag the EQ point up and down until you find the frequency, but SX users can also use the built-in off-line spectrum analyzer to be a little more precise.
To see a section of audio displayed in the frequency domain, select the appropriate Audio Event on the Project window containing the frequency you want to identify — you could also use the Range Selection tool to highlight the small section of audio you want to analyse, perhaps just an individual note — and choose Audio/Spectrum Analyser. In the Spectrum Analyser window, leave the default options set (Size in Samples = 4096, Size of Overlap = 512, Window used = Hamming, and Normalized Values ticked) and click Process.
A second Spectrum Analyser window will appear that plots a graph with frequency on the horizontal plotted against amplitude on the vertical. If the graph doesn't appear to show anything, you can make the display slightly clearer by enabling both the dB option (to display the amplitude in decibels on the vertical axis) and the Freq. Log option (to display the frequencies on a logarithmic scale, as opposed to a linear scale).
As you hover the mouse horizontally over the graph, notice how a circle appears along the curve: you'll also see a text display in the top right to explain the frequency and amplitude at the point the circle is plotted. One neat feature here if you've selected a single note to analyse is that the highest peak on the graph will usually indicate the pitch of that note. If you click the Frequency (Hz) label along the bottom of the window and choose Note (C) from the pop-up menu, you'll notice that the horizontal scale changes to show pitch instead, and by hovering the mouse over the graph you can figure out the note's pitch.
Once you've identified the appropriate frequency, you can now close the Spectrum Analyzer window and adjust the EQ controls accordingly.
 The Inspector offers two Sections to adjust the EQ controls if an audio-based track is selected on the Project window's Track List.Getting back to the issue of adjusting the EQ settings, the graph that illustrates the current EQ curve is actually interactive, so you can drag the points around on the graph to make adjustments instead of the using the rotary controls. Assuming you have no EQ bands enabled, double-clicking in the graph will enable one of the EQ bands depending on where in the graph you double-click: to the far left of the graph enables the first EQ while double-clicking to the far right of the graph enables the fourth EQ. Once an EQ is enabled, you'll notice that the actual frequency and gain values are represented by a dot plotted on the horizontal and vertical axes (alongside the number of the corresponding EQ band from one to four), and the Q is illustrated by the shape of the curve around the point.
When you drag a point around in the graph, you can move the X and Y position (thus adjusting the gain and frequency of that band) and this can be a really useful way to find the right frequency you need to EQ while the audio is playing through that channel. It can also be fun to automate this action to create some interesting sweeping effects, which you can do by enabling the 'W' Write Automation button for that channel and putting the sequencer into play while you move the appropriate point on the EQ graph. Afterwards, disable Write Automation, enable the 'R' Read Automation button, rewind and press Play to hear what you've done.
If you want to move the point on the graph in only one direction, either to adjust only the frequency (horizontal), or only the gain (vertical), hold down either the Alt/Option or Control/Command keys down respectively while moving the point. To adjust the Q of the EQ band represented by the dot, hold down Shift while dragging the point up or down (or left and right) instead — the point will stay where it is, but notice how the curve around it changes. Finally, if you want to disable a band of EQ, you can double-click the corresponding point on the graph to disable that band. The Extended Mixer in Cubase SX 3 offers three different ways of configuring EQ settings, as illustrated here — each channel is assigned identical EQ settings.
Once you've started tweaking with the inbuilt EQ, it's useful to be able to hear comparisons with and without the EQ adjustments; and while you could simply enable and disable the individual EQs, this can be a real pain if you're using all four. To temporarily disable all four EQs simultaneously, simply click that channel's Bypass EQs button, which you'll find in no fewer than five places! Firstly, in the Channel Settings window, there's a Bypass EQs button at the top-right of the EQ section and on the Channel Strip (the diamond-shaped button with a line through the middle), where it glows green when EQs are active and yellow when they're bypassed. This latter button is also duplicated on the Channel Strips found on the Mixer window, and on the appropriate track in the Track List if the Track Height is sufficient. Finally, there's also a Bypass EQ button on the EQ Section title in the Inspector: the thin, blank rectangle to the right of the title of that Inspector Section. Phew!
However, if you realise that the EQ settings you came up with really aren't working, you can reset all four EQs to their default and disabled state on a particular channel by clicking the Reset EQs button, which you'll only find in Channel Settings window to the left of the Bypass button at the top-right of the EQ section. While the icons in Cubase can sometimes be a little confusing, it's worth remembering that hovering the mouse over a button for a brief time will display a handy hint box to tell you the function of that particular button.
If you come up with some EQ settings that you'd like to keep and use on other channels in the current Project — or any other Project for that matter — Cubase lets you store EQ presets within the Channel Settings window that can easily be recalled when you want them. EQ presets are stored within Cubase and aren't saved with specific Projects.
To store a channel's EQ settings as new EQ preset, click the Store EQs button in the Channel Settings window (the '+' button at the top of the EQ section) and a new preset will be added. Double-click the current EQ preset label to the right of the Store EQs button and in the Type In Preset Name window, enter a name for the EQ preset and press Return or click OK. The currently selected EQ preset can always be renamed in this way.
To recall an existing EQ preset, click the current EQ preset label and select a different preset from the pop-up menu. To delete the currently selected EQ preset, simply click the Remove EQs button (the '-' button next to the Store EQs button), although it's worth noting that you won't get a warning before the preset is removed, and this operation cannot be undone.
The following types of filters are available to you in the lowest and uppermost bands of Cubase 's built-in EQ section:
- Low Shelving A low-shelving filter allows you to cut or boost all the frequencies below a corner frequency you can set.
- High-pass A high-pass filter allows only frequencies above the user-defined cutoff point to pass through the filter.
- High Shelving A high shelving filter is the opposite to a low shelving filter, allowing you to cut or boost all the frequencies above the corner frequency.
- Low-pass The low-pass filter is the opposite to a high-pass filter, allowing only frequencies below the cutoff point to pass through the filter.
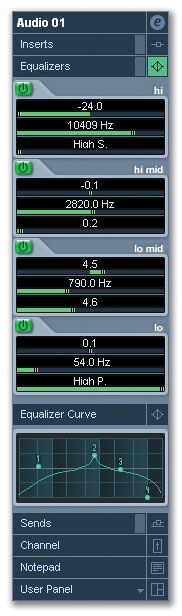
You might have noticed throughout this article that are many different places to carry out options such as bypassing the built-in EQ. Similarly, there are in fact a couple other places you can adjust the EQ settings in addition to the Channel Settings window we've been looking at. To adjust the EQ settings for an audio-based track on the Project window without opening the Channel Settings window, select the appropriate track, make sure the Inspector is visible, and click the title of the Equalisers Section in the Inspector. Although the presentation of the controls is slightly different, with the controls being shown as sliders instead of knobs, the actual workings and results are exactly the same. Alternatively, there's also an Equaliser Curve Section in the Inspector, which displays a duplicate version of the EQ graph from the Channels Settings window and behaves in exactly the same way.
If you want to have multiple Inspector Sections open simultaneously, such as the Equalisers and the Equaliser Curve, or maybe the Curve and the General Settings Section, you can Control/Command-click to open a new Section in the Inspector without the Section that's currently open closing. Alt/Option-clicking and Inspector Section opens and closes all Inspector Sections.
If you find yourself working in mostly the Mixer window when mixing, Cubase SX users can also access the controls for the built-in EQ via the Extended View on the Mixer, which isn't available to Cubase SL users. Switch to the Extended Mixer View by activating the Show Extended Mixer button on the Common Panel of the Mixer, and you can set an individual channel's Extended strip to show the EQ controls by clicking the small, downward pointing arrow just above the pan control and selecting either EQs, EQs +, or EQs Curve from the pop-up menu. EQs shows the EQ controls as faders, EQs + shows the controls as knobs, while EQs Curve shows the EQ graph at the top of the Extended strip and rows of text to describe the EQ values below. You can click these and then drag the fader that appears while the mouse is held down to adjust the values. You can set all audio-based channels to show EQ controls by clicking the third, fourth or fifth buttons from the top of the Common Panel in the Extended Section in the Mixer.
Published September 2005
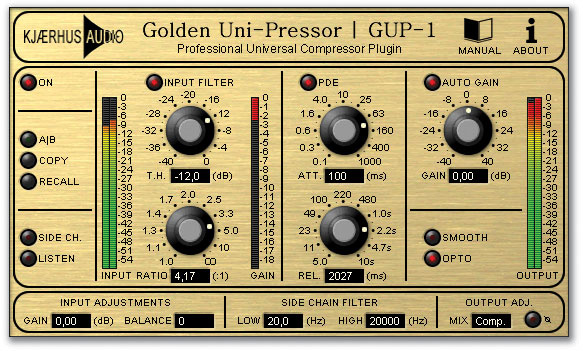 Kjaerhus Audio's Golden Unipressor allows the use of side-chain inputs in Cubase SX.