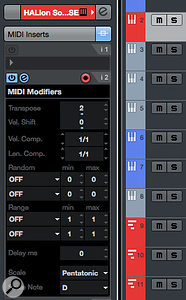
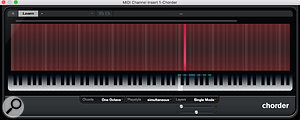
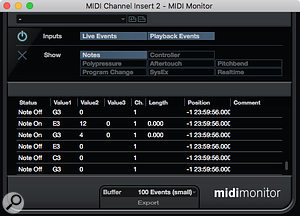
As explained in previous columns (in SOS November 2013, May 2015 and November 2018), Cubase offers a range of tools that enable anyone who lacks keyboard skills to create convincing MIDI chord or melody parts. The Chord Pad system is superb, but for a step-based approach to chord/melody creation, you should turn your attention to Cubase’s Key Editor — while most DAWs have such a piano-roll editor, this one is particularly well specified, and it boasts a couple of features that make creating chord sequences a breeze, namely Step Input and the Chord Editing panel.
Step To It
I The MIDI Key Editor offers lots of useful options for creating chord sequences.f you’re able to finger the chords you want, but not good enough to play a complex sequence in real time, Step Input can be a real time-saver. It can be enabled from the Key Editor’s Toolbar, where a blue cursor appears to tell you this mode is on. (Visit the Toolbar’s Settings panel if the buttons aren’t displayed by default.) Any notes played on your MIDI keyboard appear at the cursor position, and when you release the notes the cursor moves one ‘step’ along the timeline. The step length is determined by the Quantize setting, and the note lengths by the Quantize Length setting. (If you set the latter to ‘Quantize Link’, it’s controlled by the former.)
The automatic advance of the blue cursor makes note or chord entry very efficient. You can take as much time as you wish sorting out your fingers before triggering each chord; all the notes will snap precisely to the current grid position. To leave a step empty, simply advance the blue cursor one step using the cursor/arrow keys.
 Step Input places the notes played on your keyboard according to the current quantise settings.A couple of other things are worth noting. First, if you don’t want every step or chord to be the same length, change the Quantize setting — better still, assign keyboard shortcuts to frequently used Quantize values. Second, while Step Input detects note velocity data, having every chord hitting the grid exactly can still leave the performance feeling mechanical; a quick trip to the Key Editor’s Quantize panel might allow you to apply a more human groove.
Chord Recorder
The second approach uses the Chord Editing panel in the Key Editor’s Inspector, which has several useful features. For example, select a number of MIDI Notes and the Chord Type field will do it’s best to identify the chord. Not all random note collections will form a neat, simple chord, but it’s still a useful option if you’re struggling to make sense of what you’ve just played!
For actual chord entry, focus on the Triads and 4-Note Chord sections. Click on the arrowhead icon of any of the chord types in the Key Editor itself, then click at a certain pitch/time location to create instantly a chord of that type with the selected root note. As mentioned, the note lengths will default to the selected Quantize Length, but click-dragging to the right as you add a chord allows you to create notes of any length.
Usefully, if you click and drag up/down when placing a new chord, you can adjust the pitch. Alt-dragging up/down retains the root note pitch you first clicked on, but scrolls through the various three- and four-note chord types. It’s a good idea to enable the Key Editor’s Audition button (the speaker icon in the Toolbar) so you can ‘hear’ what you’re doing. It’s difficult to overestimate the time it takes to generate a four- or eight-bar chord sequence ‘sketch’ in this way! As MIDI tools go, it really is a bit of a gem.
Also note that if you want something denser than a three/four-note chord, you can click again on the same time location (an octave higher or lower, for instance) to generate a six- or eight-note version. And if you’re a regular Chord Track user (for an introduction to the Chord Track see SOS June 2013’s Cubase column), select the notes and then click the Add To Chord Track button, which does just what you’d imagine, and will create a new Chord Track if one is required.
Find Your Voice
Chord sequences created via the Chord Editing panel may need some velocity and quantise tweaks to ‘humanise’ them, but the Chord Editing panel offers other options for spicing up your ‘performance’. For example, select one or more chords in your sequence and you can drag them up/down to change their root note/pitch. You can also click on any of the Chord Editing panel’s three- and four-note chord types to change the harmonic structure of the chord.
 Once chords are entered, the Key Editor lets you explore different chord voicings, using the Inversions and Drop Notes buttons.And while three- and four-note chords created via the Chord Editing panel are, by default, voiced close together (as if played by the fingers of one hand), you can experiment with different voicings using the Inversions and Drop Notes buttons, which can spread the notes out in interesting ways. This is particularly useful for string-section patches, since it allows you to voice the chord over two or more octaves, producing a result that’s more likely to reflect how real string-section parts might be scored. Note that you can select any notes in a chord or selection of chords and, via the Key Editor’s Info Line, assign them to a different MIDI channel; if you’re using a multi-timbral VST (such as Halion Sonic SE) you can then, say, play back the lowest notes on a bass/cello patch while sending the others to a violin/viola. All these MIDI changes are applied in real-time, so with playback in cycle mode you can audition your changes as you make them. It’s really very neat!
Arping On
There’s just one feature I’d love to see added to the Chord Editing panel/Key Editor combo — the ability to draw in notes from a chord as an arpeggio. Essentially, this would amount to the Key Editor ‘snapping’ note input to a pre-selected chord type/root note. While that’s not currently possible, there are some simple workarounds, and the first should be obvious — once you’ve created your chord progression, slap an Arpache 5 or Arpache SX MIDI plug-in on your track and let it handle the load. But if you prefer more control over your arpeggios, some creative use of the Key Editor’s line drawing tool and the Chord Editing panel, and some simple manual edits, can quickly create a custom arp-style note pattern.
 The three stages of the arp workaround: in bar 1, the Line tool has been used to add 16th notes; in bar 2, those notes have been selected and ‘snapped’ to a C major 7th chord; and in bar 3, simple manual editing has moved ‘doubled’ notes to alternative pitches in the chord, to create a flowing arpeggio pattern.Select the Key Editor’s Line tool (use the straight-line option), and you can draw some 16th notes spanning a couple of bars/octaves. Select all these notes and apply a chord type from the Chord Editing panel, and all the notes will be forced to ‘fit’ the selected chord type, using the first note as the chord’s root. Depending on how you drew the initial line of notes, this step will probably create some ‘duplicate’ notes, with two or three notes in a row sharing the same pitch. So, as a final step, move some of these duplicates up/down to the next higher/lower note in the chord, so no consecutive notes are the same. Identifying the target pitches is trivial, since the Chord Editing panel has already snapped notes to all the obvious targets, so it’s really easy to create a sweeping arp-style pattern.
For any given four- or eight-bar loop, this process has probably taken longer to explain than it actually does to execute, but you can go as far with the manual editing stage as your creativity wants to take you.
No comments:
Post a Comment