Welcome to No Limit Sound Productions

Company Founded
2005
Overview

Our services include Sound Engineering, Audio Post-Production, System Upgrades and Equipment Consulting.
Mission
Our mission is to provide excellent quality and service to our customers. We do customized service.

Wednesday, July 31, 2019

Q. How do you increase perceived stereo width using phase?

By Paul White
I found an SOS article on stereo mixing from October 2000 on your web site which explains how you can increase perceived stereo width by using extra mixer channels out of phase. However, the diagram is missing. Can you explain how it's done?

SOS Forum post
Widening the stereo image using spare mixer channels.

Editor In Chief Paul White replies: Diagrams for older articles aren't published on the web site, but we've reprinted the one you're referring to below. This is a simple and effective technique for widening the stereo image, provided you have a couple of spare mixer channels.

First, you need to set up your mixer so that both the left and right stereo signals feed two mixer channels each. You can either do this using a couple of 'Y' leads to split the signals, or by using channel insert sends to feed the secondary left and right channels (as shown in the diagram). Ideally, the mixer should have channel phase-reverse buttons, though if you have balanced line inputs and no phase buttons, you can instead reverse the phase by switching the hot and cold cores on your 'Y' cables so that one of the left inputs and one of the right inputs is reversed.

To set up the effect, pan the main left input hard left and the main right input hard right as normal. Next, pan the secondary left input hard right, but switch in phase invert on its mixer channel or swap the hot and cold cores. Similarly, take the other right input, pan it hard left and invert its phase. In the diagram, the secondary, out of phase left and right channels are placed on opposite sides to the main left and right channels, so that, from left to right, the channels are R2, L, R and L2.

Start with the faders down on the two out-of-phase, 'wrong-side' panned signals and then gradually bring them up to add stereo width. If you go too far, you'll notice the centre signals becoming weaker and a hole appearing in the centre of the stereo field, so don't overdo it.


Published November 2003

Monday, July 29, 2019

Q. What's a good Leslie speaker effect?

By David Greeves
I'm looking for a decent stand-alone Leslie-style rotary speaker effect, mainly for use with keyboards, but also for guitars. Can you offer any suggestions?

Michael Reed
The Little Lanelei is a miniature, single-cone rotary speaker designed for recording.The Little Lanelei is a miniature, single-cone rotary speaker designed for recording.

SOS Staff Writer David Greeves replies: The Leslie rotary speaker uses relatively simple mechanical principles to produce a sound that is very hard to reproduce accurately by other means. Sound from the treble driver is dispersed through a pair of horns, pointing out in opposite directions from the central pivot point around which they rotate (although one of the horns is actually a dummy, included to balance the rotating pair). The bass driver, meanwhile, points straight down at a rotating drum which is scooped out on one side to allow the sound to escape. As these two sound sources spin around, they produce not only a tremolo effect (amplitude modulation) but also vibrato (frequency modulation) and phasing thanks to the Doppler effect, the same principle which explains why the pitch of an ambulance siren or car horn seems to rise and then fall in pitch as it speeds towards you and then away. Add to this the fact that the bass rotor is uni-directional and the treble horns are bi-directional, the differing acceleration and deceleration speeds of the two rotors, the build of the Leslie cabinet itself and the particular grungey overdrive that a vintage Hammond/Leslie combination is capable of, and you start to see why 'that sound' is so difficult to reproduce. That's not to say that there aren't some excellent hardware rotary speaker effects out there, and any of the following would be worth a try to see if they meet the needs of your setup.

Dunlop (www.jimdunlop.com) produce a couple of rotary effects. The Rotovibe pedal is mainly intended for guitarists who are after a Jimi Hendrix-style Leslie effect. It looks like a wah-wah pedal, with a single knob on the side to alter modulation depth while the expression pedal controls mod speed, a useful feature for live performance. Dunlop's UV1 Uni-Vibe offers a broader range of sounds, featuring tremolo and chorus modes with adjustable speed, volume and intensity. The optional UV1FC foot controller allows remote control of mod speed and bypass switching.

Dunlop's Uni-Vibe takes its name from the original Uni-Vibe produced by Roger Mayer, an effect used extensively by Hendrix, Robin Trower and many others. The original model is no longer in production, but Roger Mayer (www.roger-mayer.co.uk) produce an updated version, called the Voodoo-Vibe. This Class-A, all-analogue guitar effect features chorus, vibrato and tremolo modes and controls for modulation speed and range (there are three sine-wave and three triangle-wave speed ranges), intensity, symmetry and bias. It also supports an external speed control pedal. Though its earliest ancestor was originally developed as a rotary effect for the organ, the Voodoo-Vibe can produce a range of experimental and psychedelic effects that stretch far beyond Leslie emulation. You might even be able to get away with using it on vocals as well as guitars and keys.
A rear view of the Leslie 122XB cabinet, with panels removed to reveal the treble horns (top) and foam bass rotor (bottom) responsible for the distinctive Leslie sound.A rear view of the Leslie 122XB cabinet, with panels removed to reveal the treble horns (top) and foam bass rotor (bottom) responsible for the distinctive Leslie sound.

Hughes & Kettner produce a well-specified rotary effect pedal called the Rotosphere (see www.hughes-and-kettner.com), which features stereo inputs and outputs and high-voltage valve circuitry for tube drive. Authenticity is high on the agenda, with two-speed operation (the 'slow' and 'fast' speeds can be set), independent acceleration and deceleration settings for the (simulated) treble and bass rotors and an emulation of the breaker circuit, a popular modification which allows the player to disengage the motor, allowing the rotors to slowly come to a stop. When you take your foot off the breaker switch, the rotors slowly spin back up to speed. The Rotosphere is designed for both guitar and organ.

Another such effect is the Spin II from Italian organ manufacturers Voce (www.voceinc.com). This stompbox, coloured an eye-catching orange, is a stand-alone implementation of the rotary simulator from Voce's keyboards. The input can be switched to suit guitar or line-level sources and the stereo output can be turned down to feed a guitar amp. There are bypass and fast/slow footswitches and controls for the fast and slow rotor rates and rotor acceleration.

If none of these pedals will really give you the sound you need, and you've plenty of room to spare in your studio, perhaps you should consider buying a second-hand Leslie cab — I saw a solid-state Leslie 760 advertised for £150 recently, which is less than the list price of some of the effects I've mentioned above. Be aware, though, that Leslies of different vintages use completely different connection and power standards, so even if you have a Hammond organ, or a modern Hammond-modelling keyboard with a Leslie output (like Roland's VK8), it's not the case that any old Leslie will do. If you can get hold of a Leslie Combo Preamp (and I wish you luck), you'll be able to put just about anything through a Leslie cab. This handy chrome wedge-shaped pedal features bypass, fast/slow and breaker switches, provides power to the Leslie's motors and offers a quarter-inch jack input. Once again though, you'll need to match the right model of Leslie Combo Preamp with the right model of Leslie cabinet. Trek II Products in the USA (www.trekii.com) produce a modern equivalent. There's a wealth of information on Leslie maintenance, modification, and compatibility at web sites like www.theatreorgans.com and www.dairiki.com/hammondwiki where you'll find links to many other places of interest on the Net.

A final option to consider is the Little Lanilei Rotary Wave speaker (www.songworks.com). This stylish rotary speaker, available in 65W/10-inch and 35W/6.5-inch versions, features a single rotor and a speed control. While you couldn't expect it to reproduce the sound of a Leslie at full blast, it's also much smaller and lighter, and you can plug an external amplifier into it via quarter-inch jack, making it an easy way to add a subtle rotary effect to guitars, keyboards, vocals and just about anything else.


Published November 2003

Friday, July 26, 2019

Q. How do A-D converters work?

By Hugh Robjohns
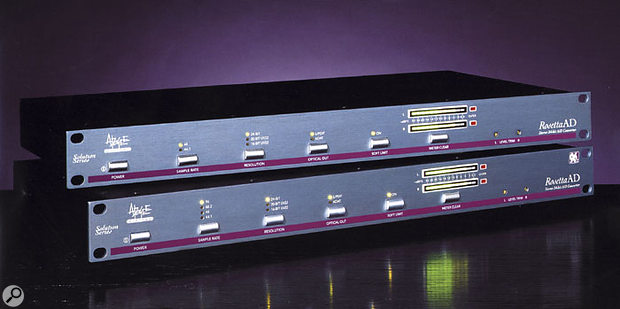
Though gearheads rarely lust after them in the way they do with other types of equipment, A-D converters, like these Apogee Rosettas, are arguably the most important tool you possess when working in the digital domain.Though gearheads rarely lust after them in the way they do with other types of equipment, A-D converters, like these Apogee Rosettas, are arguably the most important tool you possess when working in the digital domain.
How does a converter actually make an analogue signal into a digitally represented signal? What are a converter's components that enable such A-D conversion?

SOS Forum Post

Technical Editor Hugh Robjohns replies: There are three steps: filtering, sampling and quantising.
First, the audio bandwidth of the analogue signal has to be defined using a low-pass filter called an anti-alias filter. This is to make sure that the signal contains no frequencies higher than slightly less than half the sampling rate. So, in the case of a 44.1kHz sampled system like CDs, the audio bandwidth would be restricted to about 21kHz.

Next, the signal is sampled at the appropriate sampling rate. In other words, the instantaneous voltage of the analogue signal is measured at regular time intervals. This stage is essentially turning the continuously varying audio waveform into a series of discrete snapshots, in much the same way that a film camera stores continuous live action as a series of still frames.

These individual audio snapshot voltages are then 'quantised.' This means measuring the fixed analogue voltage which represents the amplitude of the waveform at the moment the sample was taken, and describing its value with a binary number which can be handled by the rest of the digital system. The output from the quantiser is the digital signal that is then recorded, transmitted or used in whatever way is intended.

A two-bit system can count four discrete levels or voltages, which is obviously pretty crude. A 16-bit system can count 65,536 different levels and a 24-bit system can count over 16 million levels. Obviously, if the maximum size of the original analogue waveform remains the same, then the greater the number of bits used in the quantiser, the smaller the voltage change that can be represented. This translates to a lower noise floor (or greater dynamic range). So a two-bit system has a dynamic range of about 12dB, while a 16-bit system has a dynamic range of about 96dB and a 24-bit system theoretically reaches about 140dB.


Published November 2003

Wednesday, July 24, 2019

Q. Is it wise to buy a second-hand microphone?

By Hugh Robjohns
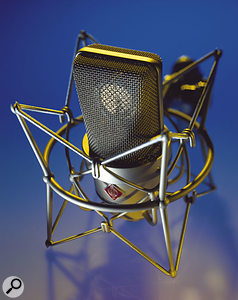
Higher-end mics like the Neumann TLM103 may cost more than budget models, but they'll last longer and can be fully repaired in the future.Higher-end mics like the Neumann TLM103 may cost more than budget models, but they'll last longer and can be fully repaired in the future.With so many brand-new budget-priced microphones out there these days, I'm wondering if it might be better to get a high-quality mic second-hand instead. I don't think I'd trust second-hand monitors, but does the same apply to mics? For the £150 or £200 I'd spend on a new mic, I could get a far better model second-hand.

SOS Forum Post

Technical Editor Hugh Robjohns replies: I would certainly support the idea of buying second-hand pro audio gear, but I would be very wary of buying gear in the price range you're talking about second-hand. My reasoning is as follows. Firstly, users of high-end professional equipment generally know what they are doing and so their equipment tends (with the inevitable exceptions) to have been reasonably well maintained. It's not always the case, but you can usually tell in an instant by looking at a piece of equipment whether or not it has been well looked-after, and if it looks OK it usually is.

Secondly, bona fide pro gear can be serviced and repaired. All the reputable speaker manufacturers will happily supply replacement drivers, and all the reputable mic manufacturers will be able to repair and recondition their microphones. So even if the gear has had a hard life, it will remain perfectly serviceable. You can still get spares for 30-year-old Studer tape machines, for example.

Conversely, budget audio equipment is made as cheaply as possible, and while you can get remarkable quality for your money, most of it is not cost-effective to service — in other words, it is disposable. The current glut of Chinese-made mics offer exceptional value, but you certainly won't be able to get them repaired in the factory after 20 years like you can a Neumann, AKG or Sennheiser. Likewise, getting spare parts for a Fostex multitrack tape recorder is a lot harder than for an old Studer or Otari.

So, if the second-hand budget gear in question is in good condition and very cheap, then it may be worth the risk, but go into it with your eyes open — it may well prove impossible or prohibitively expensive to have this kind of gear repaired should it fail a week after you bought it. On the other hand, a second-hand truly professional product should remain serviceable for decades. I bought four Sennheiser MKH20 mics second-hand a few years ago, and one turned out to be faulty, but it was serviced by Sennheiser and came back like new, and, even adding in the cost of the service, it was still a very good deal compared to the cost of the mics brand-new.


Published September 2003

Monday, July 22, 2019

Q. What is optical compression?

By Paul White
Focusrite Trak Master.Focusrite Trak Master.
The Focusrite Trak Master and Behringer Composer Pro are two affordable compressors which use optical gain control elements.The Focusrite Trak Master and Behringer Composer Pro are two affordable compressors which use optical gain control elements.
The Samson S*Com, however, uses a VCA.The Samson S*Com, however, uses a VCA.
Lately, there seem to be numerous affordable hardware compressors on the market, and I've noticed that many of them (the Platinum Focusrites and the Joemeeks, for example) are described as optical compressors. What's the difference between optical compressors and other types of compressor, such as VCA, FET and valve compressors? Are there any relative merits to these different types of compressor and are they suited to any particular applications?

Luke Ritchie

Editor In Chief Paul White replies: After microphones, nothing stirs up a group of music professionals so much as a discussion about compressors. Essentially, compressors are gain-riding devices that monitor the level of the incoming signal and then apply gain reduction in accordance with the user's control settings. Given this simplistic explanation, shouldn't all compressors sound exactly the same, in the same way that faders tend to?

Clearly compressors don't all sound the same, and there are a few good technical reasons why. Perhaps of less importance than some people might imagine is the gain control element itself, which can be a tube, a FET (field effect transistor), a VCA (voltage-controlled amplifier), an optical photocell arrangement (a light source and a light detector) or even a digital processor. Certainly all these devices add their own colorations and distortions to a greater or lesser extent, but what influences the sound most is the way the ratio and envelope characteristics deviate from theoretically perfect behaviour.

In an imaginary, perfect compressor, nothing happens to the signal until it reaches a threshold set by the user, after which a fixed compression ratio is applied. For example, if the compression ratio is set at 4:1, for every 4dB the signal rises above the threshold, the output rises by only 1dB. A modification to this is the soft-knee compressor where the ratio increases progressively as the signal approaches the threshold, the end result being a less assertive, less obtrusive form of compression.

Many classic designs don't in practice act like this perfect compressor however, as their compression ratio may vary with the input signal level. For example, some compressors work like a perfect soft-knee device until the signal has risen some way above the threshold, then the compression ratio reduces so that those higher level signals are compressed to a lesser degree than signals just above the threshold. 

The reason for this change in ratio is simply that many early gain-reduction circuits don't behave linearly, especially those using optical circuitry as the variable gain element. The components themselves are non-linear so when, for example, you combine a non-linear light source with a non-linear light detector, the composite behaviour can be quite complex and unpredictable — however, history has buried those optical circuits that didn't sound good, so we're now left with those that happened to sound musical.

The other very important factor governing the sound of a compressor is the shape of the attack and release curves. While a modern VCA compressor can be made to behave in an almost theoretically perfect way with a constant ratio and predictable attack/release curves, many of the older designs had very strange attack and release characteristics, and, in the case of optical compressors, this was originally due to the relatively slow response of a light and photocell compared with a VCA.

For example, the now legendary Universal Audio 1176 combined a fairly fast attack time with a multi-stage release envelope. Conversely, the Teletronix's LA2A's rather primitive optical components resulted in a slower and quite non-linear attack combined with a release characteristic that slowed as the release progressed. Indeed, perhaps the reason the traditional opto compressor has so much character is that there are so many places in the circuitry that non-linearities can creep in.

Having said that, some modern optical compressors use specialised integrated circuits that incorporate the necessary LED light source (which has largely taken over from the filament lamps and electroluminescent devices used in early designs) and detector element in a single package that incorporates feedback circuitry to speed up the response time and to linearise the gain control performance. Indeed, some of these are so well behaved that they can sound almost like VCAs, but using clever design, it should be possible to recreate the old sounds as well as the new using contemporary electronic devices, or imaginative software design come to that.

It's harder when it comes to saying what type of compressor is best for which job, but in very general terms, a well-designed VCA compressor will provide the most transparent gain reduction, which is ideal for controlling levels without changing the character too much. However, a compressor that allows high-level transients to sneak through with less compression can also sound kinder to material than one that controls transients too assertively, which is why some of the older, less linear designs sound good. 

That's not to say modern designs can't sound good too though — Drawmer pioneered the trick of leaking high frequencies past the compressor to maintain transient clarity while other manufacturers, such as Behringer, use built-in transient enhancers or resort to equally ingenious design tricks.

Optical compressors, especially those that don't use super-well-behaved integrated optical circuits (or those that use them imaginatively) usually impose more of their own character on the material being treated, making it sound larger than life. In this context, the compressor is as much an effect as a gain-control device, and such compressors are popular for treating vocals, drums and basses. The Joemeek and TFPro compressors fit this 'compression as an effect' category as they use discrete LEDs and photocells in a deliberately non-linear topography that's really a refinement of that used in some vintage designs.

Digital compressors and plug-ins can reproduce the characteristics of vintage classics, but only if the designers successfully identify those technical aspects of the original design that make it sound unique. If they don't, you end up with an approximation or caricature rather than a true emulation.


Published September 2003

Friday, July 19, 2019

Q. Do I need balanced patchbays?

By Mike Senior
I am currently setting up a home studio, which I'm hoping to eventually turn into a professional facility, based around a Soundtracs Topaz desk, three Egosys Wamirack soundcards and a Pentium 4 PC, with numerous synths, samplers, effects and other outboard gear. I'm now looking to wire everything together using patchbays. Bearing in mind that my console does not accommodate balanced outputs and insert points (the only balanced connections on the console are at the input stages of all channels and the effects returns), can I use unbalanced patchbays, thereby simplifying the patch lead requirements? If you are going to suggest a balanced patchbay setup, could you describe where to connect and disconnect the ground/screen connections to avoid ground loops.

SOS Forum post
Installing balanced patchbays (as opposed to unbalanced ones) makes dealing with hum much, much easier.Installing balanced patchbays (as opposed to unbalanced ones) makes dealing with hum much, much easier.

Reviews Editor Mike Senior replies: It sounds like you've already invested a good deal of money in the gear, and there's certainly enough there to produce high quality audio. However, if you're going to retain audio fidelity with so many pieces of equipment working together, I would try to balance as many of your analogue audio cables as possible. Even in my more modest home setup mains hum and induced noise are problems (which have taken upgrading to balanced connections to sort out), so if you're ever hoping to use your studio professionally you don't really have a choice. Even in commercial studios a lot of time can be spent dealing with hum, so it's worth planning for it now, in my opinion. Unbalanced connections are fine for a smaller setup than yours, but, at the stage you're at, I reckon it's a recipe for disaster.

The great thing about balanced connections is that lifting the earth connections between equipment to break earth loops is comparatively easy — just disconnect the earth wire at one end of the signal cable — but with unbalanced gear the same trick very rarely works in practice and will often make things worse. If you're wondering how to decide where to make this disconnection in your system, Mallory Nicholls suggested that his preferred method was "to connect cable shields at equipment outputs and not at equipment inputs" in his Studio Installation Workshops in SOS September 2002and November 2002. So, disconnect the shield just before it reaches the equipment inputs. If you're using any moulded cables, then you might have to perform some modification on the patchbay, but this is not usually too difficult to work out — it's what I did, and it's worked very well so far!

To incorporate any unbalanced devices within the balanced system, you have two main choices: unbalance at the input to the unbalanced device — connect one of the balanced signal wires to the jack sleeve, along with the earth wire, and don't disconnect the earth wire elsewhere — or use a balancing transformer to do the interfacing. The second solution is more costly, but may be the only way to solve any hum problems which the first solution may create. Maybe you'll be lucky and not get any appreciable hum using the first system, but if you do get hum then have a look at the Ebtech Hum Eliminators — there's an eight-channel one for £295 which would probably isolate enough connections to sort remaining hum problems out. I've only needed to use a two-channel one to sort out a persistent hum in my system, but yours is much more complex, and all of it will be connecting to the central desk, which multiplies the potential for hum.


Published September 2003

Monday, July 15, 2019

Q. What's the right type of Rockwool?

I'd like to use some Rockwool in my studio to improve the acoustics, but this is the first time I'll have used it, so I could do with some pointers about how to work with it. What is the best density for a good, fairly wide‑spectrum absorber? I have found some quite cheap Rockwool that is 100kg/m3. Is that any good?

Via SOS web site
Remember to coat Rockwool with an acoustically transparent material to trap stray fibres, as shown above. Also, placing acoustic foam on top of Rockwool panels, as in the picture below, makes a far more effective acoustic absorber as the foam absorbs high frequencies that the Rockwool does not. Remember to coat Rockwool with an acoustically transparent material to trap stray fibres, as shown above. Also, placing acoustic foam on top of Rockwool panels, as in the picture below, makes a far more effective acoustic absorber as the foam absorbs high frequencies that the Rockwool does not.Q. What's the right type of Rockwool?

SOS Reviews Editor Matt Houghton replies: The denser the material, the more effective it will be at absorbing low frequencies, but the flip side of this is that it also becomes better at reflecting higher frequencies back into the room. The 100kg/m3 product that you've mentioned should do a decent job, but it's denser than I'd choose for a broadband absorber. In fact, in my home studio, I use 100mm-thick 100kg/m3 Rocksilk for bass trapping, with a decent gap behind it. 

However, if you then place some acoustic foam over the top of it you'll have a much more effective acoustic absorber, as the dense Rockwool will absorb lower frequencies, while the foam will absorb some of the highs that would otherwise be reflected, making a very effective broadband absorber. If you don't want the foam, try looking for mineral wool in the region of 45‑75kg/m3. Remember to cover these slabs in some acoustically transparent material that will trap any stray fibres. If you're in a commercial studio, this will need to meet fire safety regulations, but for a home studio you could get away with a cotton sheet (I've used tablecloths!).  

Friday, July 12, 2019

Q. What are the best freeware plug-ins?

There are loads of freeware plug‑ins floating around out there now, so I find I'm getting swamped by choices. One site I checked out listed 670 of them! I'd rather not slow down my sessions looking for the perfect delay when just sticking with a good one and working with it would be much more productive. I've checked out a few of the ones mentioned in Mix Rescue and have been quite impressed, so I was wondering whether you could give me some further suggestions for a couple for each basic category of plug‑in. In particular, I'd be interested in any 'go to' freeware choices. I'm on a PC, so VST would be best.

Eoghan Brady via emailSome good freeware and donationware VST equalisers: Cockos ReaEQ, Bootsy Nasty CS, Antress Modern Black Dragon, and DDMF LP10.Some good freeware and donationware VST equalisers: Cockos ReaEQ, Bootsy Nasty CS, Antress Modern Black Dragon, and DDMF LP10.Q. What are the best freeware plug-ins?Q. What are the best freeware plug-ins?Q. What are the best freeware plug-ins?

SOS contributor Mike Senior replies: First of all, you could do worse than just download the ReaPlugs VST suite, which is a big chunk of the Reaper plug‑in complement and includes everything you're after, in one form or another. I've done whole mixes with just Reaper's plug‑ins, so I can vouch for their effectiveness. Other particularly worthwhile sets I've found are those from Antress Modern (http://antress.er‑webs.com), Bootsy (http://varietyofsound.wordpress.com), GVST (www.gvst.co.uk), MDA (http://mda.smartelectronix.com) and Voxengo (www.voxengo.com), which cover a lot of bases between them.

But on to some specific things I like, all of which have proved their worth in the heat of Mix Rescue! For general‑purpose EQ'ing, I do like Reaper's ReaEQ a lot, but for extra colour, try Bootsy's Nasty series and the Antress Modern emulations. DDMF (www.ddmf.eu) have a great donationware linear‑phase EQ called LP10, too. For synth‑style filtering, I usually just tend to automate ReaEQ, but Camel Audio's Camel Crusher (www.camelaudio.com) and Ohm Force's Frohmage (www.ohmforce.com) have more obvious attitude, if required. As far as dynamics are concerned, ReaComp and ReaXcomp in the ReaPlugs set are, again, good all‑round workhorses, but things like Georg Yohng's W1 (www.yohng.com), Buzzroom's BuzMaxi 3 (www.x-buz.com), Bootsy's Density, Jeroen Breebaart's PC2 (www.jeroenbreebaart.com) and the Antress Modern vintage emulations all get regular use on my projects. ReaGate and ReaFIR are a solid bet for most expansion and noise‑reduction tasks, so I've never really bothered looking elsewhere.

My freeware fallback for chorus, phaser, and flanger effects is Kjaerhus Audio's Classic series, and although I could no longer find a web presence for them at the time of writing, it's still possible to find the plug‑ins hosted on other sites via Google. MDA's Leslie and The Interruptor's Wow & Flutter (www.interruptor.ch) are cool for general modulation grunginess and I use those a lot. For tremolo/chopper effects, try Tweakbench's Cairo (www.tweakbench.com) or Oli Larkin's Autopan and LFO Chopper (www.olilarkin.co.uk). When it comes to distortion/saturation, there's lots of good stuff and I admit to being a bit of a collector in this respect. Some of my favourites are Bootsy's Ferric, GVST's GClip and GRecti, Jeroen Breebaart's Ferox, MDA's Combo and Bandisto, Mokafix Noamp (www.mokafix.com), Silverspike's Rubytube (www.silverspike.com), and Voxengo's Tubeamp: so much dirt, so little time! For more outrageous grainy and grungy effects, DBlue's Glitch (http://illformed.org) is a good bet, as are Jack Dark's outrageous Darkware series (www.gersic.com/plugins/hosted/darkware/darkware.html) and Tweakbench's Pudding and Sideslip.

The Interruptor's delay plug‑ins are good, as are GSi's WatKat (www.genuinesoundware.com), Tweakbench's Maelcum and GVST's GDuckDelay. That said, I tend to use ReaDelay for basic delay requirements most of the time. Smart Ambience is a great functional reverb demo, but Christian Knufinke's SIR (www.knufinke.de/sir/sir1.html) with impulses from Echo Chamber (www.memi.com/echochamber/responses/index.html) takes the cake for me in the freeware reverb department. For stereo image adjustment and M/S processing, my clear favourites are Voxengo's MSED and Flux's Stereo Tool (www.fluxhome.com). The latter has one of the best stereo vectorscope displays I've encountered anywhere. Speaking of displays, Roger Nichols' Inspector (www.rndigital.com) was my metering and spectrum-analysis plug‑in of choice for a long time, although Voxengo's SPAN is also good. I tend to use Schwa's payware Schope instead for most things these days, however. And speaking of Schwa (www.stillwellaudio.com), they have a great freeware bitscope plug‑in called Bitter that can be handy for digital troubleshooting. The TT Dynamic Range Meter is great if you're interested in the mastering 'loudness wars'; you can get it free on request via the Brainworx site (www.brainworx‑music.de).

Finally, here's a couple of odds and ends. Although I've yet to come across a decent, simple, freeware pitch‑shifter, if you're after freeware pitch correction, look no further than GVST's GSnap, which is pretty effective and has seen use in a number of Mix Rescues before now. If you're a fan of Aphex‑style psychoacoustic enhancement, also be sure to fire up Stillwell Audio's exciter, one of the plug‑ins available within the ReaPlugs ReaJS host, which does the same kind of thing.


Published November 2010

Wednesday, July 10, 2019

Q. Where's the best place to mount a large monitor screen?

I'm using a big desk with a shelf on the back as my studio workstation. Being partially sighted, I need my screen fairly close in order to see the details. I'm thinking about buying some studio monitors to put up on the back shelf of the desk, but will the fact that my screen is in front, albeit in the centre of the speakers, be a problem? Would the problem concern stereo imaging more so than frequency response? The screen is a 24‑inch model that is mounted on an arm for maximum flexibility.
It's better for acoustics if everything, where possible, is placed symetrically in a room. If you require a large screen in a studio, for any reason, it's a good idea to place it between and behind your monitors.It's better for acoustics if everything, where possible, is placed symetrically in a room. If you require a large screen in a studio, for any reason, it's a good idea to place it between and behind your monitors.

Via SOS web site

SOS contributor Martin Walker replies: To get the flattest frequency response from your loudspeakers, you need to install some acoustic treatment to damp down the room 'modes' that make each room resonate at certain frequencies, depending on its dimensions.

On the other hand, to get the best stereo imaging, the left and right halves of your studio should, if possible, be a mirror image of each other, and you should place the loudspeakers symmetrically with respect to the walls and fit acoustic absorption at the 'mirror points' on both side walls and the ceiling. 'Early reflections' bouncing off these points will obscure the details in your mixes and make it more difficult to pinpoint where each sound is panned.

Even your gear should, ideally, be installed in a symmetrical fashion. For instance, avoid placing cupboards, shelves, desks or keyboards on one side of the room only, since the sound bouncing off them will result in an unbalanced stereo image that will muddle your imagery.

Moreover (and here's where we get to your specific query), you can get troublesome reflections from audio bouncing off other objects between your ears and the loudspeakers, such as mixing desks and forward‑mounted monitor screens. Maintaining a clear area in front of your loudspeakers is the secret of good stereo imaging, although, thankfully, most modern flat-screen monitors will result in far smaller acoustic problems than the old (and relatively massive) CRT monitors.

A quick way to hear what difference any object is having on your stereo image is to temporarily drape a duvet, or similar, over it while listening to a mono signal being played through both loudspeakers (solo acoustic guitar might be a good one to try). If, with the duvet in place, the phantom central image between your loudspeakers becomes better focused and more concrete, as if a physical player is sat in front of you, then that object is interfering with your imaging.

There are several possible ways to avoid such audio compromises. The easiest is to place your monitor screen further away, either between the loudspeakers or behind them. This generally means you need a larger screen, and some studios hang huge monitor screens on the wall behind the speakers so their clients get a good overview of what's going on. However, even with 20/20 vision, this approach is often not good enough for detailed editing, so a second, smaller, screen is generally mounted much closer to the operator. Keep this as low as possible so that it's out of the speaker's line of fire.
Another more specialised, but elegant, alternative that I've spotted in various studios is a monitor screen recessed into a hole in the desktop. An easy version of this is to remove your monitor stand and lay your screen at an appropriate angle on your desktop, well below the critical area in front of the loudspeakers.

Yet another approach is the one you've already adopted. Since your screen is "mounted on an arm for maximum flexibility”, you can simply push it back out of the way of the loudspeakers for critical listening. This is a great idea for any musician; if only we had a similar option for mixing desks!


Published October 2010